zum Warenkorb 0,00 €
0
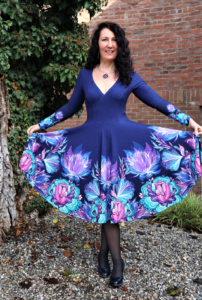
Nähanleitung /// How to sew: Nova
Tellerrock-Kleid mit Wickeloptik und Wiener Nähten
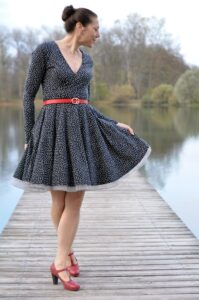
NOVA ist der Traum von einem Drehkleid mit Tellerrock und einem Oberteil in Wickeloptik.
Die Figur wird durch Wiener Nähte vorn und hinten perfekt geformt.
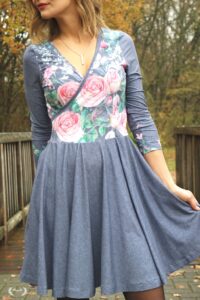
Ärmel sind in den Längen kurz, 3/4 und lang im Schnittmuster vorhanden. Hier findest du zudem eine Anleitung, wie du deine Nova ärmellos nähen kannst.
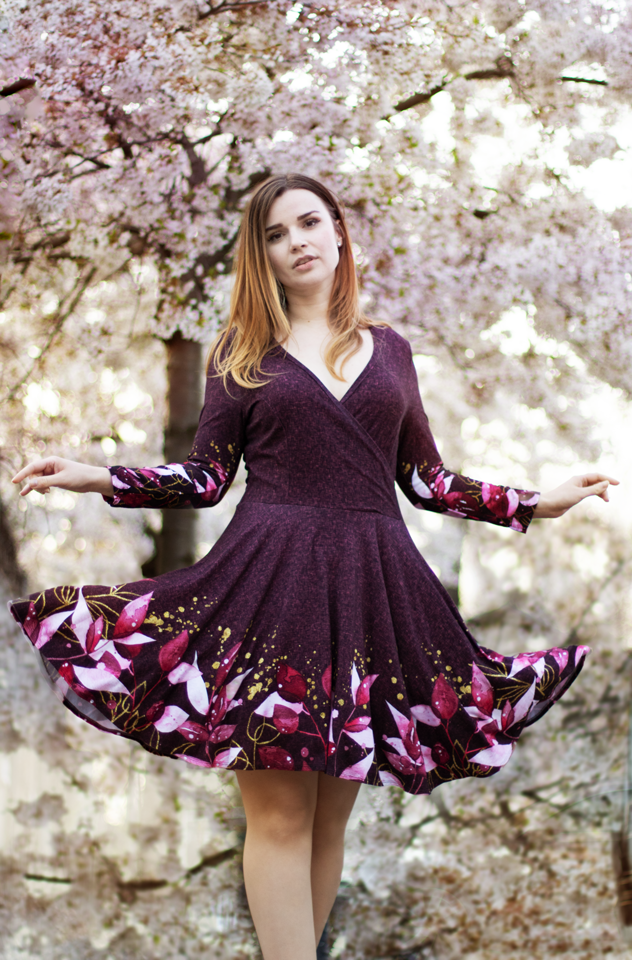
Außerdem gibt es ein Sommerärmel Add On für Nova.
Der Schnitt ist für eine Körpergröße von 170 cm konzipiert, sowie für Körbchengröße B. Wenn du einen großen Busen hast, erfährst du hier, ob eine FBA zur Anpassung des Schnittes notwendig ist.
Dress with circle skirt and wrap look
NOVA is the dream of a swivel dress with a circle skirt and a top with a wrap look.
The figure is perfectly formed by princess seams at the front and back.
Sleeves are available in short, 3/4 and long lengths in the pattern. Here you will also find instructions on how to sew your Nova sleeveless. If you have large breasts, you can find out here whether an FBA is necessary to adjust the pattern.
There is also a summersleeve Add On for Nova.
The pattern is designed for a person who is 170 cm tall and has a B cup.
Richtige Größe drucken
Die gekauften Dateien haben zwei verschiedene Varianten: A4 und A0 Dateien. Die A0 kannst du online oder in einem Copyshop drucken lassen, A4 kann dein Drucker drucken. Bei beiden Varianten ist es dir möglich, nur die Größe zu drucken, die du tatsächlich benötigst. Oder zwei-drei Größen, falls du Anpassungen vornehmen musst.
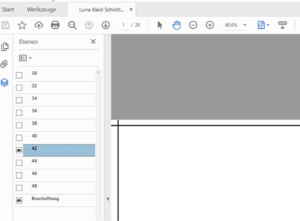
Öffne die Datei im Acrobat Reader und klicke das Symbol in der linken Leiste am Rand an, das auf dem Bild blau dargestellt ist. Daraufhin klappt ein neues Menü auf, in dem du durch einen Klick auf das Auge die Größen ein- und ausblenden kannst. Die Ebene „Beschriftung“ sollte immer an bleiben. Beim oben gezeigten Beispiel würdest du Gr. 42 drucken.
Blende nun alle unnötigen Größen aus und drucke das Schnittmuster wie gewohnt. Auf dem Beispielbild ist es die Größe 42, die gedruckt wird.
Print the correct size
The purchased files come in two different variants: A4 and A0 files. You can have the A0 printed online or in a copy shop. Your printer can print A4. With both variants it is possible for you to print only the size that you actually need. Or two to three sizes in case you need to make adjustments.
Open the file in Acrobat Reader and click on the symbol in the left bar at the edge, which is shown in blue on the picture. A new menu then opens in which you can show and hide sizes by clicking on the eye. The „labeling“ layer should always remain on.
Now hide all unnecessary sizes and print the pattern as usual. Using the example above, you would print size 42 only.
Maßtabelle /// Size chart (cm)

Stoffbedarf alle Größen/// Fabric requirements all sizes: 2,6 m
Anpassung
Das Kleid liegt an Brust und Taille figurnah an und fällt nach unten hin sehr locker. Wähle deine Größe anhand des Brust- und Taillenmaßes aus.
Sollte die Differenz zwischen deinem Oberbrust- und deinem Brustumfang größer als 5 cm sein, entscheide dich für eine FBA zur Anpassung. Mehr zum Thema FBA findest du in unserem Blog
Solltest du Hilfe benötigen, schau gern in der Mondstoff-Gruppe auf Facebook vorbei: Mondstoff-Gruppe
Adjustment
The dress is fitted at the bust and waist and falls very loosely at the bottom. Choose your size based on your chest and waist measurements.
If the difference between your upper chest and your chest measurement is more than 5 cm, try FBA for adjustment. You can find more about FBA in our blog
If you need help, feel free to join the Mondstoff group on Facebook: Mondstoff Group
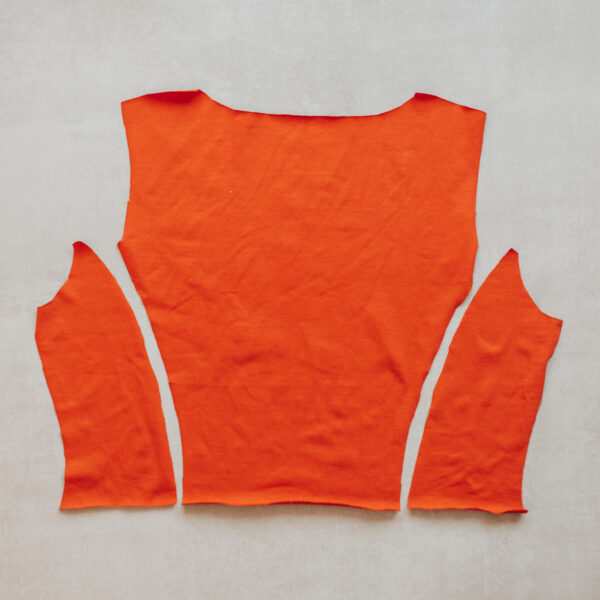
1. Zuschnitt
2x vorderes Mittelteil in doppelter Stofflage
2x vorderes Seitenteil in doppelter Stofflage
1x hinteres Mittelteil im Bruch
2x hinteres Seitenteil in doppelter Stofflage
2x Rock im Bruch
2x Ärmel in doppelter Stofflage
Ausschnittstreifen nach Tabelle (je nach Dehnbarkeit des Stoffes ist es ggf nötig, den Streifen etwas länger zuzuschneiden)
Übertrage beim Zuschnitt alle Passzeichen mit einem kleinen Knips innerhalb der Nahtzugabe.
Der Stoffbedarf ist mit 2,6m sehr großzügig angegeben und entspricht dem maximalen Verbrauch für eine Nova mit langen Armen bei einem gemusterten Stoff. Für kurze Ärmel und uni Stoffe ist der Bedarf deutlich niedriger. Faustregel: der Stoffbedarf beträgt 2x die gewünschte Rocklänge plus gewünschte Ärmellänge.
1. Cutting
2x front middle part (mirrored)
2x front side panel (mirrored)
1x back middle part on fold
2x rear side panels (mirrored)
2x skirt on fold
2x sleeves (mirrored)
Cut out strip for neckline according to the table (depending on the stretchability of the fabric, it may be necessary to cut the strip a little longer)
When cutting, transfer all marks with a small clip inside the seam allowance.
The fabric requirement is very generous at 2.6m. For short sleeves and plain fabrics, the demand is significantly lower. Rule: the fabric requirement is 2x the desired skirt length plus the desired sleeve length.
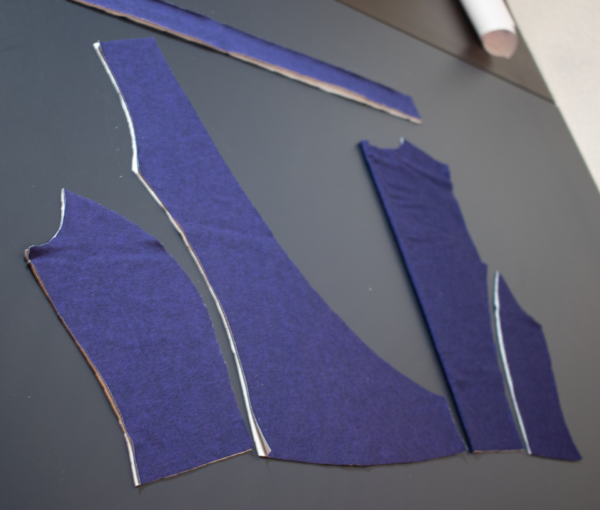
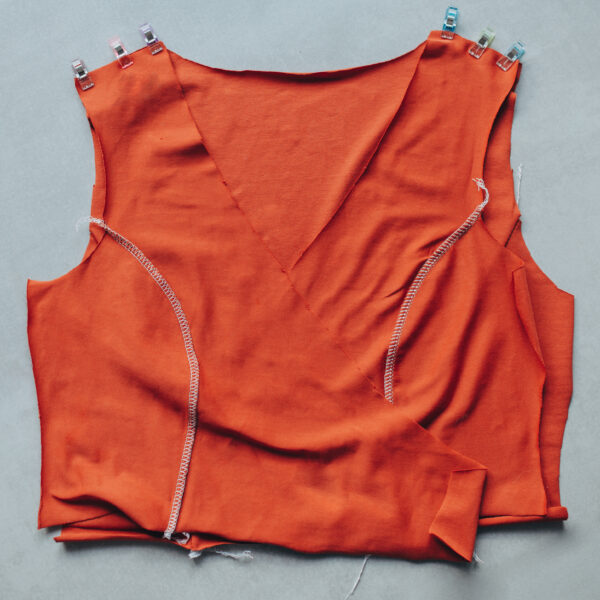
2. Vorderteil nähen
Das Vorderteil hat sogenannte Wiener Nähte, die das Oberteil in Form bringen.
Nähe zunächst die vorderen Seitenteile jeweils an das dazugehörige Mittelteil. Orientiere dich beim zusammenstecken an den Knipsen. Nutze dazu die Overlock oder einen elastischen Stich deiner Nähmaschine.
Die Nahtzugaben Richtung vordere Mitte bügeln.
2. Sewing the front
The front part has so-called princess seams, which bring the upper part into shape.
First sew the front side parts to the corresponding middle part. Use the snaps to orientate yourself when sewing them together. Use the serger or an elastic stitch on your sewing machine.
Iron the seam allowances toward the center front.
3. Rückenteil nähen
Nähe die Seitenteile jeweils an das mittlere Hinterteil. Die Nahtzugaben Richtung hintere Mitte bügeln.
3. Sewing the back
Sew the side pieces to the middle back piece. Iron the seam allowances toward the center back.
4. Schulternähte schließen
Schließe nun die Schulternähte, indem du die Vorderteile rechts auf rechts an das Rückenteil nähst. Bügle die Schulternähte in Richtung Rückenteil.
4. Closing the shoulder seams
Now close the shoulder seams by sewing the front pieces to the back piece, right sides together. Iron the shoulder seams toward the back.
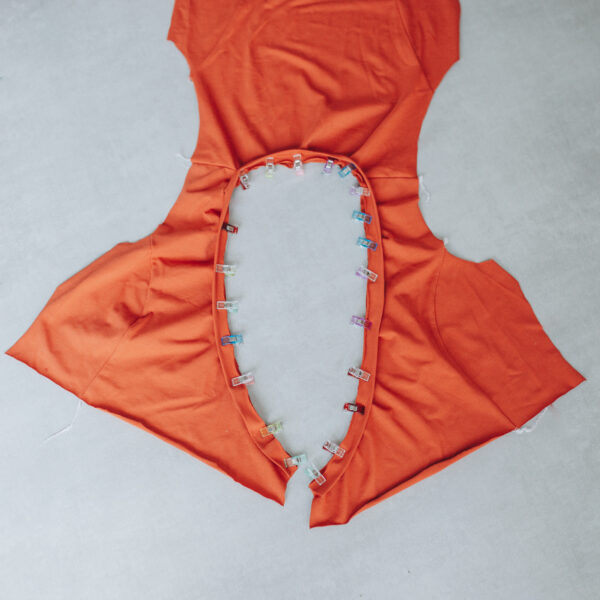
5. Ausschnittstreifen annähen
Bügle den Ausschnittstreifen links auf links zur Hälfte. Stecke ihn nun rechts auf rechts mit den offenen Kanten auf die Kante des aufgeklappten Oberteils. Der Streifen muss dabei gedehnt werden. Nutze zum festnähen einen elastischen Stich. Wenn du mit der Overlock nähst, kannst du das Differential etwas erhöhen. Dies verhindert ein Ausleiern der Ausschnittkante. Bügle die Nahtzugabe in Richtung Oberteil und steppe den gesamten Ausschnitt knappkantig von rechts ab.
5. Sewing the neckline
Iron the neckline strip in half, wrong sides together. Now pin it right sides together with the open edges on the edge of the unfolded upper part. The strip needs to be stretched. Use an elastic stitch to sew. If you sew with the serger you can increase the differential a bit. This prevents sagging. Iron the seam allowance in the direction of the bodice and topstitch the entire neckline from the right edge.
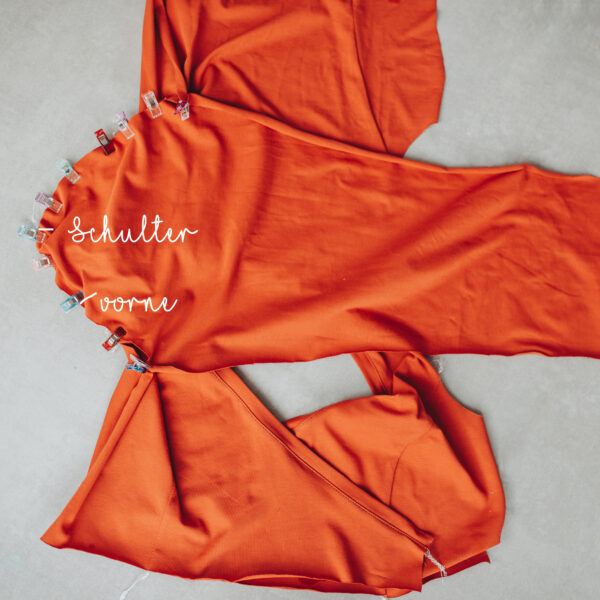
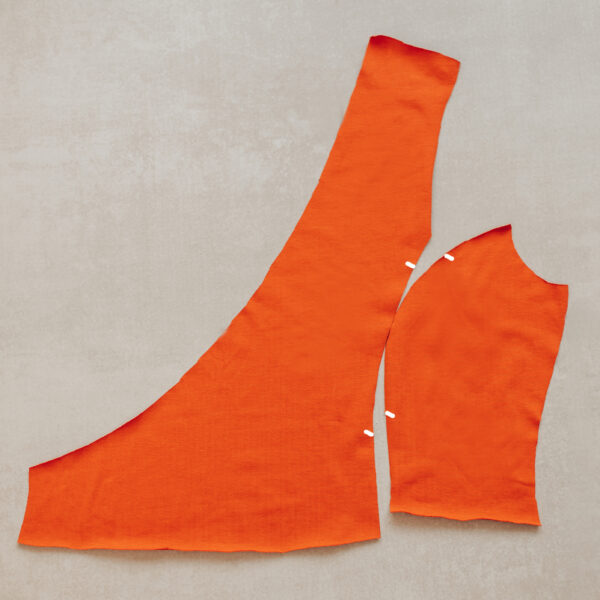
6. Ärmel annähen
Stecke nun die Ärmel rechts auf rechts an das Oberteil. Beachte hier die Knipse für die Schulter und das Vorderteil und nähe sie mit einem elastischen Stich fest. Der Knips des Ärmels trifft vorne auf die Wiener Naht.
6. Sewing the sleeves
Pin the sleeves to the bodice, right sides together. Note the snaps for the shoulder and front piece here and sew them in place with an elastic stitch. The snap of the sleeve meets the princess seam at the front.
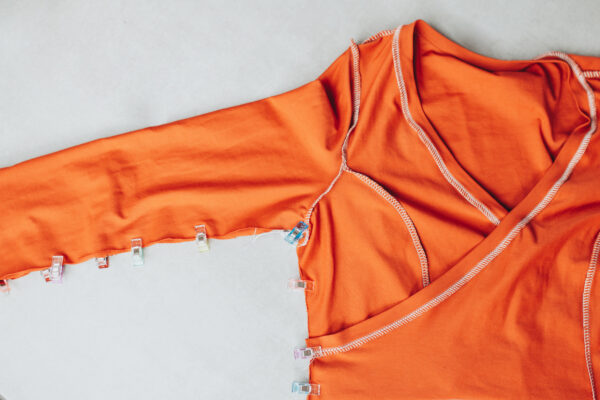
7. Seitennähte schließen
Stecke nun Ärmel und Oberteil rechts auf rechts und schließe die Seitennähte in einem Rutsch. Das Vorderteil wird dabei in der jeweiligen Seitennaht fixiert. Optional kannst du die untere Kante des Oberteils mit großer Stichlänge zusammenheften, damit beim Annähen des Rockes nichts verrutscht.
Markiere dir die vordere und hintere Mitte. Säume die Ärmel. Klappe dafür die Saumzugabe von 2 cm nach innen und nähe sie mit einem elastischen Stich oder einer Zwillingsnadel.
7. Closing the sideseams
Now pin the sleeves and top right sides together and close the side seams in one go. The front part is fixed in the respective side seam. Optionally, you can baste the lower edge of the top together with a large stitch so that nothing slips when the skirt is sewn on.
Mark the center front and center back. Hem the sleeves. To do this, fold the 2 cm hem allowance inwards and sew it with an elastic stitch or twin needle.
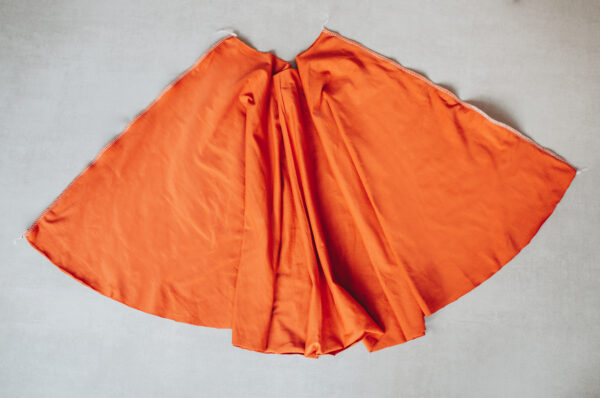
8. Rock nähen
Markiere dir an deinen Rockteilen jeweils die vordere und hintere Mitte. Stecke beide Rockteile rechts auf rechts und nähe sie zusammen.
Stecke nun den Rock rechts auf rechts an das vorbereitete Oberteil, sodass die hinteren und vorderen Mitten sowie die Seitennähte aufeinander treffen.
8. Sewing the skirt
Mark the center front and center back on your skirt pieces. Pin both skirt pieces right sides together and sew them together.
Now pin the skirt to the prepared top, right sides together, so that the back and front centers as well as the side seams meet.
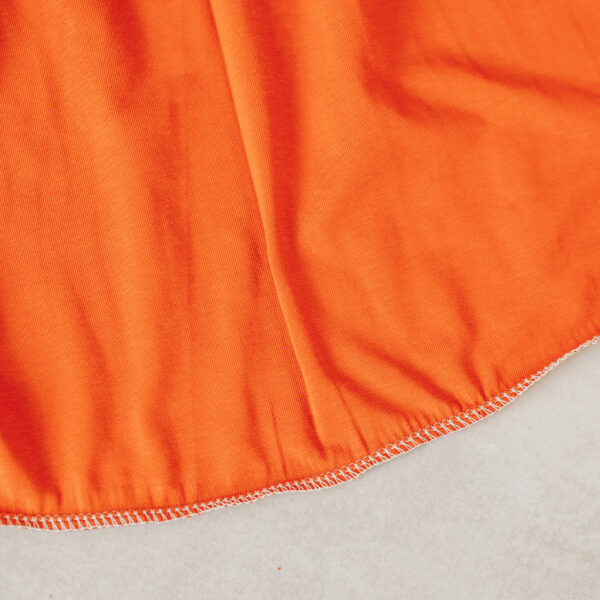
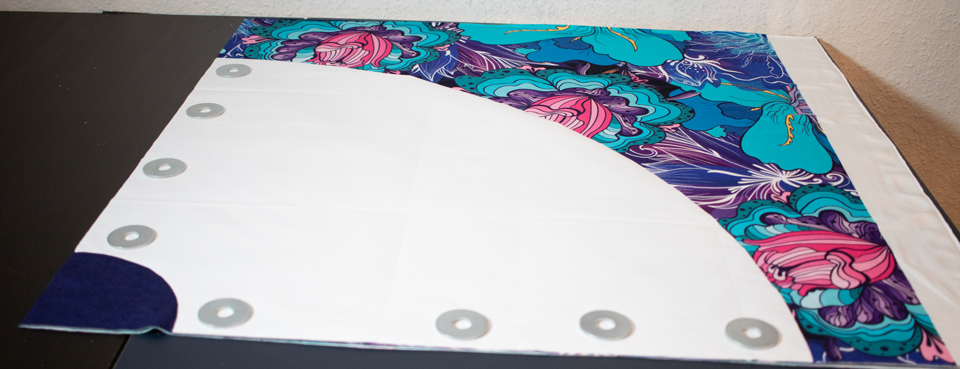
9. Tellerrock säumen
Tellerröcke solltest du grundsätzlich so schmal wie möglich säumen. Der Rock nimmt von oben nach unten an Weite zu, je mehr du umklappst, desto größer ist der Unterschied zwischen den Weiten, was zu Mehrweite im Saum und dementsprechend Falten führt.
Variante 1:
Stelle an deiner Overlock den Differentialtransport etwas nach oben, sodass sich der Stoff beim Versäubern leicht kräuselt. Die Mehrweite wird so automatisch eingehalten. Klappe den Saum 0,7 cm nach innen und steppe ihn ab. Das ist die schnellste Methode. Durch das leichte Kräuseln legt sich der Saum fast automatisch in Form.
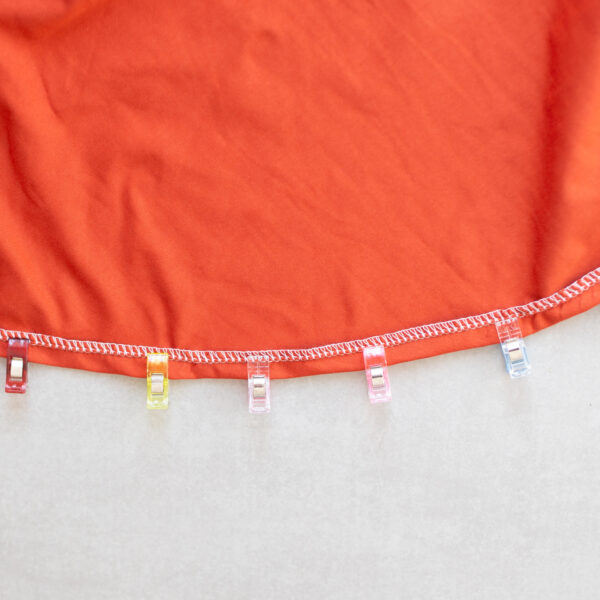
Variante 2:
Bügeln und Geduld. Klappe immer eine kleine Strecke deines Saumes 0,7 cm um und bügle mit viel Dampf. Fixiere die Strecken mit Klammern oder Nadeln und arbeite dich so einmal um den ganzen Rock. Die Mehrweite hälst du dabei von Hand etwas ein. Das Bügeleisen ist hier unverzichtbar.
9. Hem the skirt
You should always hem circle skirts as narrowly as possible. The skirt increases in width from top to bottom, the more you fold over, the greater the difference between the widths, which leads to extra width in the hem and corresponding creases.
Variant 1:
Raise the differential on your serger so that the fabric gathers slightly. Fold the hem inwards 0,7 cm and topstitch. This is the fastest method. Due to the slight ruffling, the hem almost automatically shapes itself.
Variant 2:
Ironing and patience. Fold over a small stretch of your hem 0.7 cm at a time and iron with plenty of steam. Secure the stretches with clips or pins, working your way around the entire skirt in this way. The iron is indispensable here.