
zum Warenkorb 0,00 €
0Nähanleitung /// How to sew: Phobos und Deimos

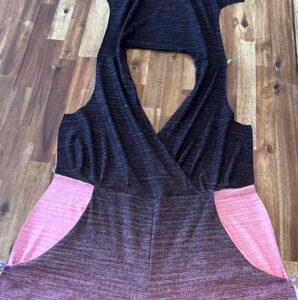
Phobos & Deimos
„Phobos“ und „Deimos“ bilden zusammen den perfekten Baukasten für alle Liebhaber von Wickeloptik. Phobos ist ein Kleid mit 2 verschiedenen Rockvarianten- einem schmalen und einem weiten in A-Linie, Deimos ein raffinierter Jumpsuit mit weiten Palazzo-Beinen. Bei beiden Schnitten habt ihr die Wahl zwischen 2 Ärmellängen. Optional können Phobos und Deimos auch ärmellos genäht werden. Auch eine FBA-Variante ist bereits im Schnitt enthalten.
Phobos & Deimos
„Phobos“ and „Deimos“ together make the perfect kit for all wrap look lovers. Phobos is a dress with 2 different skirt options- one narrow and one wide. Deimos is a sophisticated jumpsuit with wide palazzo legs. With both patterns you have the choice between 2 sleeve lengths. Optionally, Phobos and Deimos can also be sewn sleeveless. An FBA variant is also already included in the pattern.
Richtige Größe drucken
Die gekauften Dateien haben zwei verschiedene Varianten: A4 und A0 Dateien. Die A0 kannst du online oder in einem Copyshop drucken lassen, A4 kann dein Drucker drucken. Bei beiden Varianten ist es dir möglich, nur die Größe zu drucken, die du tatsächlich benötigst. Oder zwei-drei Größen, falls du Anpassungen vornehmen musst.
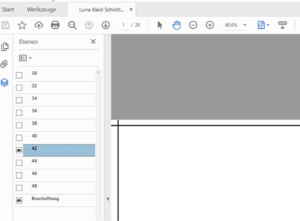
Öffne die Datei im Acrobat Reader und klicke das Symbol in der linken Leiste am Rand an, das auf dem Bild blau dargestellt ist. Daraufhin klappt ein neues Menü auf, in dem du durch einen Klick auf das Auge die Größen ein- und ausblenden kannst. Die Ebene „Beschriftung“ sollte immer an bleiben. Beim oben gezeigten Beispiel würdest du Gr. 42 drucken.
Blende nun alle unnötigen Größen aus und drucke das Schnittmuster wie gewohnt. Auf dem Beispielbild ist es die Größe 42, die gedruckt wird.
Print the correct size
The purchased files come in two different variants: A4 and A0 files. You can have the A0 printed online or in a copy shop. Your printer can print A4. With both variants it is possible for you to print only the size that you actually need. Or two to three sizes in case you need to make adjustments.
Open the file in Acrobat Reader and click on the symbol in the left bar at the edge, which is shown in blue on the picture. A new menu then opens in which you can show and hide sizes by clicking on the eye. The „labeling“ layer should always remain on.
Now hide all unnecessary sizes and print the pattern as usual. Using the example above, you would print size 42 only.
Maßtabelle /// Size chart (cm)

Stoffbedarf Bordürenstoffe /// Fabric requirement border fabrics

Stoffempfehlung
Für Phobos und Deimos eignen sich am besten Stoffe mit weichem Fall, wie unser Viskosejersey, aber auch leichte Modal- und Tencelstoffe eignen sich. Der Stoff sollte mindestens 5% Elasthananteil haben.
Fabric recommendation
Fabrics with a soft drape are best for Phobos and Deimos, such as our viscose jersey, but lightweight modal and tencel fabrics are also suitable. The fabric should have at least 5% elastane.
Anpassung/Adjustment

Zwischen zwei Größen
Wenn du den Schnitt anpassen musst, weil du zwischen 2 Größen bist, drucke nur die Größen, die du zum Verbinden benötigest. Zum Beispiel Brust 40, Taille 38. Verwende die Ebenenfunktion und drucke nur 40 und 38 aus. Die Größen werden dann mit einer Linie verbunden, im Beispielbild ist es die rote Linie.
Solltest du Hilfe benötigen, schau gern in der Mondstoff-Gruppe auf Facebook vorbei: Mondstoff-Gruppe
Bitte beachten
Nähe unbedingt ein Probeteil aus einem günstigen Stoff. Für Phobos und Deimos sind alle drei Maße relevant: Oberweite, Taille und Hüfte. Die Wicklung liegt genau in der Taille. Solltest du also einen sehr langen oder kurzen Oberkörper haben solltest du unbedingt deine Taillenlänge ausmessen. So gehst du dafür vor: miss von der höchsten Stelle der Schulter (da, wo die Schulternaht sitzt) über die Brustspitze bis zu deiner Taille. Vergleiche diese Länge mit dem Schnittmuster, indem du hier von der Schulter aus über die Brust bis zur Taille misst. Verlängere oder kürze dann entsprechend Vorder- und Rückteil.
Für Deimos ist zudem auch die Schrittlänge extrem wichtig. Miss unbedingt deine Kreuznaht aus, damit diese Strecke lang genug für deinen Körper ist. Die Kreuznaht führt vom Taillenbund vorne zwischen deinen Beinen hindurch zum Taillenbund hinten. Die Hose von Deimos soll im Schritt locker sitzen und nicht eng anliegen. Verlängern kannst du die Schrittnaht unterhalb der Tascheneingriffe. Achte darauf, die Vorderhose um die gleiche Strecke zu verlängern wie die Hinterhose.
Between two sizes
If you need to adjust the pattern because you are between 2 sizes, only print the sizes you need to connect. For example chest 40, waist 38.
Use the layers function and print out only 40 and 38.
The sizes are then connected with a line, in the example image it is the red line.
If you need help, feel free to join the Mondstoff group on Facebook: Mondstoff Group
Please note
Be sure to sew a test piece from an inexpensive fabric. For Phobos and Deimos, all three measurements are relevant: Bust, waist and hips. The wrapped part meets the waist. If you have a very long or short torso, you should measure your waist length. Here’s how to do it: measure from the highest point of your shoulder (where the shoulder seam is), across the top of your chest, and down to your waist. Compare this length with the pattern by measuring from the shoulder over the bust point to the waist. Then lengthen or shorten the front and back accordingly.
For Deimos the inseam length is also extremely important. Be sure to measure your cross seam so that this stretch is long enough for your body. The cross seam runs from the waistband in the front, between your legs, to the waistband in the back. Deimos pants should be loose in the crotch, not tight. You can lengthen the inseam below the pocket openings. Be sure to lengthen the front pants the same distance as the back pants.
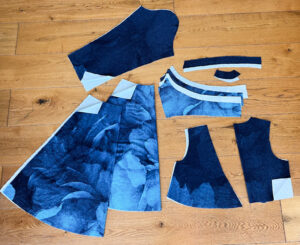
Zuschnitt Phobos (Kleid)
Für das Oberteil
2 x oberes Vorderteil gegengleich (entscheide dich für die Variante mit oder ohne FBA, ob du eine FBA brauchst kannst du hier nachlesen)
1 x Rückteil im Bruch
4 x Wickelteil gegengleich
2 x Beleg vorderer Ausschnitt gegengleich
1 x hinterer Beleg im Bruch
2 x Ärmel gegengleich (entscheide dich für eine Länge)
Für die A-Linie
1 x Vorderrock im Bruch
1 x Hinterrock im Bruch
Für den schmalen Rock
1 x Vorderrock im Bruch
1 x Hinterrock im Bruch
Zuschnitt Deimos (Jumpsuit)
Für das Oberteil
2 x oberes Vorderteil gegengleich (entscheide dich für die Variante mit oder ohne FBA, ob du eine FBA brauchst kannst du hier nachlesen)
1 x Rückteil im Bruch
4 x Wickelteil gegengleich
2 x Beleg vorderer Ausschnitt gegengleich
1 x hinterer Beleg im Bruch
2 x Ärmel gegengleich (entscheide dich für eine Länge)
Für die Hose
2 x Vorderhose gegengleich
2 x Hinterhose gegengleich
2 x vorderer Taschenbeuel gegengleich
2 x hinterer Taschenbeutel gegengleich
Cutting Phobos (dress)
For the top
2 x upper front part mirrored (decide for the variant with or without FBA, if you need a FBA you can read here)
1 x back piece on fold
4 x wrap part mirrored
2 x front neckline facing
1 x back facing on fold
2 x sleeves mirrored (decide for one length)
For the A-line skirt
1 x front skirt on fold
1 x back skirt on fold
For the narrow skirt
1 x front skirt on fold
1 x back skirt on fold
Cutting Deimos (Jumpsuit)
For the top
2 x upper front part mirrored (decide for the variant with or without FBA, if you need a FBA you can read here)
1 x back piece on fold
4 x wrap part mirrored
2 x front neckline facing
1 x back facing on fold
2 x sleeves mirrored (decide for one length)
For the pants
2 x front trousers mirrored
2 x back trousers mirrored
2 x front pocket bag mirrored
2 x back pocket bag mirrored
Passzeichen übertragen
Übertrage alle Passzeichen mit Hilfe eines Trickmarkers oder ähnlichem auf die linke Stoffseite.
Transfer the marks
Transfer all marks to the wrong side of the fabric using a trick marker or something similar.
Oberteil nähen / Sewing the Top

Schulternähte schließen
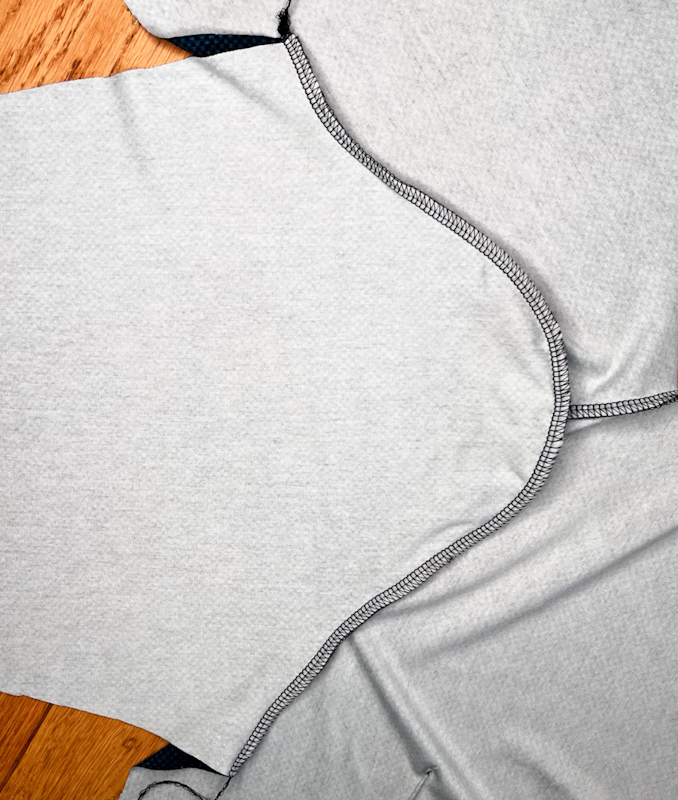
Nähe als erstes die Schulternaht. Die Vorderteile werden dabei auf das Rückteil gelegt und mit einem elastischen Stich zusammengenäht.
Closing the shoulderseams
Sew the shoulder seam first. The front pieces are placed on the back piece and sewn together with an elastic stitch.
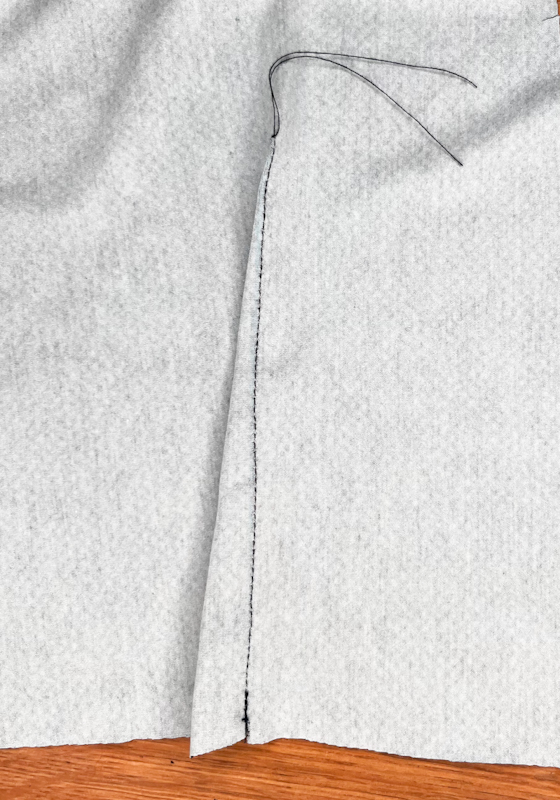
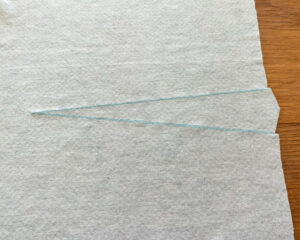
Abnäher am Rücken schließen
Schließe am Rückteil des Oberteils die Abnäher, indem du mit einem kurzen Geradstich in Richtung Abnäherspitze nähst. Verriegele das Ende der Naht nicht und verknote die Enden gründlich.
Sewing the darts
Close the darts on the backtop by sewing from with a short straight stitch in the direction oft the dart tip. Don´t lock at the end of the seam and knot the ends thoroughly.

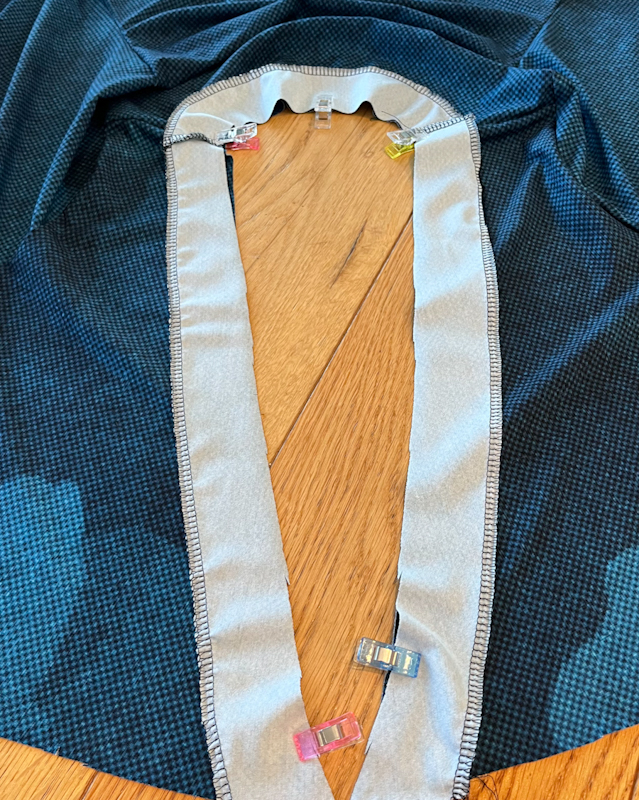
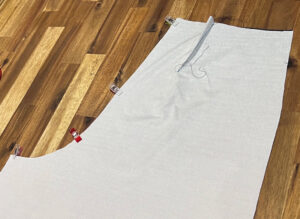
Beleg vorbereiten und nähen
Lege die beiden hinteren Belege rechts auf rechts auf den vorderen Beleg und schließe die Nähte mit einem elastischen Stich. Optional kannst du die äußere Belegkante mit der Overlock versäubern.
Lege dein Kleid mit der rechten Seite zu dir. Stecke den Beleg einmal komplett rechts auf rechts an das Kleid. Nähe den Beleg mit einem elastischen Stich einmal ringsherum fest.
Prepare the facing
Place the two back facings right sides together on the front facing and close the seams with an elastic stitch. Optionally, you can finish the outer edge of the facing with the serger.
Lay your dress right side towards you. Pin the facing to the dress, right sides together. Sew the facing all the way around with an elastic stitch.
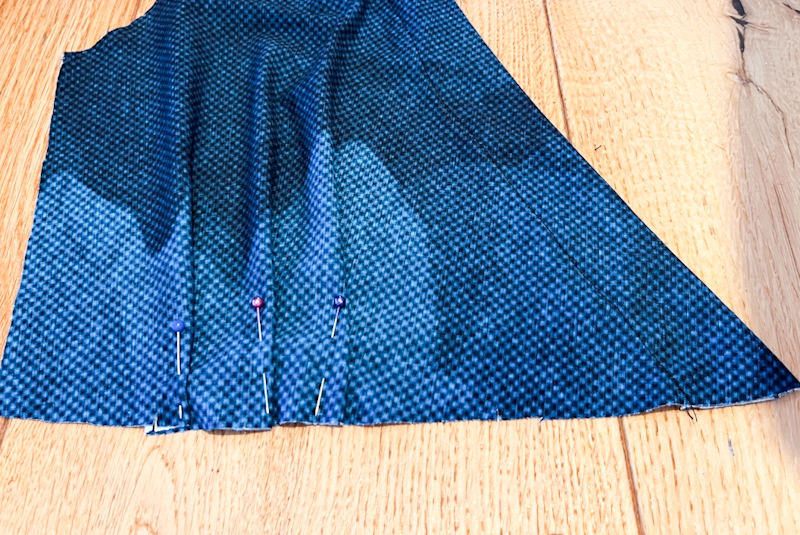
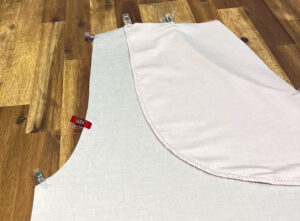
Falten nähen
Am Vorderteil befinden sich jeweils 3 kleine Legefältchen. Stecke jeweils die 2 Knipse aufeinander und lege die so entstandenen Fältchen Richtung Körpermitte und fixiere sie mit einem Gradstich innerhalb der Nahtzugabe.
Steppe anschließend den Beleg auf der Versäuberungsnaht einmal rundherum ab.
Sewing the pleats
There are 3 small pleats on the front part. Put the 2 snaps on top of each other and lay the resulting folds in the direction of the middle of the body and fix them with a straight stitch inside the seam allowance.
Topstitch the facing all the way around.
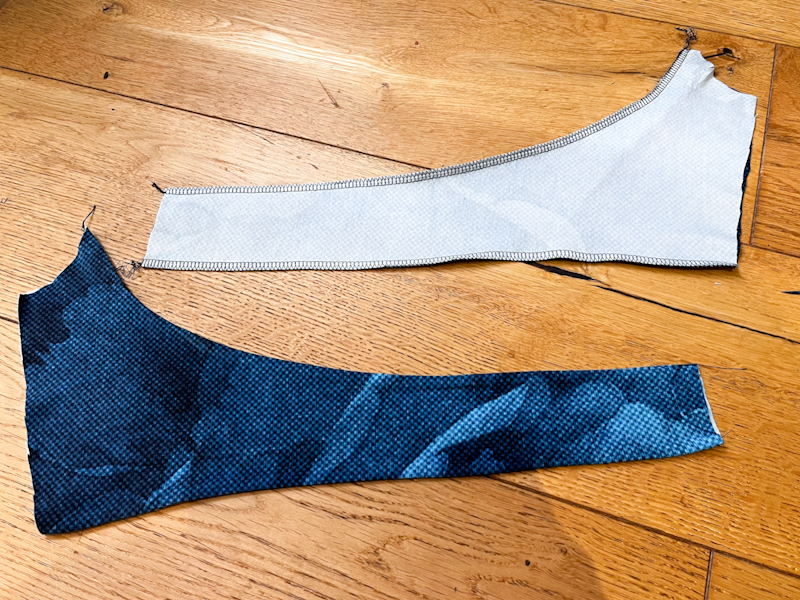
Wickelteile vorbereiten
Lege jeweils 2 Wickelteile rechts auf rechts und schließe die langen Seiten mit einem elastischen Stich. Wende die Wickelteile und bügle sie einmal gründlich.
Prepare the wraps
Place 2 wrap pieces right sides together and close the long sides with an elastic stitch. Turn the wrap pieces and iron them once thoroughly.
Wickel annähen
Lege die Wickelteile jeweils auf die Vorderteile und fixiere sie im Bereich des Ärmels innerhalb der Nahtzugabe.
Place the wraps
Place each of the wrap pieces on the front pieces and secure them inside the seam allowance of the armhole.
Ärmel annähen
Stecke die Ärmel rechts auf rechts an das Oberteil. Beachte hier die Knipse für die Schulter und das Vorderteil und nähe sie mit einem elastischen Stich fest.
Optional:
Du kannst den Schnitt auch ärmellos nähen. Versäubere dafür die Armlöcher mit einem Versäuberungsstreifen. Schneide diesen mit Faktor 0,85 zu, damit sich die Armlöcher später schön anlegen.
Sewing the sleeves
Pin the sleeves to the bodice, right sides together. Note the snaps for the shoulder and front piece here and sew them in place with an elastic stitch.
Optional:
You can also sew the pattern sleeveless. For this, finish the armholes with a strip. Cut this with a factor of 0.85, so that the armholes fit nicely later.
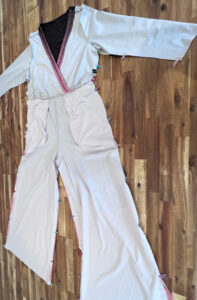
Kleid nähen / Sewing the dress
Schmalen Rock vorbereiten
Schließe sowahl am Vorder- als auch am Hinterrock die Abnäher indem du mit einem kurzen Geradstich in Richtung Abnäherspitze nähst. Verriegele das Ende der Naht nicht und verknote die Enden gründlich.
Prepare the narrow Skirt
Close the darts on the front and back skirt by sewing from with a short straight stitch in the direction oft the dart tip. Don´t lock at the end of the seam and knot the ends thoroughly.
Vorderrock annähen
Lege den Vorderrock rechts auf rechts an das Oberteil. Das Oberteil überlappt sich an der vorderen Mitte. Nähe mit einem elastischen Stich. Der schmale Rock wird genauso angenäht.
Sewing the front skirt
Place the front skirt right sides together on the top. The top overlaps at the center front. Sew with an elastic stitch. The narrow skirt is sewn on in the same way.
Hinterrock annähen
Lege den Hinterrock rechts auf rechts auf das Rückteil. Beim schmalen Rock treffen die Abnäher des Rockes genau auf die Abnäher des Oberteils.
Sewing the back skirt
Place the back skirt right sides together on the back piece. For the narrow skirt, the darts of the skirt meet exactly with the darts of the bodice.
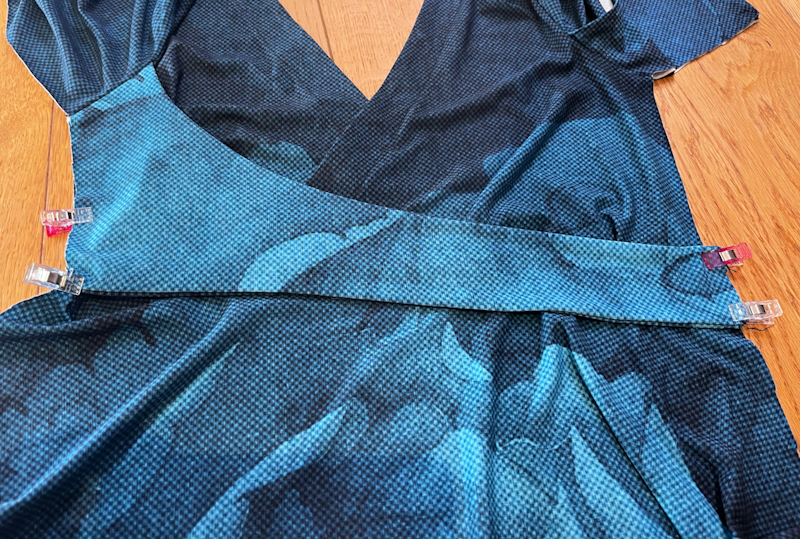
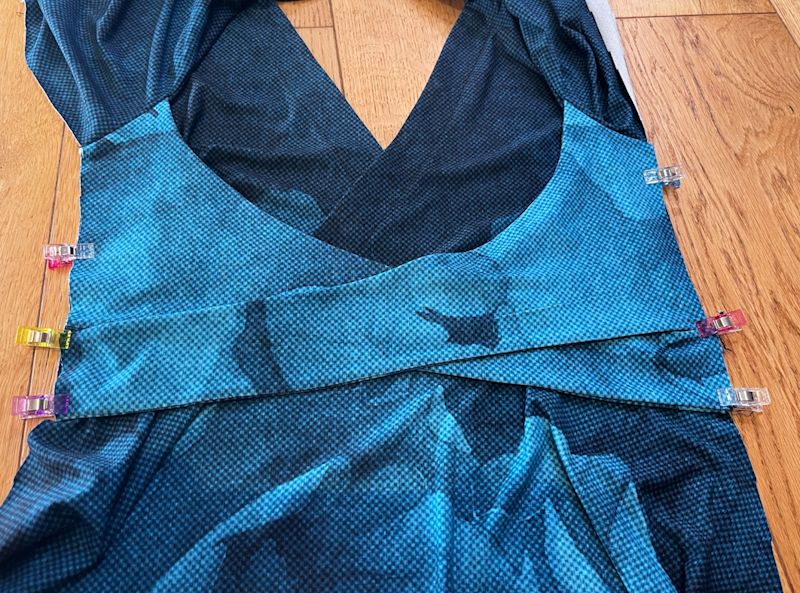
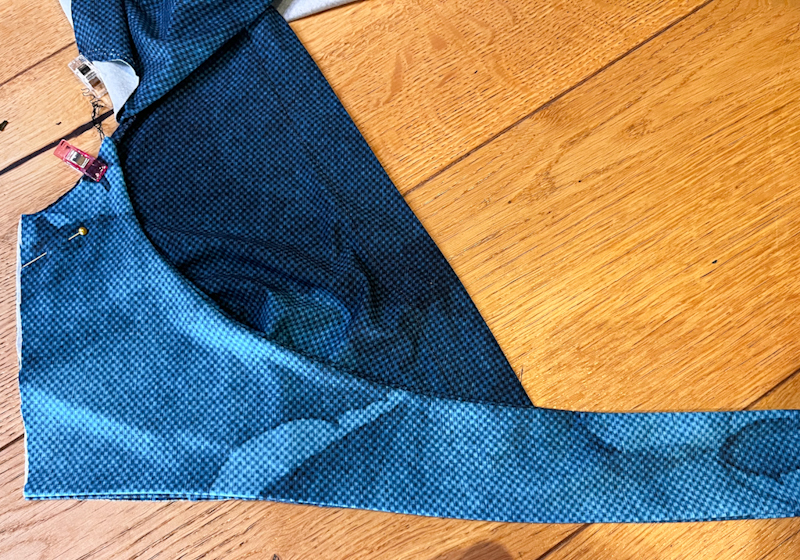
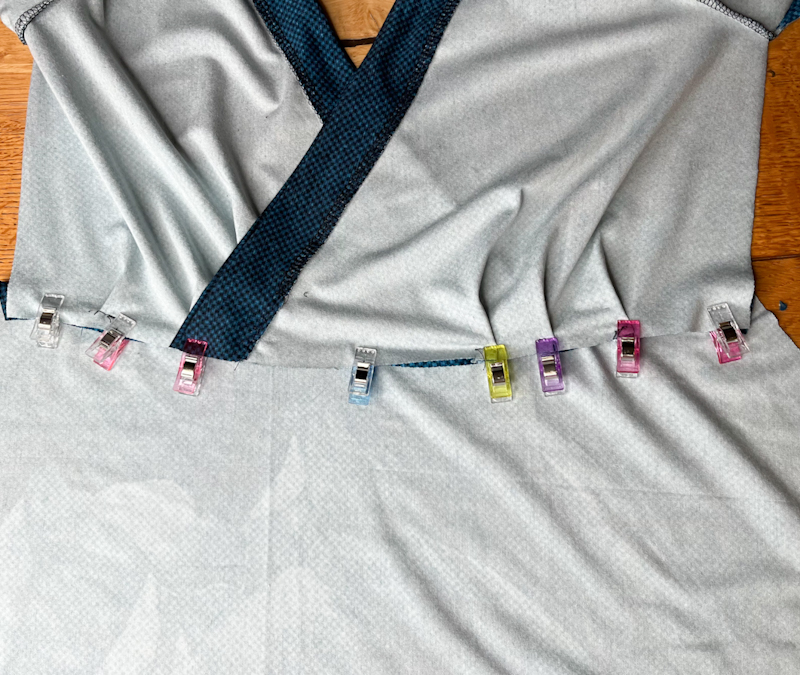
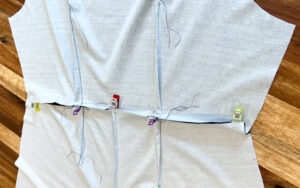
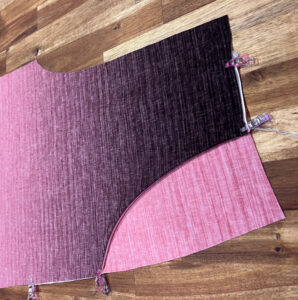
Wickel positionieren
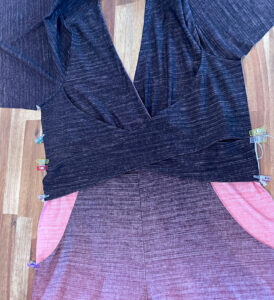
Klappe das Kleid auf und lege es mit der rechten Seite zu dir. Positioniere die Wickel wie abgebildet. Die breitere Seite des Wickels trifft unten genau auf die Teilungsnaht, das kurze Wickelende wird unten jeweils anhand der Knips-Markierung positioniert und trifft oben ebenfalls auf die Teilungsnaht. Fixiere die Wickel innerhalb der Nahtzugabe mit einem Gradstich.
Achtung:
Je nach deinen individuellen Maßen kann es sein, dass du die Wickel in der Seite etwas kürzen musst, damit es später in der Taille anliegt. Bevor du die Seitennähte final schließt, fixiere sie mit einer Hilfsnaht und probiere einmal an.
Wrap position
Unfold the dress and place it with the right side facing you. Position the wraps as shown. The wider side of the wrap will meet the bottom of the dividing seam exactly, the short end of the wrap will be positioned at the bottom using the snap markings and will also meet the dividing seam at the top. Secure the wraps within the seam allowance with a straight stitch.
Attention:
Depending on your individual measurements, you may need to shorten the wraps a bit in the side so that it fits at the waist later. Before you close the side seams finally, fix them with an auxiliary seam and try on once.
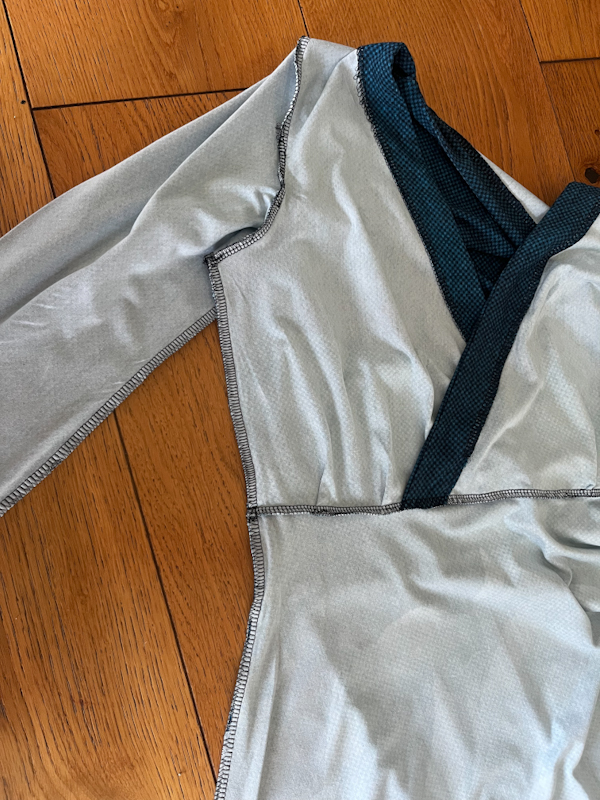
Seitennähte schließen
Lege Vorder- und Rückteil rechts auf rechts und schließe die Seitennähte in einem Rutsch.
Closing the sideseams
Place the front and back pieces right sides together and close the side seams in one go.
Jumpsuit nähen / Sewing the jumpsuit
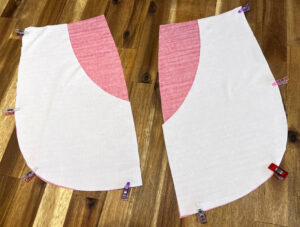
Taschen vorbereiten
Lege den Tascheneingriff jeweils rechts auf rechts auf den hinteren Taschenbeutel und nähe ihn mit einem elastischen Stich.
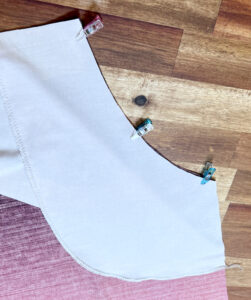
Taschen an die Hose nähen
Lege die geöffnete Tasche jeweils rechts auf rechts mit dem Tascheneingriff auf die Hose und nähe sie mit einem elastischen Stich fest.
Optional: flachsteppen
Klappe den Taschenbeutel auf und bügle die Nahtzugaben in Richtung Taschenbeutel. Steppe die Nahtzugabe knappkantig ab und klappe den Taschenbeutel nach innen. Das sogenannte Flachsteppen verhindert ein späteres Herausrutschen der Tasche ohne sichtbare Naht von rechts.
Taschen fixieren
Fixiere die Taschen innerhalb der Nahtzugaben mit einem Geradstich, damit sie beim Zusammennähen der Hose nicht verrutschen.
Prepare the pockets
Place each pocket opening right sides together on the back pocket bag and sew with an elastic stitch.
Sew pockets to the trousers
Place the opened pocket right sides together with the pocket opening on the trousers and sew it in place with an elastic stitch.
Option: flat-stitching
Unfold the pocket and iron the seam allowances toward the pocket. Stitch the seam allowance close to the edge and fold the pocket bag inwards. The so-called flat stitching prevents the bag from slipping out later without a visible seam from the right.
Fix the pockets
Fix the pockets inside the seam allowances with a straight stitch so that they don’t slip when you sew the trousers together.
Abnäher schließen
Schließe an der Hinterhose die Abnäher, indem du mit einem kurzen Geradstich in Richtung Abnäherspitze nähst. Verriegele das Ende der Naht nicht und verknote die Enden gründlich.
Closing the darts
Close the darts on the back trousers by sewing with a short straight stitch in the direction oft the dart tip. Don´t lock at the end of the seam and knot the ends thoroughly.
Schrittnähte schließen
Schließe sowohl an der Vorder- als auch an der Hinterhose die Schrittnähte.
Closing the inseams
Close the inseams on both the front and back pants.
Hose an das Oberteil nähen
Nähe die Vorderhose rechts auf rechts auf das vordere Oberteil wie auch beim Rock beschrieben.
Nähe die Hinterhose an das hintere Oberteil. Wie beim schmalen Rock treffen die Abnäher der Hinterhose auf die Abnäher des Rückteils.
Connecting trousers and top
Sew the front trousers right sides together to the front upper part as described for the skirt.
Sew the back trousers to the back bodice. As with the narrow skirt, the darts of the back trousers meet the darts of the back piece.
Wickel positionieren
Klappe den Jumpsuit auf und lege ihn mit der rechten Seite zu dir. Positioniere die Wickel genau wie beim Kleid. Fixiere die Wickel innerhalb der Nahtzugabe mit einem Gradstich.
Achtung:
Je nach deinen individuellen Maßen kann es sein, dass du die Wickel in der Seite etwas kürzen musst, damit es später in der Taille anliegt. Bevor du die Seitennähte final schließt, fixiere sie mit einer Hilfsnaht und probiere einmal an.
Wrap position
Unfold the jumpsuit and place it with the right side facing you. Position the wraps exactly as you did for the dress. Secure the wraps inside the seam allowance with a degree stitch.
Attention:
Depending on your individual measurements, you may need to shorten the wraps a bit in the side so that it fits at the waist later. Before you close the side seams finally, fix them with an auxiliary seam and try on once.
Seitennähte und Innenbeinnaht schließen
Lege Vorder- und Rückteil rechts auf rechts und schließe die Seitennähte in einem Rutsch. Schließe anschließend die Innenbeinnaht.
Closing the Sideseams and the inner leg seam
Place the front and back pieces right sides together and close the side seams in one go. Then close the inside leg seam.
Kleid und Jumpsuit säumen / Hem dress and Jumpsuit
Säumen
Ärmel säumen
Versäubere die Ärmel mit der Overlock. Säume mit 2,5 cm.
Hose säumen
Versäubere die Kanten mit der Overlock. Säume die Hose mit 2,5 cm Saumzugabe.
Kleid säumen
Versäubere die Kanten mit der Overlock. Säume das Kleid mit 2,5 cm Saumzugabe.
Hem
Hem the sleeves
Finish the sleeves with the serger. Hem with 2.5 cm.
Hem the pants
Finish the pants with the serger. Hem the pants with 2.5 cm hem allowance.
Hem the dress
Finish the dress with the serger. Hem the dress with 2.5 cm hem allowance.