zum Warenkorb 0,00 €
0Nähanleitung /// How to sew: Hera
Das perfekte Kleid für alle: Hera
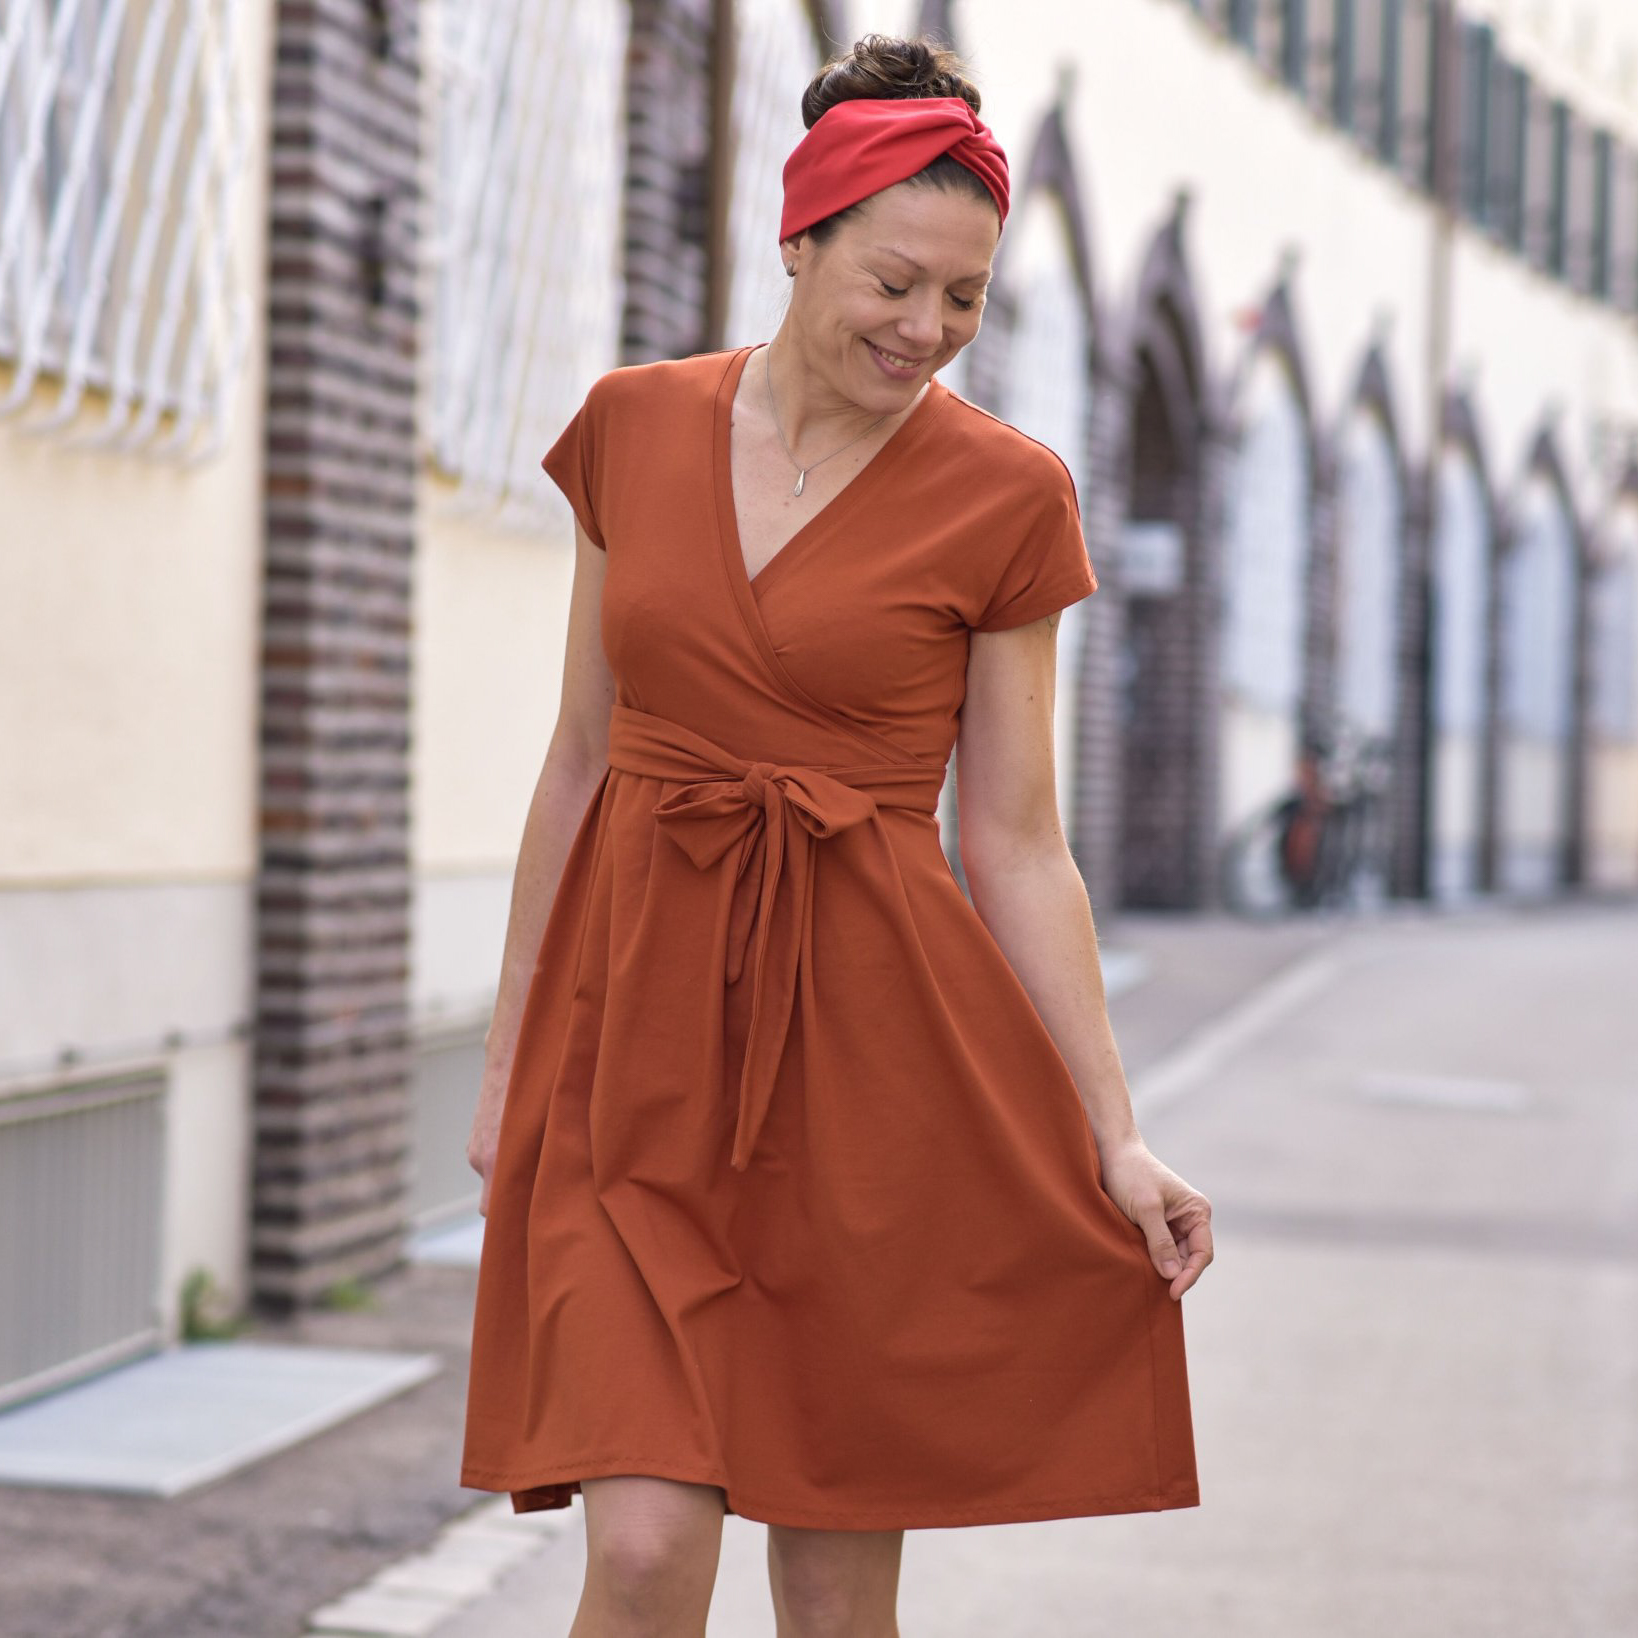
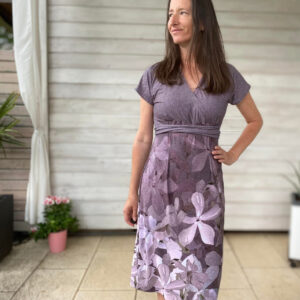
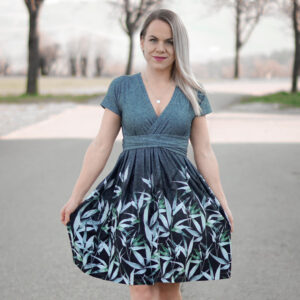
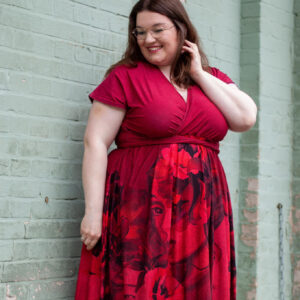
Hera ist elegantes und trotzdem bequemes Sommerkleid in zwei Varianten: mit einem engen Rock und einem schwingenden Faltenrock. Das Oberteil formt mit kleinen Falten und Abnähern ein wunderschönes Dekolleté. Das Oberteil endet unter der Brust und wird mit einem eingenähten Bindegürtel nochmal in seiner Form unterstrichen. Mit dem kostenlosen Ärmel Add on ist Hera auch in der kälteren Jahreszeit die perfekte Begleiterin.
Ganz neu: Im Schnitt enthalten ist ein zweites Schnittteil für das Oberteil mit integrierter FBA (full bust adjusment). Ob ihr eine FBA braucht und wie ihr die Größe ermittelt erfahrt ihr hier. Die Maßtabelle ist noch einmal unter “Anpassung” erläutert.
The perfect dress for everybody: Hera
Hera is an elegant and comfortable summer dress in two versions: with a tight skirt and a swinging pleated skirt. The top forms a beautiful décolleté with small pleats and darts. The top ends under the breast and its shape is underlined again with a sewn-in tie belt. With the free sleeve add-on, Hera is the perfect companion even in the colder seasons.
Brand new: The pattern includes a second pattern piece for the top with integrated FBA (full bust adjustment). You can find out here whether you need an FBA and how to determine the size. The sizechart is explained again under “Adjustment”.
Richtige Größe drucken
Print the correct size
Maßtabelle /// Size chart (cm)


Stoffempfehlung
Fabric recommendation
Fabrics with a soft drape and some body, such as our viscose jersey but also modal french terry, are best suited for Hera. The fabric should have at least 5% elastane.
Anpassung
Die Variante mit dem weiten Rock eignet sich perfekt zum kaschieren und trägt sich sehr leger und bequem. An der Brust liegt Hera eng an, wähle daher die Größe anhand deines Brustumfangs aus. Die enge Rockvariante schmiegt sich an Taille und Hüfte figurnah an, sodass hier alle 3 Maße entscheidend sind.
Sollte die Differenz zwischen deinem Oberbrust- und deinem Brustumfang größer als 5 cm sein, entscheide dich für die Oberteilvariante mit integrierter FBA (full bust adjustment). Mehr zum Thema FBA findest du in unserem Blog
Wenn du eine FBA brauchst wähle deine entsprechende Größe aus der Maßtabelle in der Zeile “Brust/FBA”.
Solltest du Hilfe benötigen, schau gern in der Mondstoff-Gruppe auf Facebook vorbei: Mondstoff-Gruppe
Adjustment
If you need help, feel free to join the Mondstoff group on Facebook: Mondstoff Group
1. Zuschnitt
1. Cutting
Der schmale Rock/The narrow skirt
1. Passzeichen übertragen
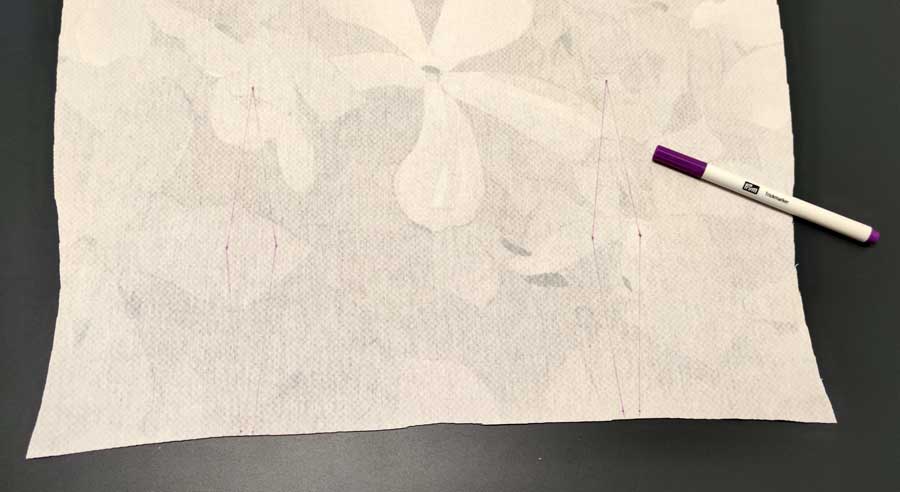
Übertrage alle Abnäher und Passzeichen mit Hilfe eines Trickmarkers oder ähnlichem auf die linke Stoffseite.
1. Transfer the marks
Transfer all darts and marks to the wrong side of the fabric using a trick marker or something similar.
2. Abnäher schließen
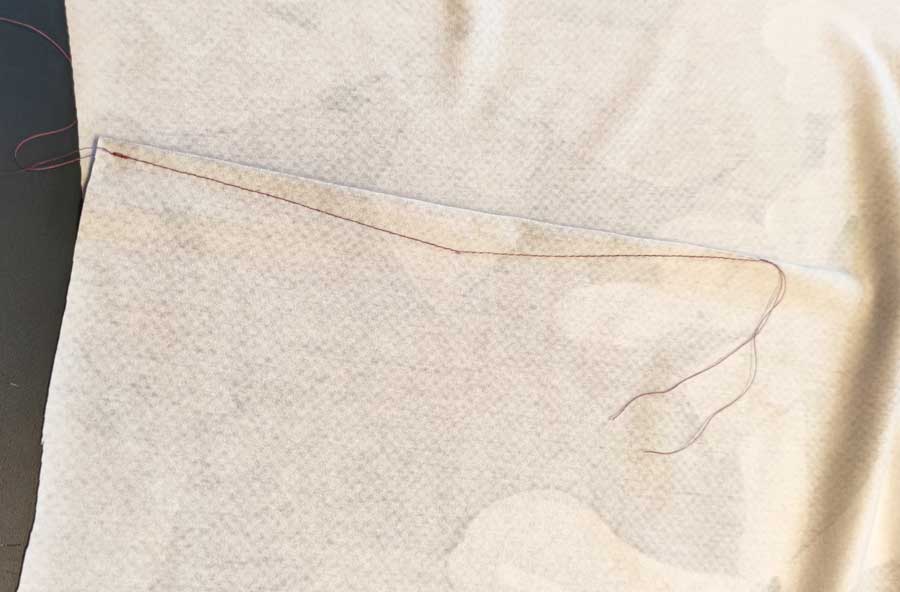
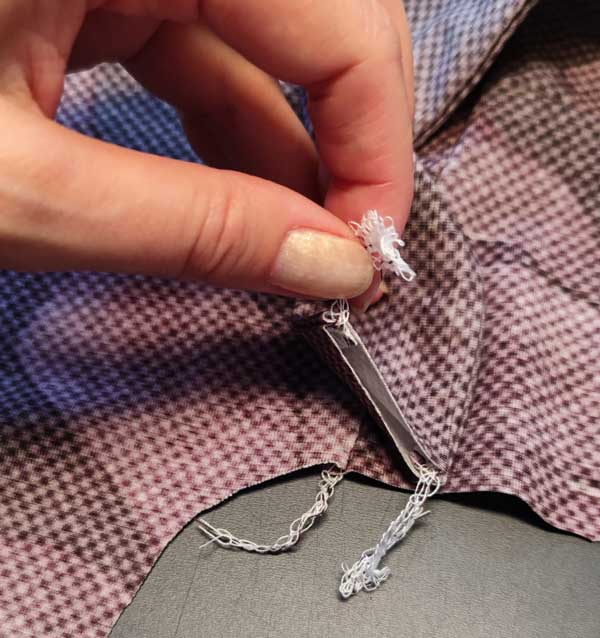
Schließe sowohl am Vorder- als auch am Hinterrock die Abnäher, indem du von der oberen Kante mit einem kleinen Gradstich (Stichlänge 2,5) nähst. Verriegle das Ende der Naht nicht, sondern lass lange Fäden stehen und verknote sie gründlich.
2. Sewing the darts
Close the darts on both the front and back skirts by sewing a small straight stitch (stitch length 2.5) from the top edge. Do not lock the end of the seam, but leave long threads and knot them thoroughly.
Variante Faltenrock/The pleated skirt
1. Passzeichen übertragen
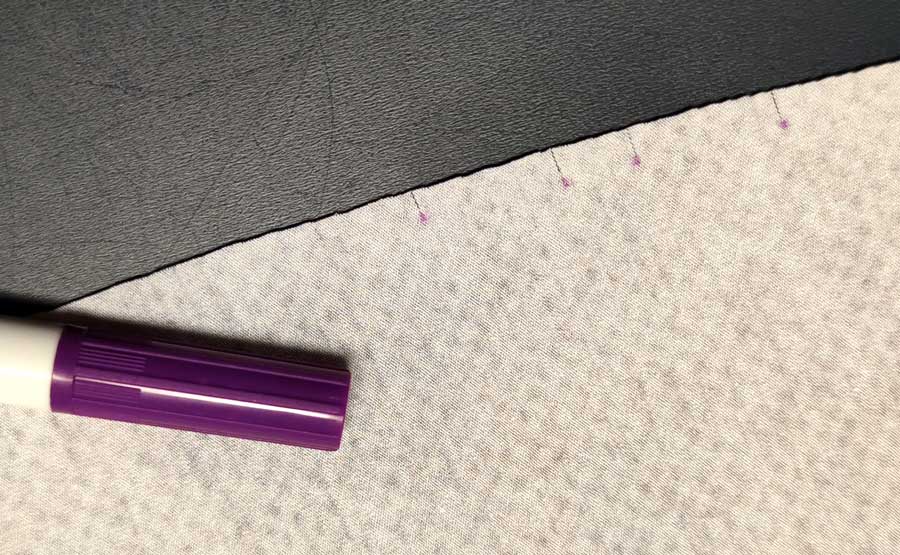
Übertrage alle Markierungen für die Falten. Mache dafür entweder kleine Knipse innerhalb der Nahtzugabe oder nutze einen Trickmarker.
1. Transfer the marks
Transfer all the markings for the folds. Either make small snaps inside the seam allowance or use a trick marker.
2. Falten nähen
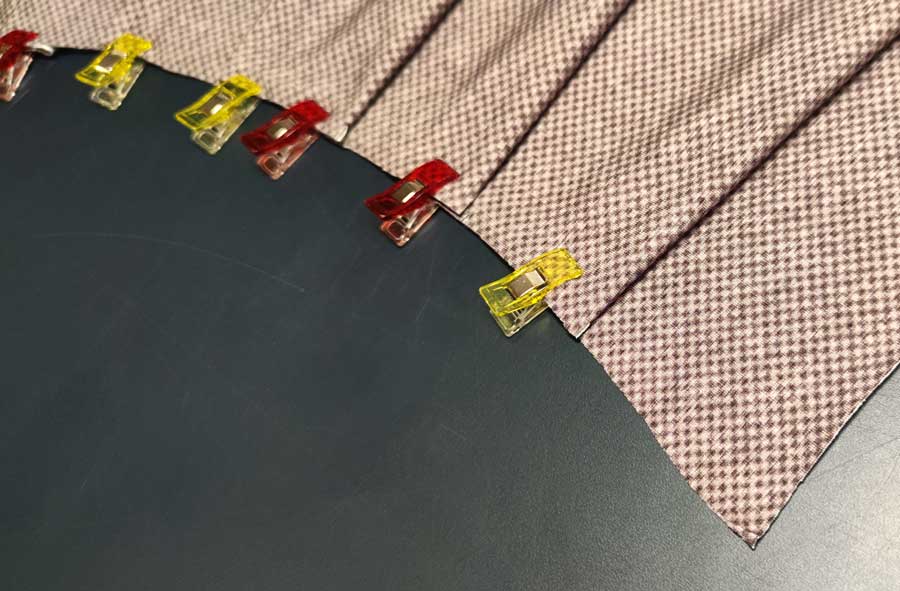
Vorder- und Hinterrock werden gleich genäht. Auf dem Schnittmuster ist die Legerichtung der insgesamt 6 Falten eingezeichnet. Stecke immer 2 Knipse aufeinander und lege die so entstandene Falte in Richtung Seitennaht.
2. Sewing the pleats
The front and back skirts are sewn the same way. The direction of the 6 pleats is marked on the pattern. Always put 2 snaps on top of each other and place the resulting fold in the direction of the side seam.
3. Falten fixieren
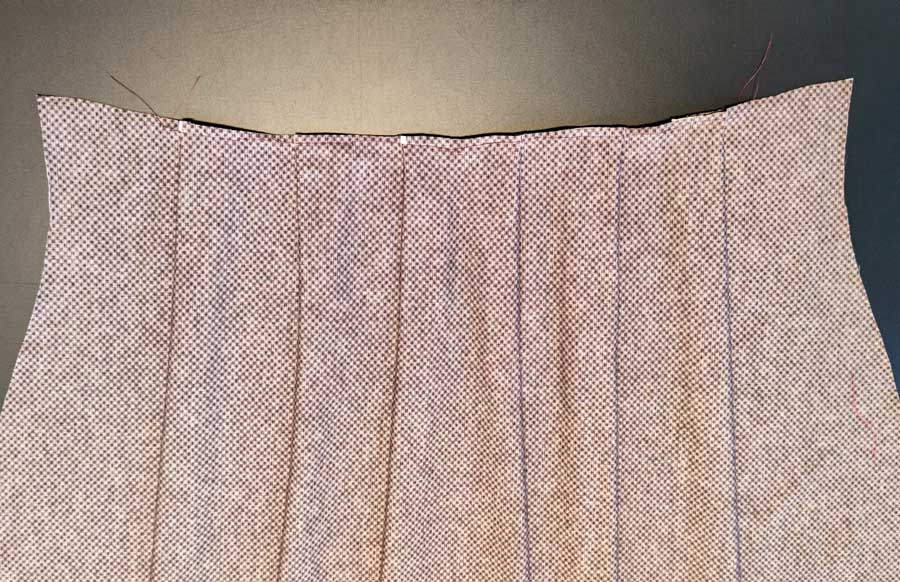
Fixiere die Falten innerhalb der Nahtzugabe mit einem Gradstich.
3. Fix the folds
Fix the folds inside the seam allowance with a straight stitch.
Oberteil nähen/Sewing the top

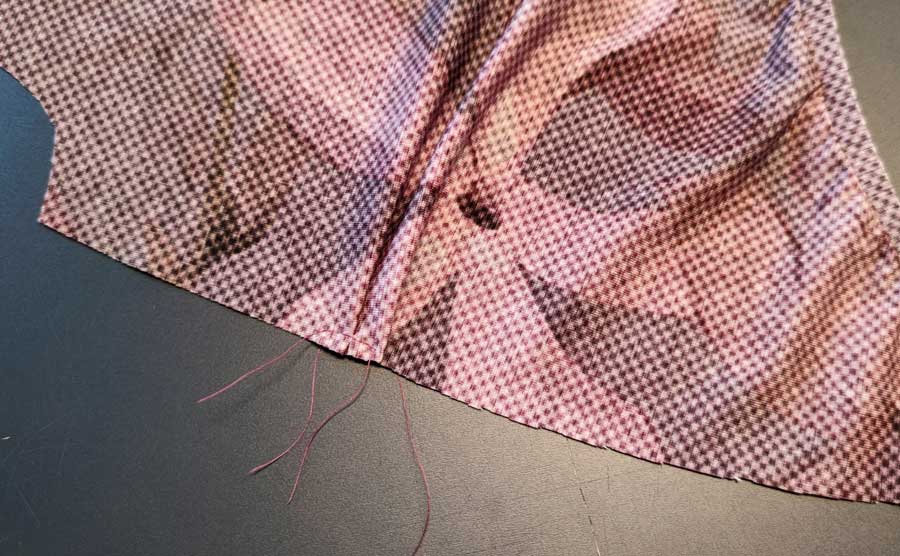
1. Falten nähen
Am Vorderteil befinden sich 2 kleine Legefältchen. Stecke jeweils die 2 Knipse aufeinander und lege die so entstandenen Fältchen Richtung Körpermitte und fixiere sie mit einem Gradstich innerhalb der Nahtzugabe.
1. Sewing the pleats
There are 2 small pleats on the front part. Put the 2 snaps on top of each other and lay the resulting folds in the direction of the middle of the body and fix them with a straight stitch inside the seam allowance.
2. Rückenteil
Am Rückteil befinden sich 2 kleine Abnäher. Schließe sie, indem du von der unteren Kante mit einem kleinen Gradstich (Stichlänge 2,5) nähst. Verriegle das Ende der Naht nicht, sondern lass lange Fäden stehen und verknote sie gründlich.
2. The back
There are 2 small darts on the back. Close them by sewing a small straight stitch (2.5 stitch length) from the bottom edge. Do not lock the end of the seam, but leave long threads and knot them thoroughly.
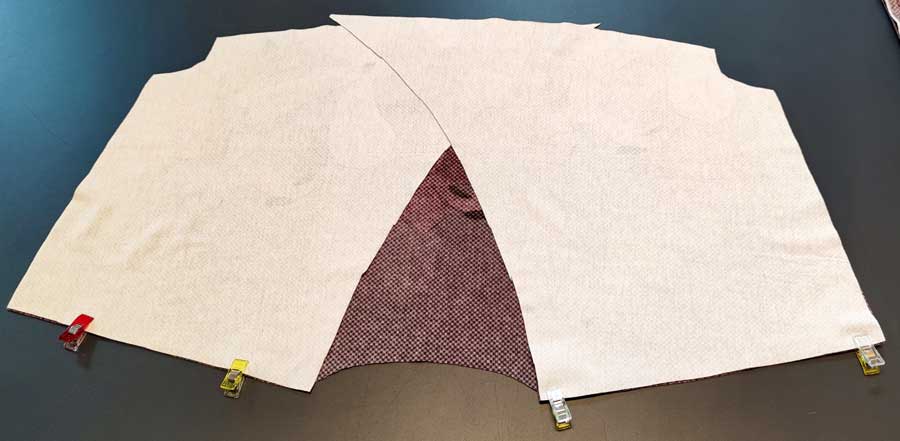
3. Schulternähte schließen
Lege die beiden Vorderteile rechts auf rechts auf das Rückenteil und schließe die Schulternaht mit einem elastischen Stich.
3. Shoulderseams
Place the two front pieces right sides together on the back piece and close the shoulder seam with an elastic stitch.
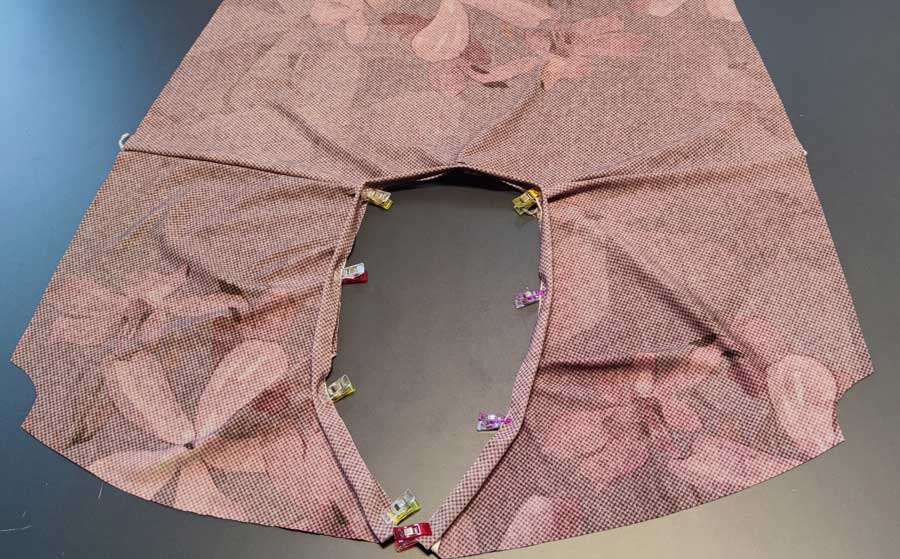
4. Bündchen annähen
Bügel den Bündchenstreifen einmal links auf links und stecke ihn gleichmäßig unter Dehnung an das aufgeklappte Oberteil. Nähe ihn mit einem elastischen Stich fest. Wenn du mit der Overlock nähst kannst du optional den Differential etwas erhöhen um einem späteren Ausleiern vorzubeugen. Bügel den Ausschnitt einmal gründlich. Optional kannst du von rechts knappkantig absteppen.
4. The cuff
Iron the cuff strip to half and pin it to the unfolded bodice while stretching evenly. Sew it in place with an elastic stitch. If you sew with the serger, you can optionally increase the differential a little to prevent it from wearing out later. Iron the neckline thoroughly once. Optionally, you can topstitch from the right edge.
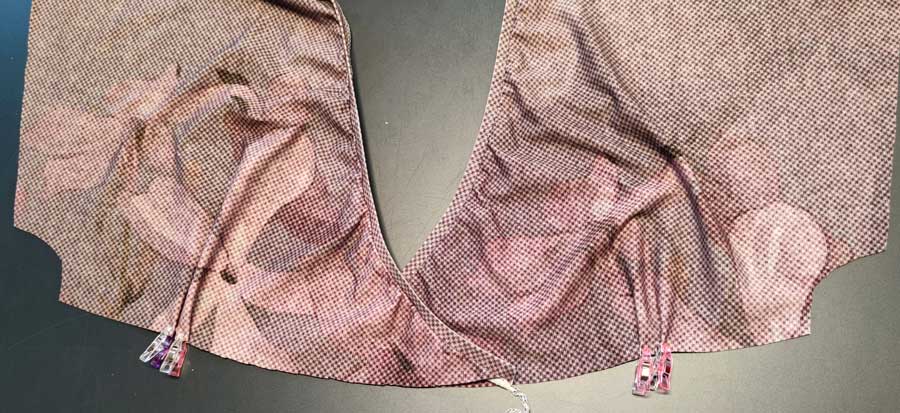
5. Überlappung fixieren
Lege nun die beiden Vorderteile übereinander. Die Markierungen für die Überlappung (durchgehender Strich im Schnittmuster) treffen jeweils auf das Bündchen. Fixiere das Vorderteil innerhalb der Nahtzugabe mit einem Gradstich.
5. Fix the front
Now lay the two front pieces on top of each other. The markings for the overlap (continuous line in the pattern) meet the end of the cuff. Fix the front part inside the seam allowance with a straight stitch.
Der Gürtel/The belt


1. Gürtel nähen
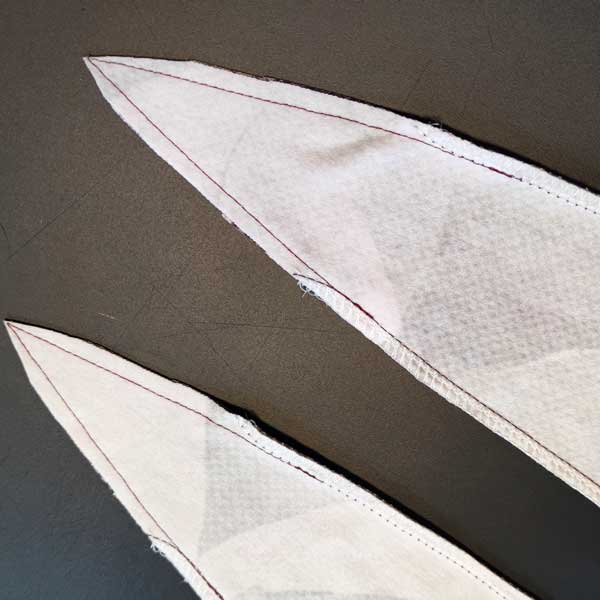
Lege jeweils 2 Gürtelteile rechts auf rechts aufeinander. Nutze zum zusammennähen im Bereich der Spitze einen kleinen Gradstich. Für den Rest kannst du die Overlock nutzen. Schneide die Nahtzugabe im Bereich der Spitze knappkantig zurück und wende die Gürtelteile auf rechts. Bügel die Gürtelteile. Optional kannst du sie einmal ringsherum knappkantig absteppen.
1. Sewing the belt
Place 2 belt parts on top of each other, right sides together. Use a small straight stitch to sew together the tip area. For the rest you can use the serger. Cut back the seam allowance in the area of the tip and turn the belt parts right side out. Iron the belt parts. Optionally, you can topstitch them all around.
Kleid fertig stellen/Finishing the dress
1. Vorderes Kleid zuammennähen
Lege den Vorderrock rechts auf rechts auf das Vorderteil des Oberteils und nähe mit einem elastischen Stich.
1. Front dress
Place the front skirt on the front part of the top right sides together and sew with an elastic stitch.
2. Hinteres Kleid zusammennähen
Lege den Hinterrock auf das hintere Oberteil und nähe mit einem elastischen Stich.
2. The back skirt
Place the back skirt on the back bodice and sew with an elastic stitch.
3. Gürtel annähen
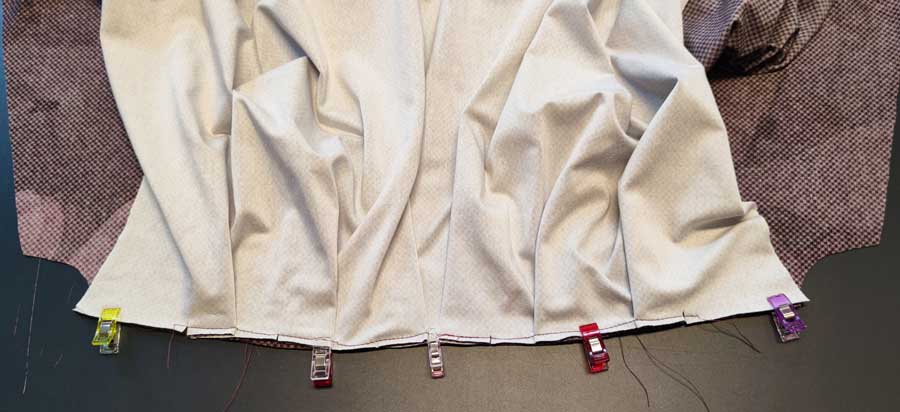
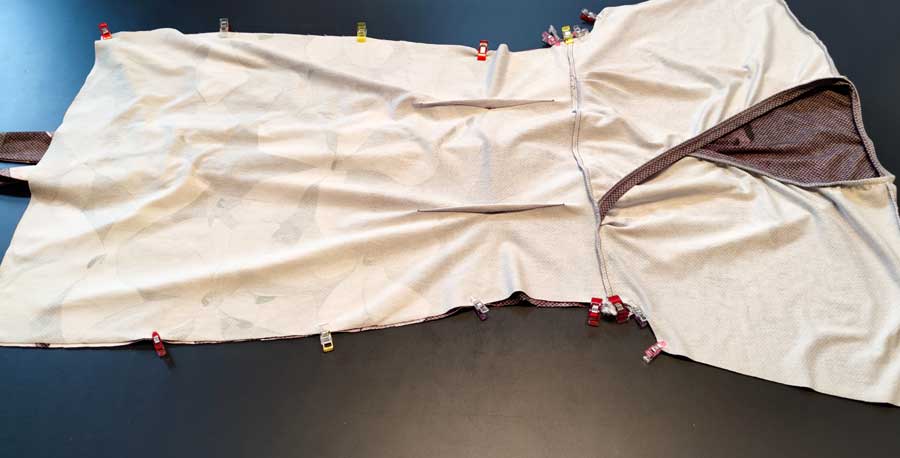
Lege nun jeweils ein Gürtelteil rechts auf rechts auf das Vorderkleid (siehe Bild) und fixiere es innerhalb der Nahtzugabe.
3. The belt
Now place one belt piece on the front dress, right sides together (see picture) and fix it inside the seam allowance.
4. Seitennähte schließen
Lege nun Vorder- und Hinterkleid rechts auf rechts zusammen und schließe die Seitennähte in einem Rutsch.
4. Closing the sideseams
Now put the front and back dress together right sides together and close the side seams in one go.
5. Gürtelposition
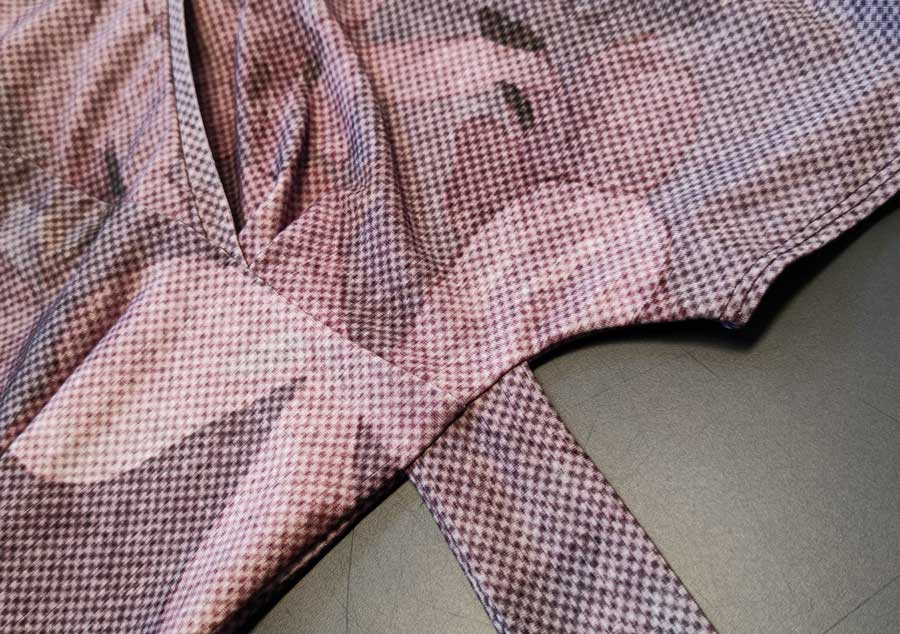
So sehen die zwischengefassten Gürtelteile aus. Sie liegen genau mittig auf der Teilungsnaht und verdecken diese später beim tragen.
5. Beltposition
This is what the interposed belt parts look like. They lie exactly in the middle of the dividing seam and cover them later when worn.
5. Säumen
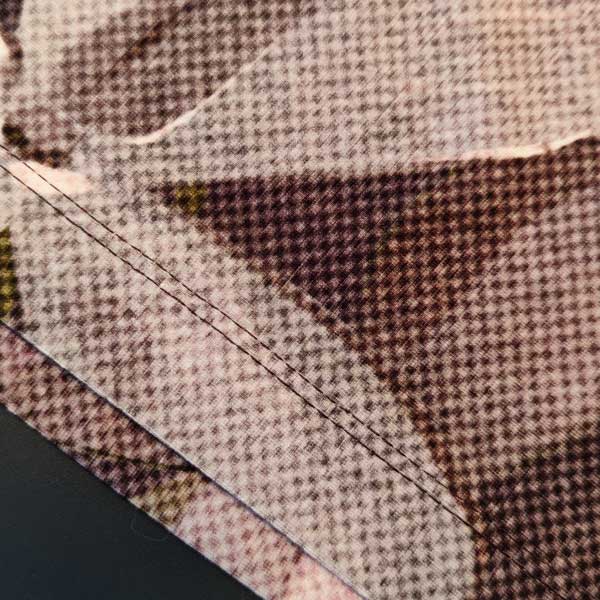
Säume den Rock mit 2,5 cm Saumzugabe, die Ärmel mit 0,7 cm Saumzugabe.
6. Hem
Hem the skirt with a 2.5 cm hem allowance, the sleeves with a 0.7 cm hem allowance.


