zum Warenkorb 0,00 €
0Nähanleitung /// How to sew: Titania
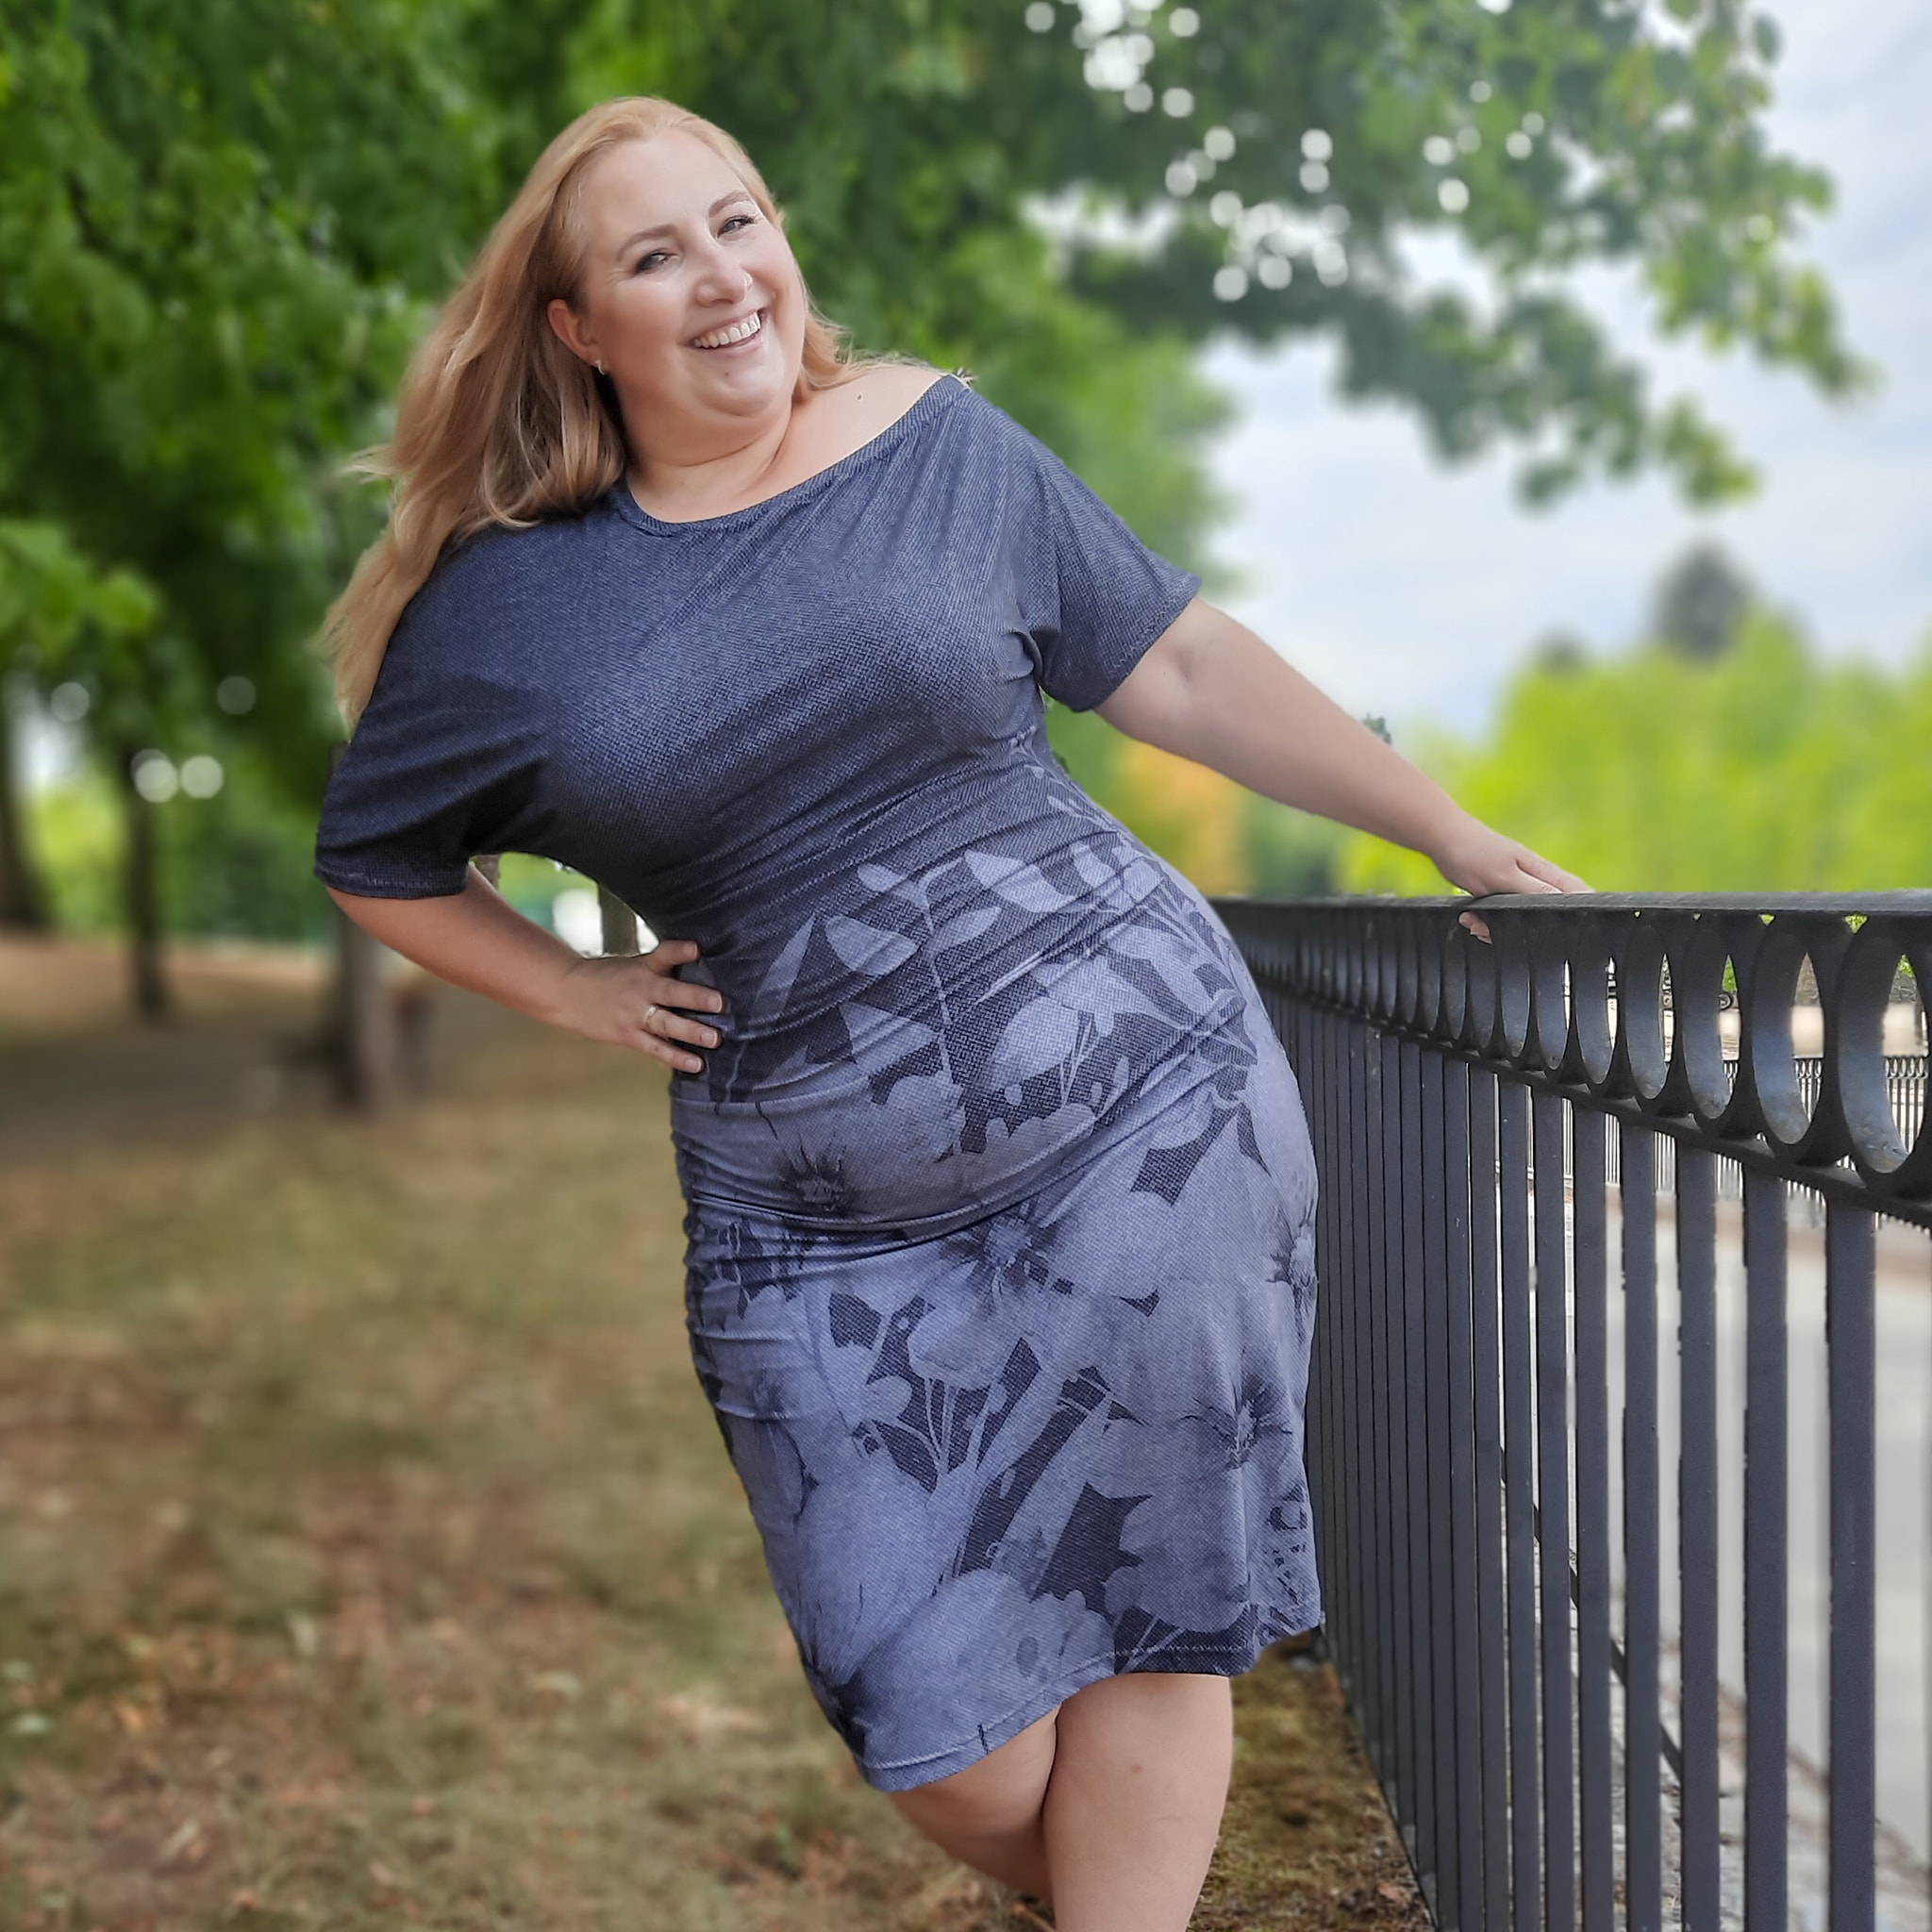
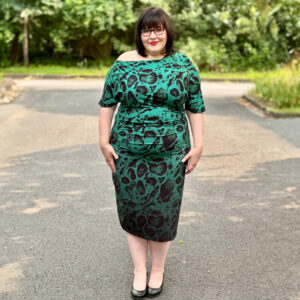
Titania
„Titania“ ist ein sehr elegantes und trotzdem bequemes Kleid, das in den warmen und kalten Jahreszeiten getragen werden kann. Das Kleid kann in Midi und normaler Länge genäht werden. Ebenfalls können die Ärmel weggelassen werden. Rechts und links befinden sich vorne je drei Falten, die ein kleines Bäuchlein kaschieren. Das besondere Extra ist die Asymmetrie, das Kleid kann einseitig schulterfrei getragen werden.
Titania
„Titania“ is a very elegant yet comfortable dress that can be worn in warm and cold seasons. The dress can be sewn in midi and normal length. Also the sleeves can be omitted. On the right and left side there are three pleats in the front, which conceal a small belly. The special extra is the asymmetry, the dress can be worn off-the-shoulder on one side.
Richtige Größe drucken
Die gekauften Dateien haben zwei verschiedene Varianten: A4 und A0 Dateien. Die A0 kannst du online oder in einem Copyshop drucken lassen, A4 kann dein Drucker drucken. Bei beiden Varianten ist es dir möglich, nur die Größe zu drucken, die du tatsächlich benötigst. Oder zwei-drei Größen, falls du Anpassungen vornehmen musst.
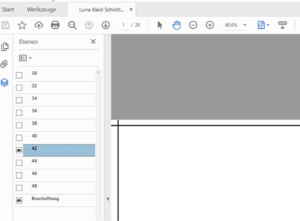
Öffne die Datei im Acrobat Reader und klicke das Symbol in der linken Leiste am Rand an, das auf dem Bild blau dargestellt ist. Daraufhin klappt ein neues Menü auf, in dem du durch einen Klick auf das Auge die Größen ein- und ausblenden kannst. Die Ebene „Beschriftung“ sollte immer an bleiben. Beim oben gezeigten Beispiel würdest du Gr. 42 drucken.
Blende nun alle unnötigen Größen aus und drucke das Schnittmuster wie gewohnt. Auf dem Beispielbild ist es die Größe 42, die gedruckt wird.
Print the correct size
The purchased files come in two different variants: A4 and A0 files. You can have the A0 printed online or in a copy shop. Your printer can print A4. With both variants it is possible for you to print only the size that you actually need. Or two to three sizes in case you need to make adjustments.
Open the file in Acrobat Reader and click on the symbol in the left bar at the edge, which is shown in blue on the picture. A new menu then opens in which you can show and hide sizes by clicking on the eye. The „labeling“ layer should always remain on.
Now hide all unnecessary sizes and print the pattern as usual. Using the example above, you would print size 42 only.
Maßtabelle /// Size chart (cm)

Stoffbedarf Bordürenstoffe /// Fabric requirement border fabrics

Stoffempfehlung
Für Titania eignen sich am besten Stoffe mit weichem Fall und etwas Stand, wie unser Viskosejersey, aber auch Frenchterry ist insbesondere für die Variante mit langen Ärmeln perfekt. Der Stoff sollte mindestens 5% Elasthananteil haben.
Fabric recommendation
Fabrics with a soft drape and some stand are best for Titania, like our viscose jersey, but Frenchterry is also perfect, especially for the version with long sleeves. The fabric should have at least 5% elastane.
Anpassung/Adjustment

Zwischen zwei Größen
Wenn du den Schnitt anpassen musst, weil du zwischen 2 Größen bist, drucke nur die Größen, die du zum Verbinden benötigest. Zum Beispiel Brust 40, Taille 38. Verwende die Ebenenfunktion und drucke nur 40 und 38 aus. Die Größen werden dann mit einer Linie verbunden, im Beispielbild ist es die rote Linie.
Solltest du Hilfe benötigen, schau gern in der Mondstoff-Gruppe auf Facebook vorbei: Mondstoff-Gruppe
Bitte beachten
Nähe unbedingt ein Probeteil aus einem günstigen Stoff. Für den Schnitt sind alle drei Maße wichtig: Brustumfang, Taille und Hüftweite. Sollten diese Maße voneinander abweichen, musst du das Schnittmuster entsprechend anpassen. Die oberen Falten sollten oberhalb und die unteren Falten unterhalb der Taille sitzen. Solltest du einen sehr langen oder sehr kurzen Oberkörper haben kannst du zwischen den Falten kürzen.
Das Kleid, insbesondere in der Midi-Länge, soll eng am Bein sitzen. Eventuell musst du das Kleid an den Beinen nach der ersten Anprobe etwas enger nähen, damit es richtig sitzt. Titania wird auf einer Seite off-shoulder getragen. Wenn du eher breite Schultern hast, kannst du den Ausschnitt eine Größe größer zuschneiden.
Between two sizes
If you need to adjust the pattern because you are between 2 sizes, only print the sizes you need to connect. For example chest 40, waist 38.
Use the layers function and print out only 40 and 38.
The sizes are then connected with a line, in the example image it is the red line.
If you need help, feel free to join the Mondstoff group on Facebook: Mondstoff Group
Please note
Be sure to sew a test piece from an inexpensive fabric. All three measurements are important for the pattern: bust measurement, waist measurement and hip measurement. If these measurements differ, you will need to adjust the pattern accordingly. The upper pleats should be above the waist and the lower pleats below the waist. If you have a very long or very short torso, you can shorten between the pleats.
The dress, especially in the midi length, should sit close to the leg. You may need to sew the dress a little tighter at the legs after the first fitting to make it fit properly. Titania is worn off-shoulder on one side. If you have rather broad shoulders, you can cut the neckline one size larger.
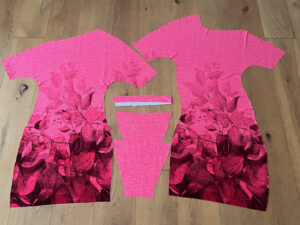
Zuschnitt
1 x Vorderteil
1 x Rückteil
2 x Ärmel im Bruch (optional)
1 x Ausschnittbündchen
Cutting
1 x front part
1 x back part
2 x sleeves on fold (optional)
1 x neckline cuff
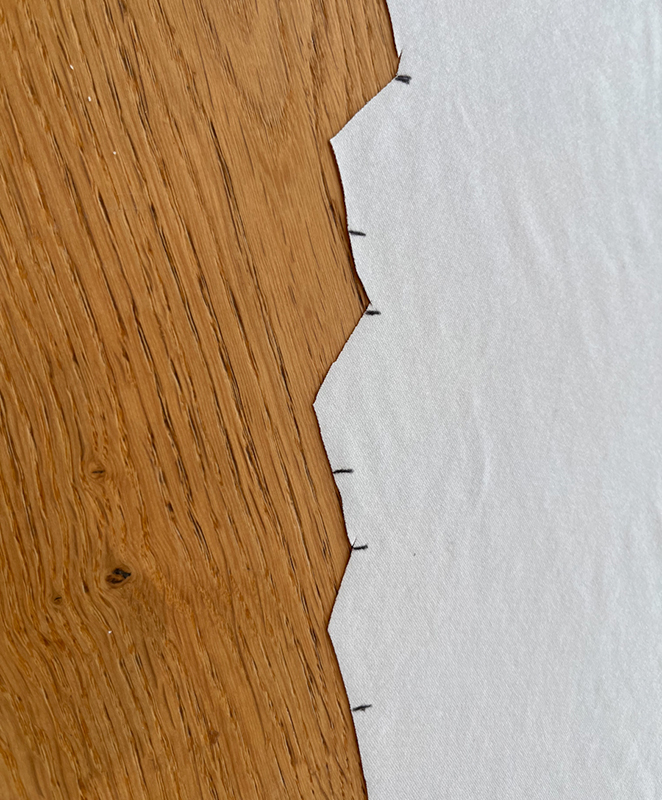
Passzeichen übertragen
Übertrage alle Passzeichen mit Hilfe eines Trickmarkers oder ähnlichem auf die linke Stoffseite.
Transfer the marks
Transfer all marks to the wrong side of the fabric using a trick marker or something similar.
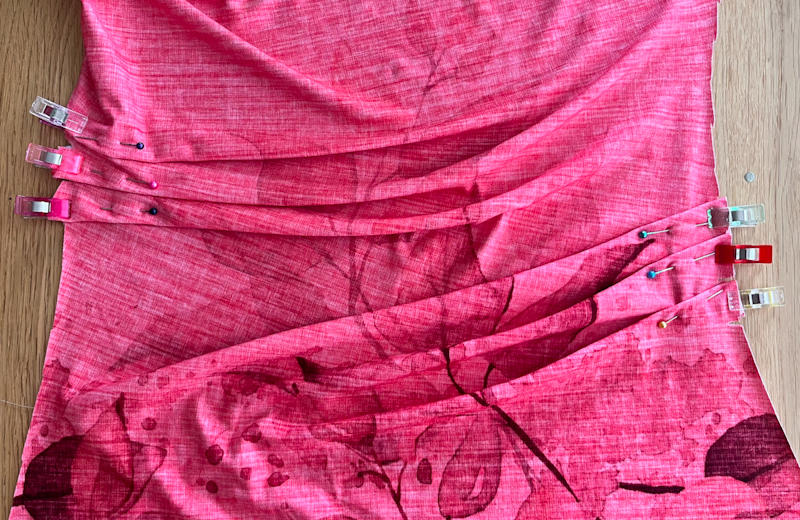
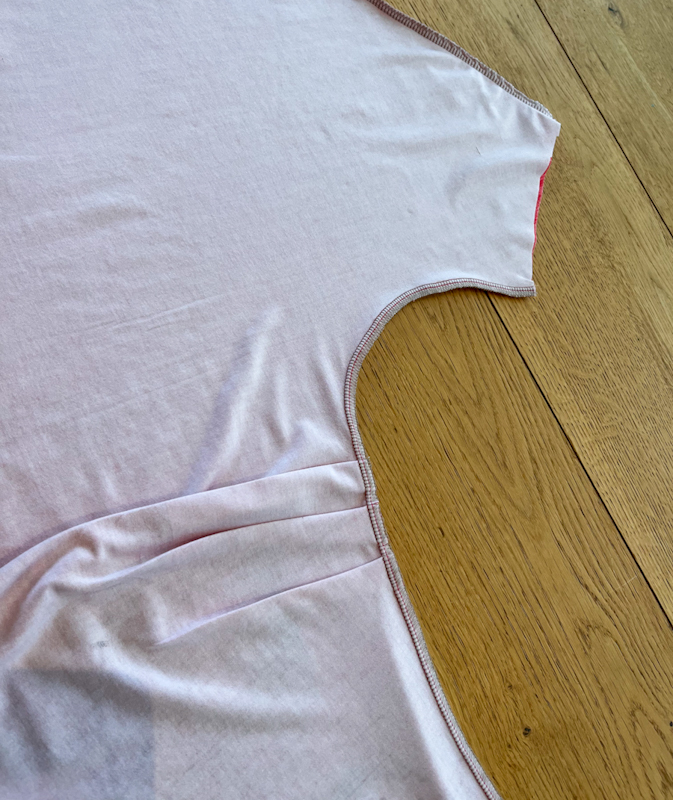
Falten nähen
Das Vorderteil hat rechts und links Lege-Falten. Die oberen Falten werden nach unten gelegt, wie auf dem Schnittmuster eingezeichnet. Die unteren Falten werden nach oben gelegt, ebenfalls mit Pfeil auf dem Schnitt angezeigt. Fixiere die Falten innerhalb der Nahtzugabe mit einem Gradstich.
Prepare the pleats
The front piece has laying pleats on the right and left sides. The upper pleats are placed downward, as indicated on the pattern. The bottom pleats are placed up, also indicated with arrows on the pattern. Fix the pleats inside the seam allowance with a straight stitch.

Schulternähte schließen
Lege das Vorderteil rechts auf rechts auf das Rückenteil und schließe die Schulternaht mit einem elastischen Stich.
Closing the shoulder seams
Place the front piece right sides together on the back piece and close the shoulder seam with an elastic stitch.


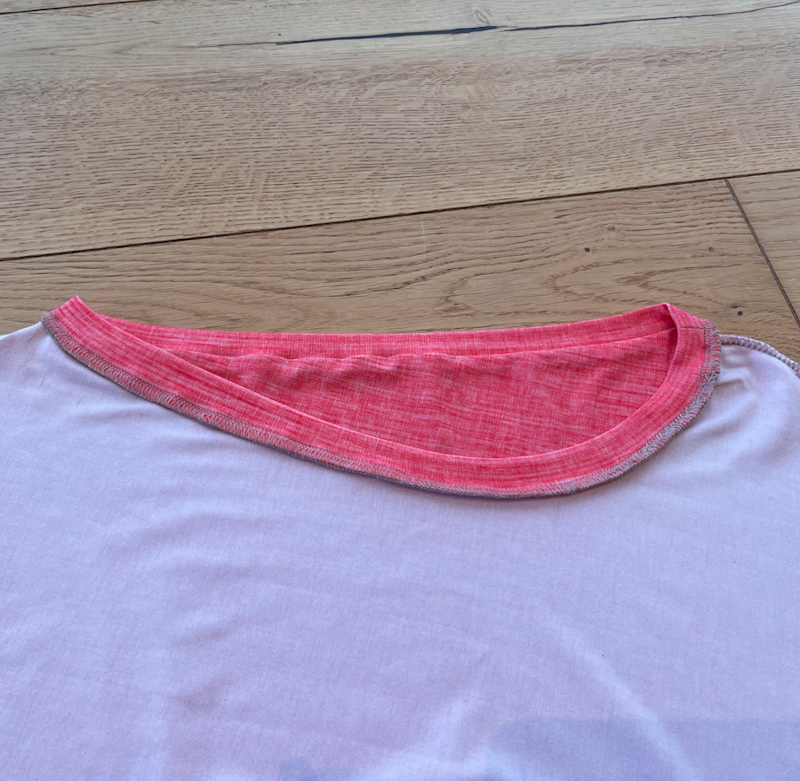
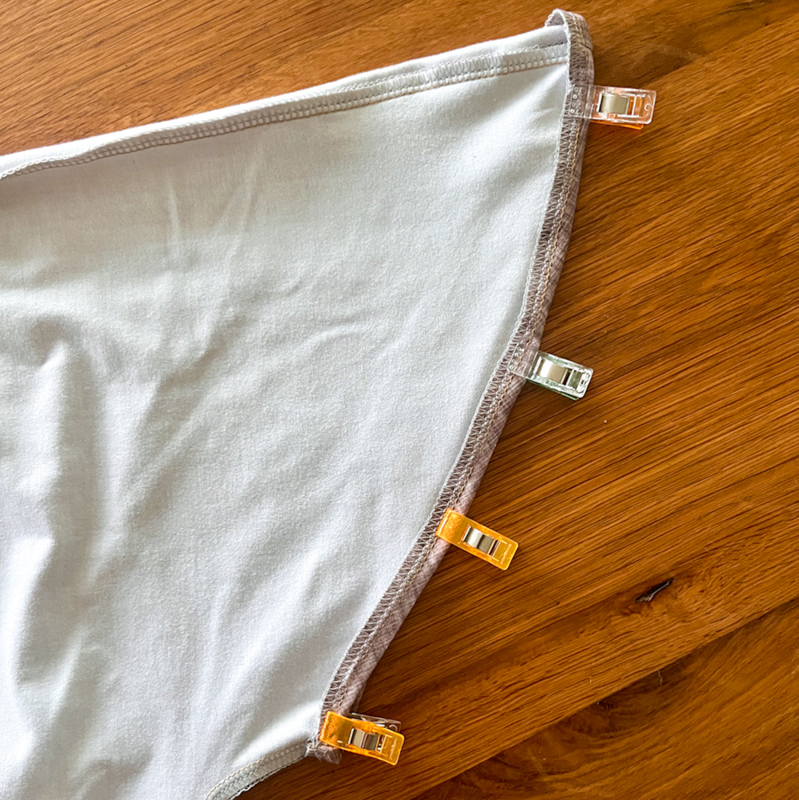
Bündchen annähen
Schließe den Streifen zu einem Ring, indem du die kurzen Seiten zusammennähst. Bügel den Bündchenstreifen einmal links auf links und stecke ihn gleichmäßig unter Dehnung an das aufgeklappte Oberteil. Nähe ihn mit einem elastischen Stich fest. Wenn du mit der Overlock nähst kannst du optional den Differential etwas erhöhen um einem späteren Ausleiern vorzubeugen. Bügel den Ausschnitt einmal gründlich. Optional kannst du von rechts knappkantig absteppen.
Achtung: der Streifen ist mit Faktor 0,8 berechnet. Je nach Dehnbarkeit des Stoffes solltest du ihn etwas großzügiger zuschneiden.
The neckline
Close the strip into a ring by sewing the short sides together. Iron the neckline strip to half and pin it to the unfolded bodice while stretching evenly. Sew it in place with an elastic stitch. If you sew with the serger, you can optionally increase the differential a little to prevent it from wearing out later. Iron the neckline thoroughly once. Optionally, you can topstitch from the right edge.
Attention: the strip is calculated with a factor of 0.8. Depending on the stretch of the fabric, you should cut it a little longer.
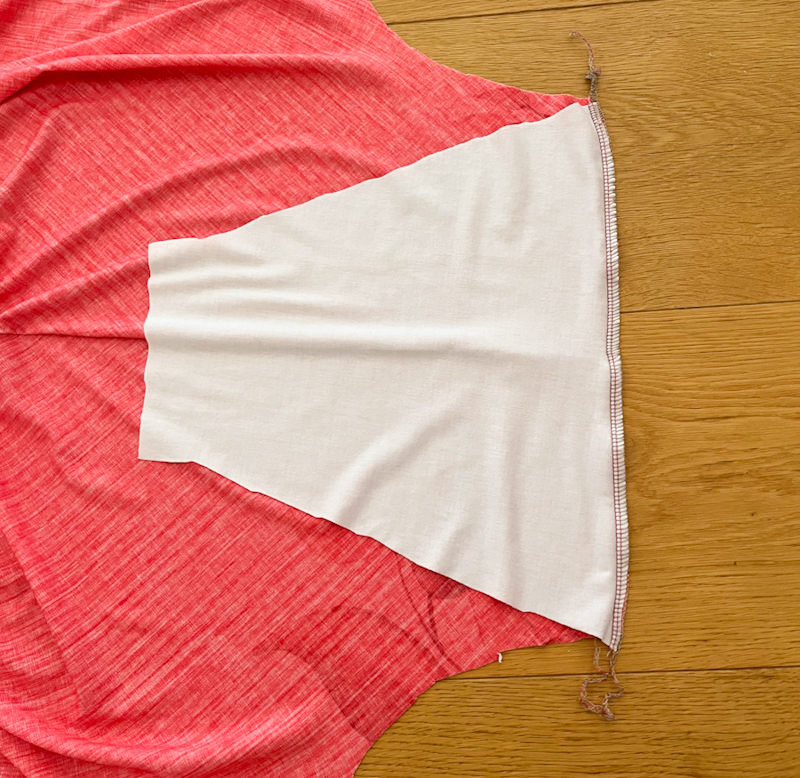
Optional: Ärmel annähen
Lege das Kleid aufgeklappt vor dich und stecke die Ärmel jeweils rechts auf rechts fest. Die Mitte des Ärmels trifft auf die Schulternaht. Nähe die Ärmel mit einem elastischen Stich.
Option: sewing the sleeves
Lay the dress unfolded in front of you and pin the sleeves right sides together. The center of the sleeve meets the shoulder seam. Sew the sleeves with an elastic stitch.
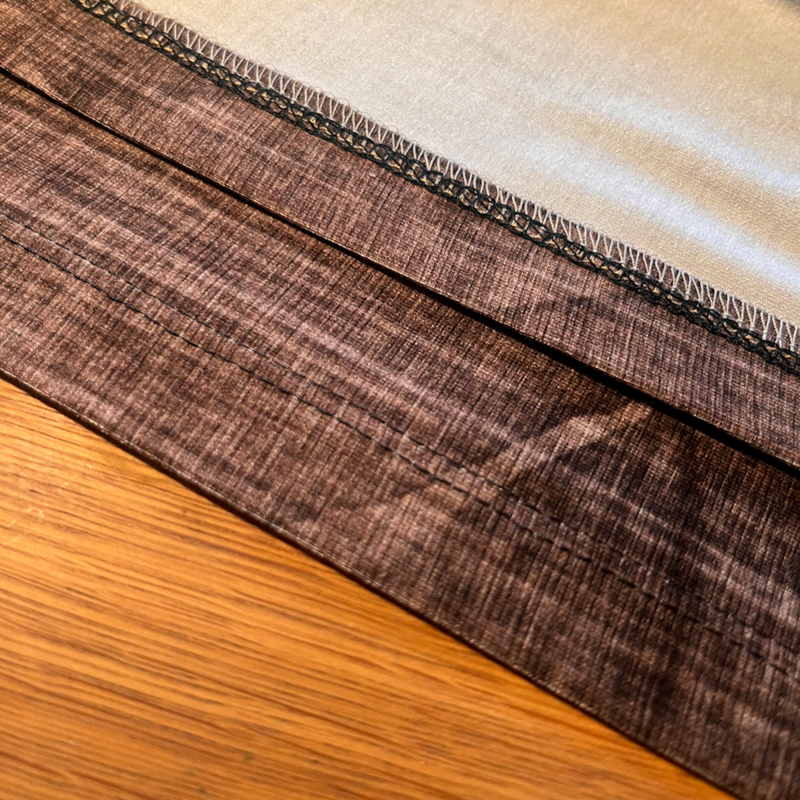
Seitennähte schließen
Lege Vorder- und Rückteil rechts auf rechts und schließe die Seitennähte in einem Rutsch.
Closing the sideseams
Place the front and back pieces right sides together and close the side seams in one go.
Säumen
Ärmel säumen
Versäubere die kurzen Ärmel mit der Overlock. Säume mit 0,7 cm. Die langen Ärmel werden mit 2,5 cm Saumzugabe gesäumt.
Rock säumen
Säume den Rock mit 2,5 cm Saumzugabe.
Hem
Hem sleeves
Finish the short sleeves with the serger. Hem with 0.7 cm. Hem the long sleeves with 2.5 cm hem allowance.
Hem skirt
Hem the skirt with 2.5 cm hem allowance.