zum Warenkorb 0,00 €
0Nähanleitung /// How to sew: Rhea

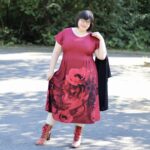
Schnell genäht und raffiniert: Rhea
Rhea ist ein leicht zu nähendes, gut sitzendes Kleid in zwei Längen und 2 Ärmelvarianten. Dank der kleinen Falten wird Rhea zu einem absoluten Figurwunder und ist dennoch ganz schnell genäht.
Ganz neu: Im Schnitt enthalten ist ein zweites Schnittteil für das Vorderteil mit integrierter FBA (full bust adjusment). Ob ihr eine FBA braucht und wie ihr die Größe ermittelt erfahrt ihr hier. Die Maßtabelle ist noch einmal unter „Anpassung“ erläutert.
Quickly sewn and clever: Rhea
Rhea is an easy-to-sew, well-fitting dress in two lengths and two sleeve options. Thanks to the small folds, Rhea is an absolute figure miracle and is still sewn up very quickly.
Brand new: The pattern includes a second pattern piece for the front with integrated FBA (full bust adjustment). You can find out here whether you need an FBA and how to determine the size. The sizechart is explained again under „Adjustment“.
Richtige Größe drucken
Die gekauften Dateien haben zwei verschiedene Varianten: A4 und A0 Dateien. Die A0 kannst du online oder in einem Copyshop drucken lassen, A4 kann dein Drucker drucken. Bei beiden Varianten ist es dir möglich, nur die Größe zu drucken, die du tatsächlich benötigst. Oder zwei-drei Größen, falls du Anpassungen vornehmen musst.
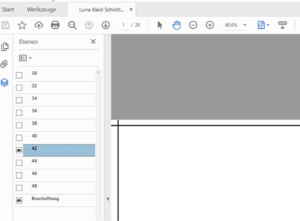
Öffne die Datei im Acrobat Reader und klicke das Symbol in der linken Leiste am Rand an, das auf dem Bild blau dargestellt ist. Daraufhin klappt ein neues Menü auf, in dem du durch einen Klick auf das Auge die Größen ein- und ausblenden kannst. Die Ebene „Beschriftung“ sollte immer an bleiben. Beim oben gezeigten Beispiel würdest du Gr. 42 drucken.
Blende nun alle unnötigen Größen aus und drucke das Schnittmuster wie gewohnt. Auf dem Beispielbild ist es die Größe 42, die gedruckt wird.
Print the correct size
The purchased files come in two different variants: A4 and A0 files. You can have the A0 printed online or in a copy shop. Your printer can print A4. With both variants it is possible for you to print only the size that you actually need. Or two to three sizes in case you need to make adjustments.
Open the file in Acrobat Reader and click on the symbol in the left bar at the edge, which is shown in blue on the picture. A new menu then opens in which you can show and hide sizes by clicking on the eye. The „labeling“ layer should always remain on.
Now hide all unnecessary sizes and print the pattern as usual. Using the example above, you would print size 42 only.
Maßtabelle /// Size chart (cm)

Stoffverbrauch unsere Bordürenstoffe
Lange Version ohne Ärmel alle Größen: 2 m
Lange Version mit Ärmeln alle Größen: 2,5 m
Kurze Version mit und ohne Ärmel alle Größen: 1,70 m
Fabric requirement for our border fabrics
Long version without sleeves all sizes: 2 m
Long version with sleeves all sizes: 2.5 m
Short version with and without sleeves all sizes: 1.70 m
Stoffempfehlung
Für Rhea eignen sich am besten weich fallende Viskosejerseys oder Modaljerseys mit mindestens 5% Elasthananteil.
Fabric recommendation
Softly falling viscose jerseys or modal jerseys with at least 5% elastane are best suited for Rhea.
Anpassung
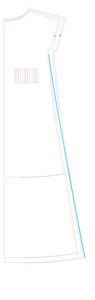
Für dieses Schnittmuster sind alle drei Maße relevant: Oberweite, Taille und Hüfte. Weichen die Maße voneinander ab, muss unbedingt angepasst werden. Drucke nur die Größen aus, die du benötigst. In dem Beispiel haben wir nach Maßtabelle oben eine 36 und unten eine 40. Verbinde den oberen Teil der 36 mit dem unteren Teil der 40 mit einer sanft auslaufenden Linie. Für die Falten nutze die Markierungen der Größe, die du für die Taille ermittelt hast.
Sollte die Differenz zwischen deinem Oberbrust- und deinem Brustumfang größer als 5 cm sein, entscheide dich für die Oberteilvariante mit integrierter FBA (full bust adjustment). Mehr zum Thema FBA findest du in unserem Blog
Wenn du eine FBA brauchst wähle deine entsprechende Größe aus der Maßtabelle in der Zeile „Brust/FBA“.
Solltest du Hilfe benötigen, schau gern in der Mondstoff-Gruppe auf Facebook vorbei: Mondstoff-Gruppe
Adjustment
All three measurements are relevant for this pattern: bust, waist and hips. If the dimensions deviate from each other, it is essential to adjust them. Print only the sizes you need. In the example, according to the size chart, we have a 36 at the top and a 40 at the bottom. Connect the upper part of the 36 to the lower part of the 40 with a gently fading line. For the pleats, use the markings of the size for the waist.
If the difference between your upper chest and your chest circumference is more than 5 cm, opt for the top variant with integrated FBA (full bust adjustment). You can find more about FBA in our blog.
If you need help, feel free to join the Mondstoff group on Facebook: Mondstoff Group
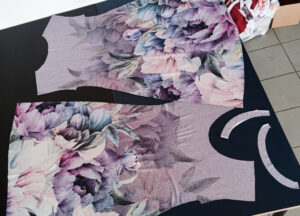
Zuschnitt
Entscheide anhand deiner Maße (siehe „Anpassung“) ob du das Vorderteil mit oder ohne FBA wählst. Beide Oberteile werden in gleicher Weise genäht.
1x Vorderteil im Bruch (Variante mit FBA oder ohne)
1x Rückteil im Bruch
1x vorderer Beleg im Bruch
1x hinterer Beleg im Bruch
für die Version mit langen Ärmeln:
2x Ärmel im Bruch
Cutting
Based on your measurements (see „Adjustment“), decide whether you want the front with or without FBA. Both bodices are sewn in the same way.
1x front part on fold (version with FBA or without)
1x back on fold
1x front facing on fold
1x back facing on fold
for the long sleeve version: 2x sleeves on fold
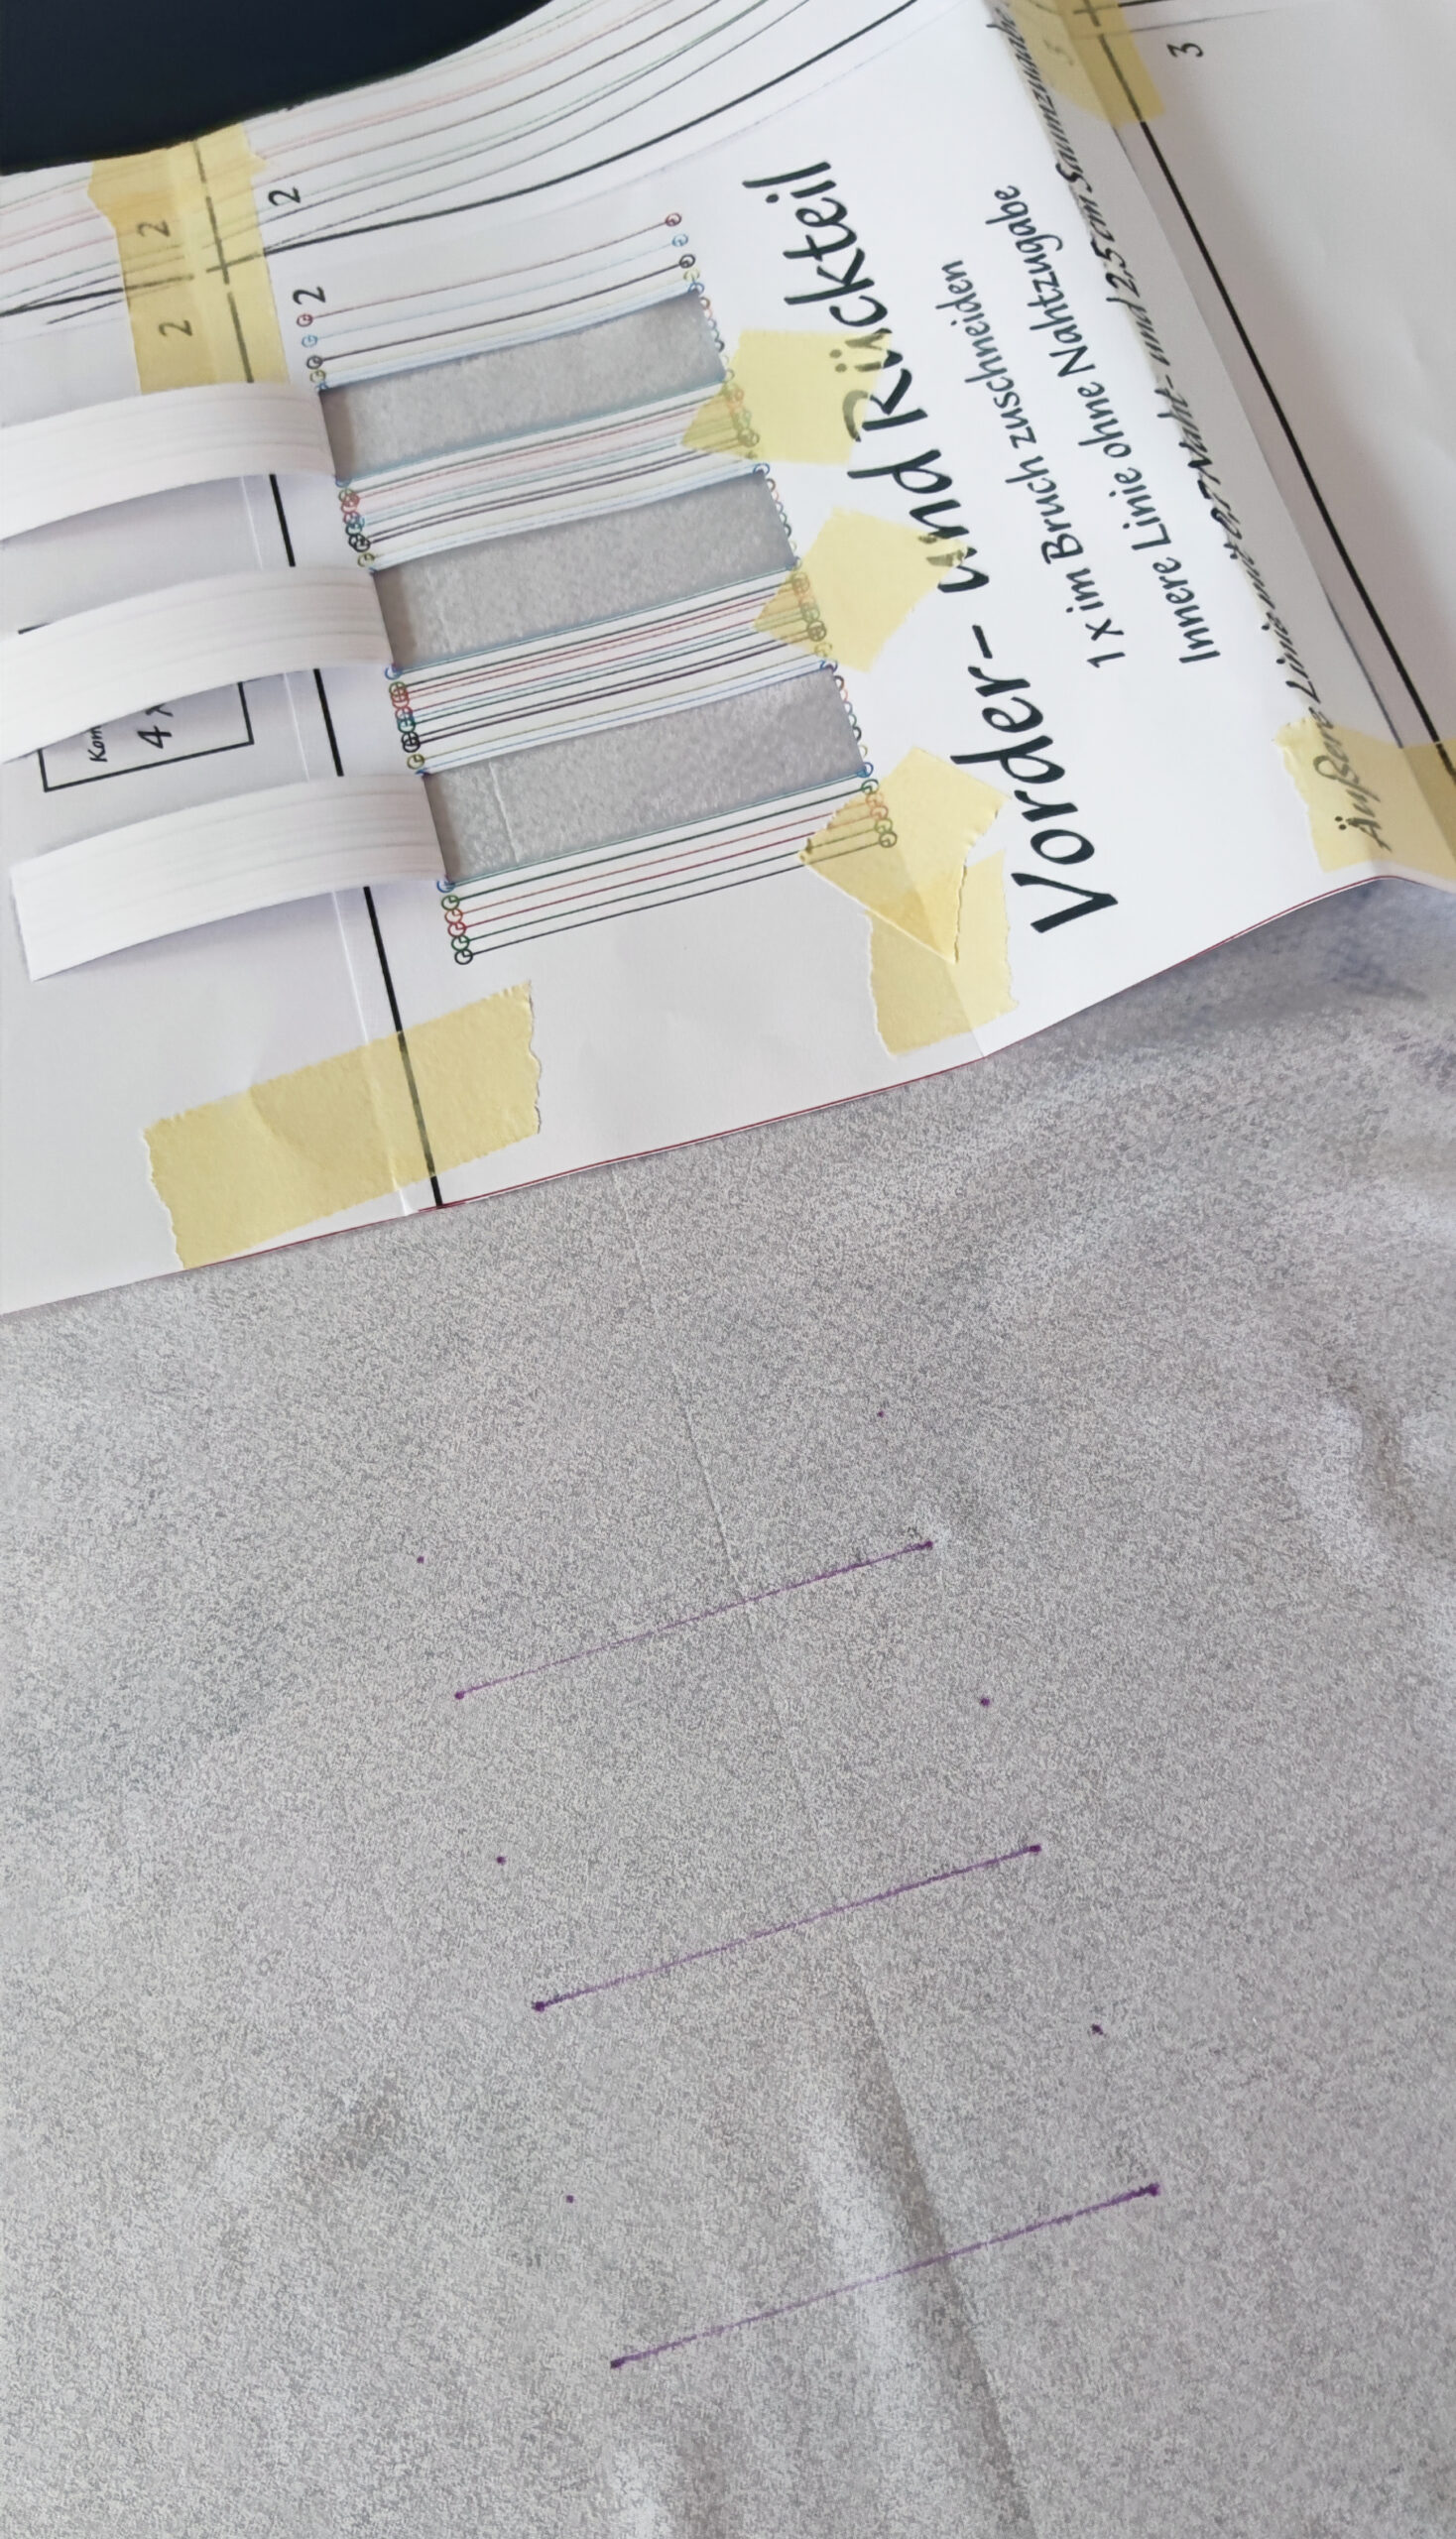
1. Passzeichen übertragen
Übertrage alle Passzeichen mit Hilfe eines Trickmarkers oder ähnlichem auf die linke Stoffseite. Um die Falten zu übertrage schneide das Schnittmuster wie im Bild auf und zeichne die Markierungen (jeweils 2 Linien pro Falte) auf.
1. Transfer the marks
Transfer all marks to the wrong side of the fabric using a trick marker or something similar. To transfer the folds, cut open the pattern as shown in the picture and draw the markings (2 lines per fold).
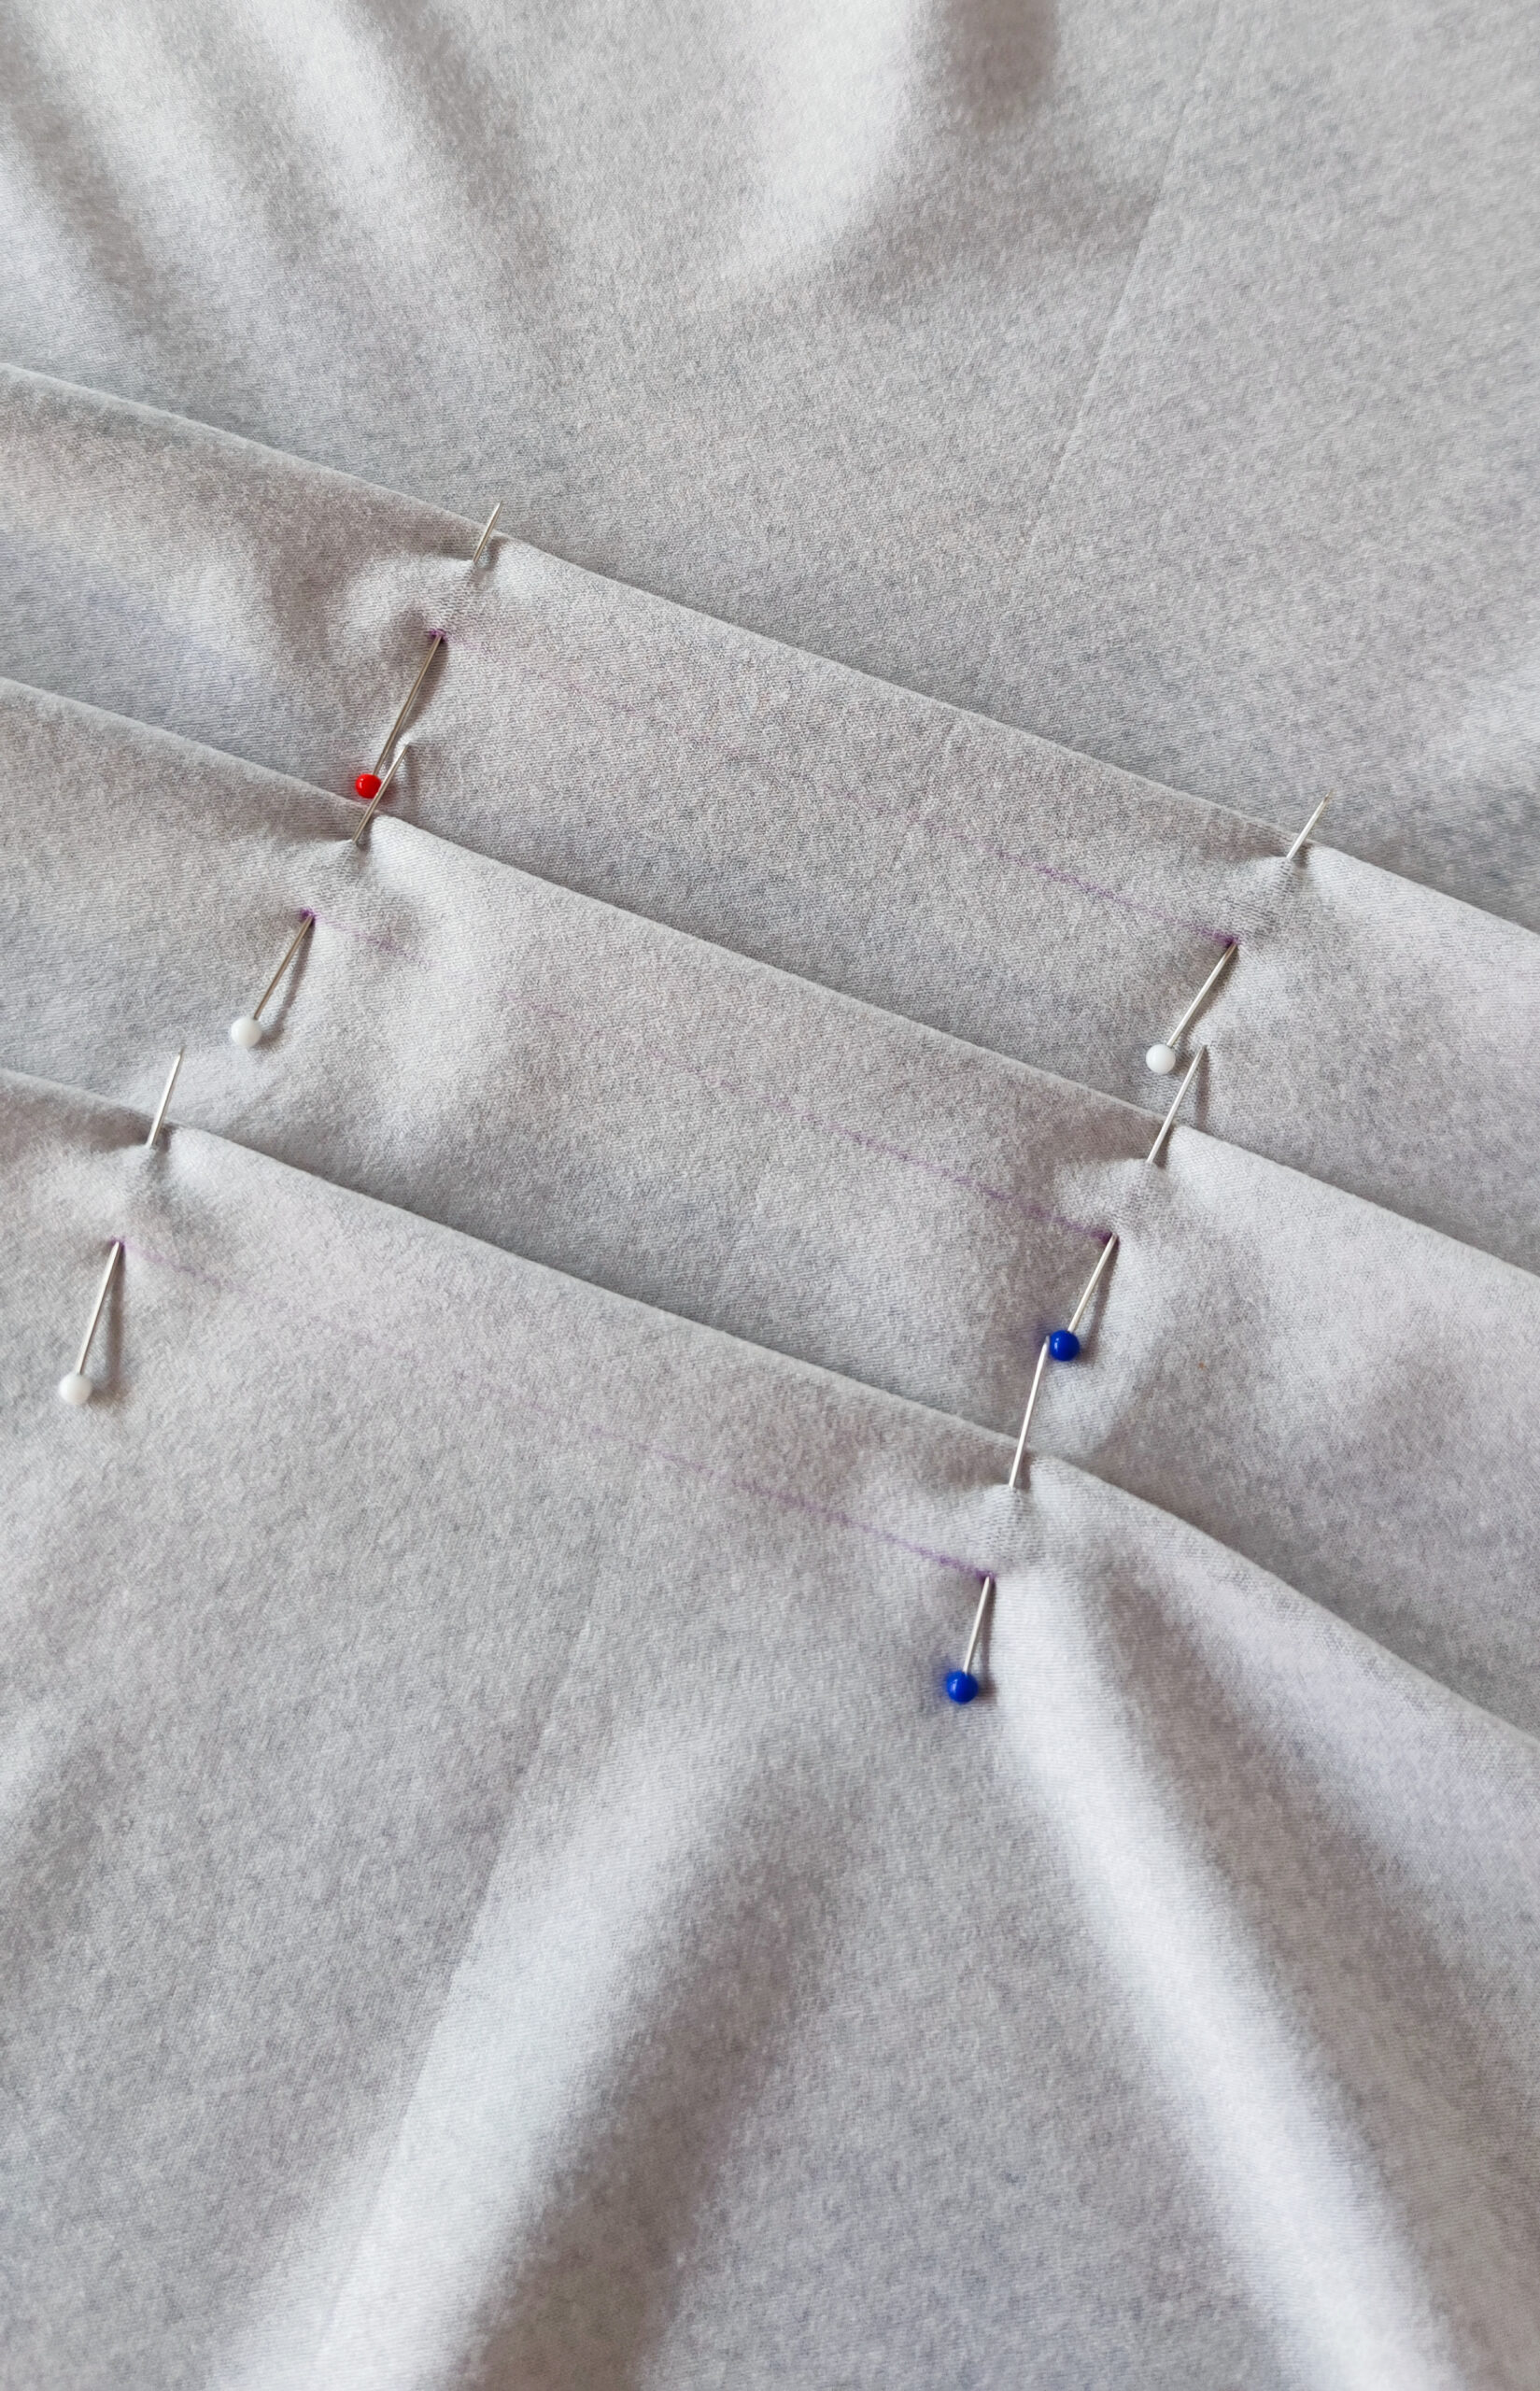
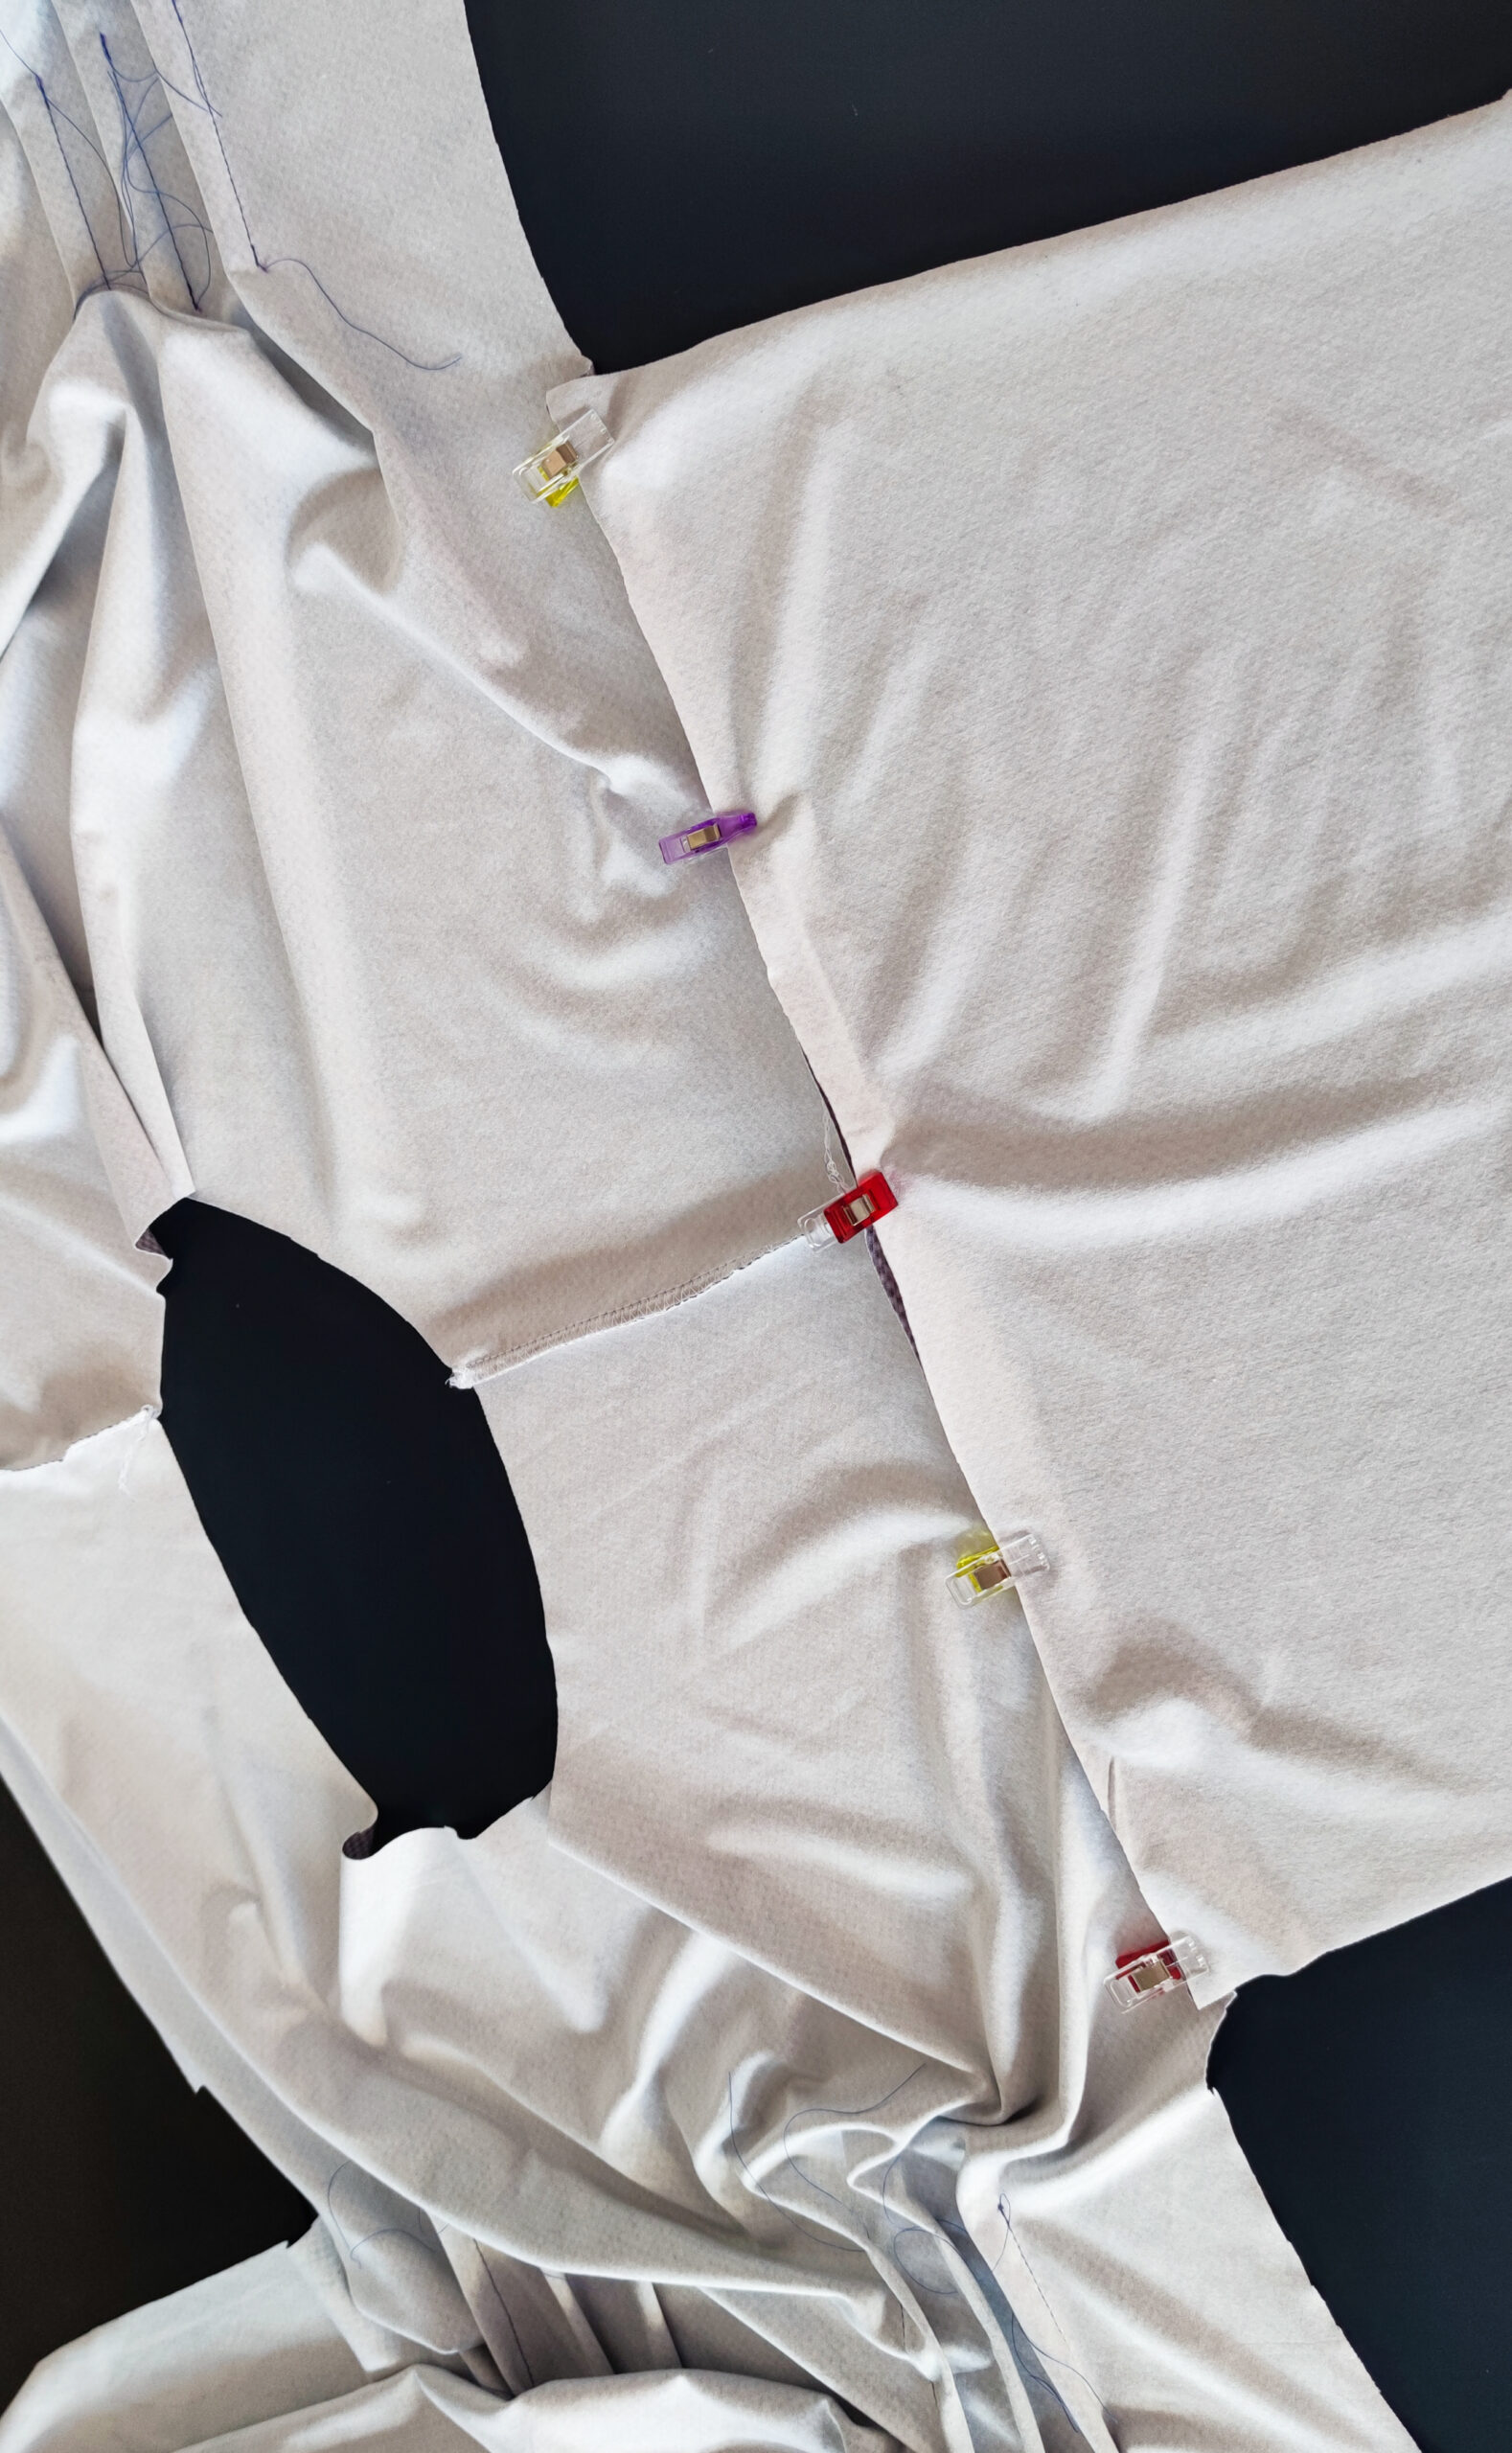
2. Falten stecken
Stecke zunächst die Falten zusammen. Nimm dafür am besten Stecknadeln zu Hilfe und stecke immer eine Nadel von links durch die Punktmarkierungen hindurch zur anderen Seite, sodass die Punkte oben und unten genau aufeinander liegen.
2. Pin the folds
First pin the folds together. It is best to use pins for this. Put a needle through the dot markings from the left to the other side so that the dots above and below match exactly.

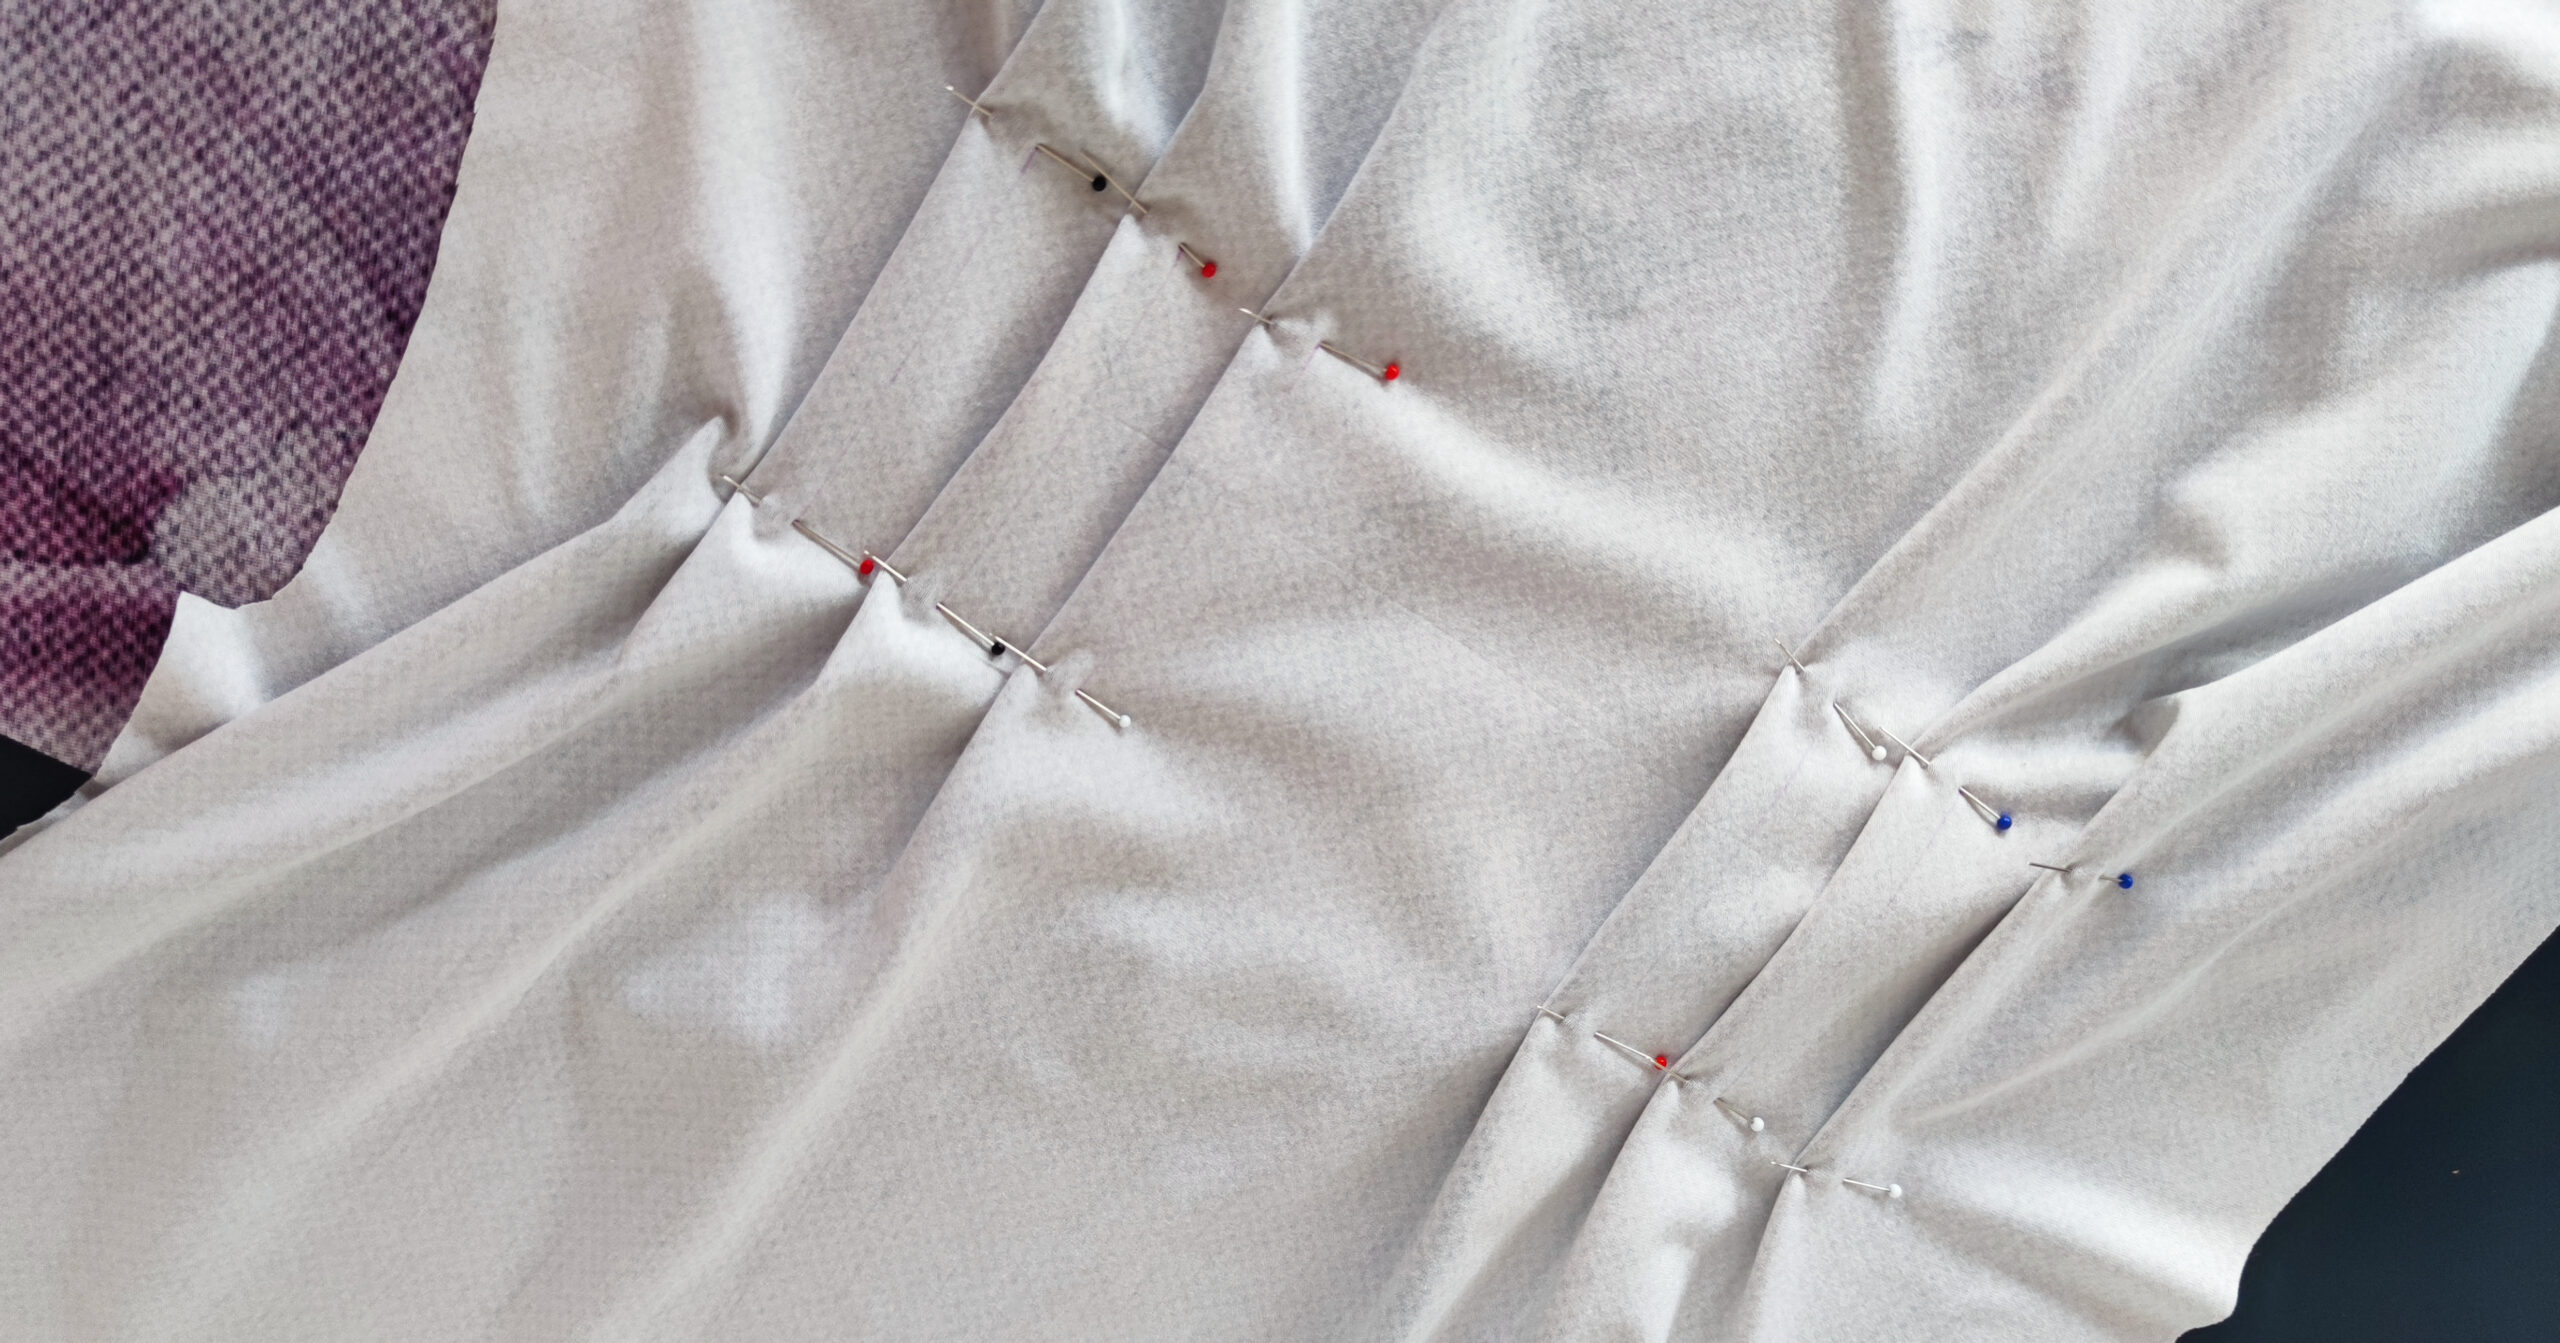
3. Falten nähen
Nähe die Strecke zwischen den Punkten mit einem Geradstich (Stichlänge 2 – 2,5). Verriegle Anfang und Ende dabei sehr gründlich, damit die Naht beim Tragen später nicht aufgeht. Bügle die so entstandenen Falten jeweils zur vorderen und hinteren Mitte. Verfahre so mit Vorder- und Rückteil.
3. Sew the folds
Sew between the dots with a straight stitch (stitch length 2 – 2.5). Backstitch the beginning and end very thoroughly so that the seam doesn’t come undone later when you wear it. Iron the resulting folds towards the center front and center back. Do the same for the front and back pieces.
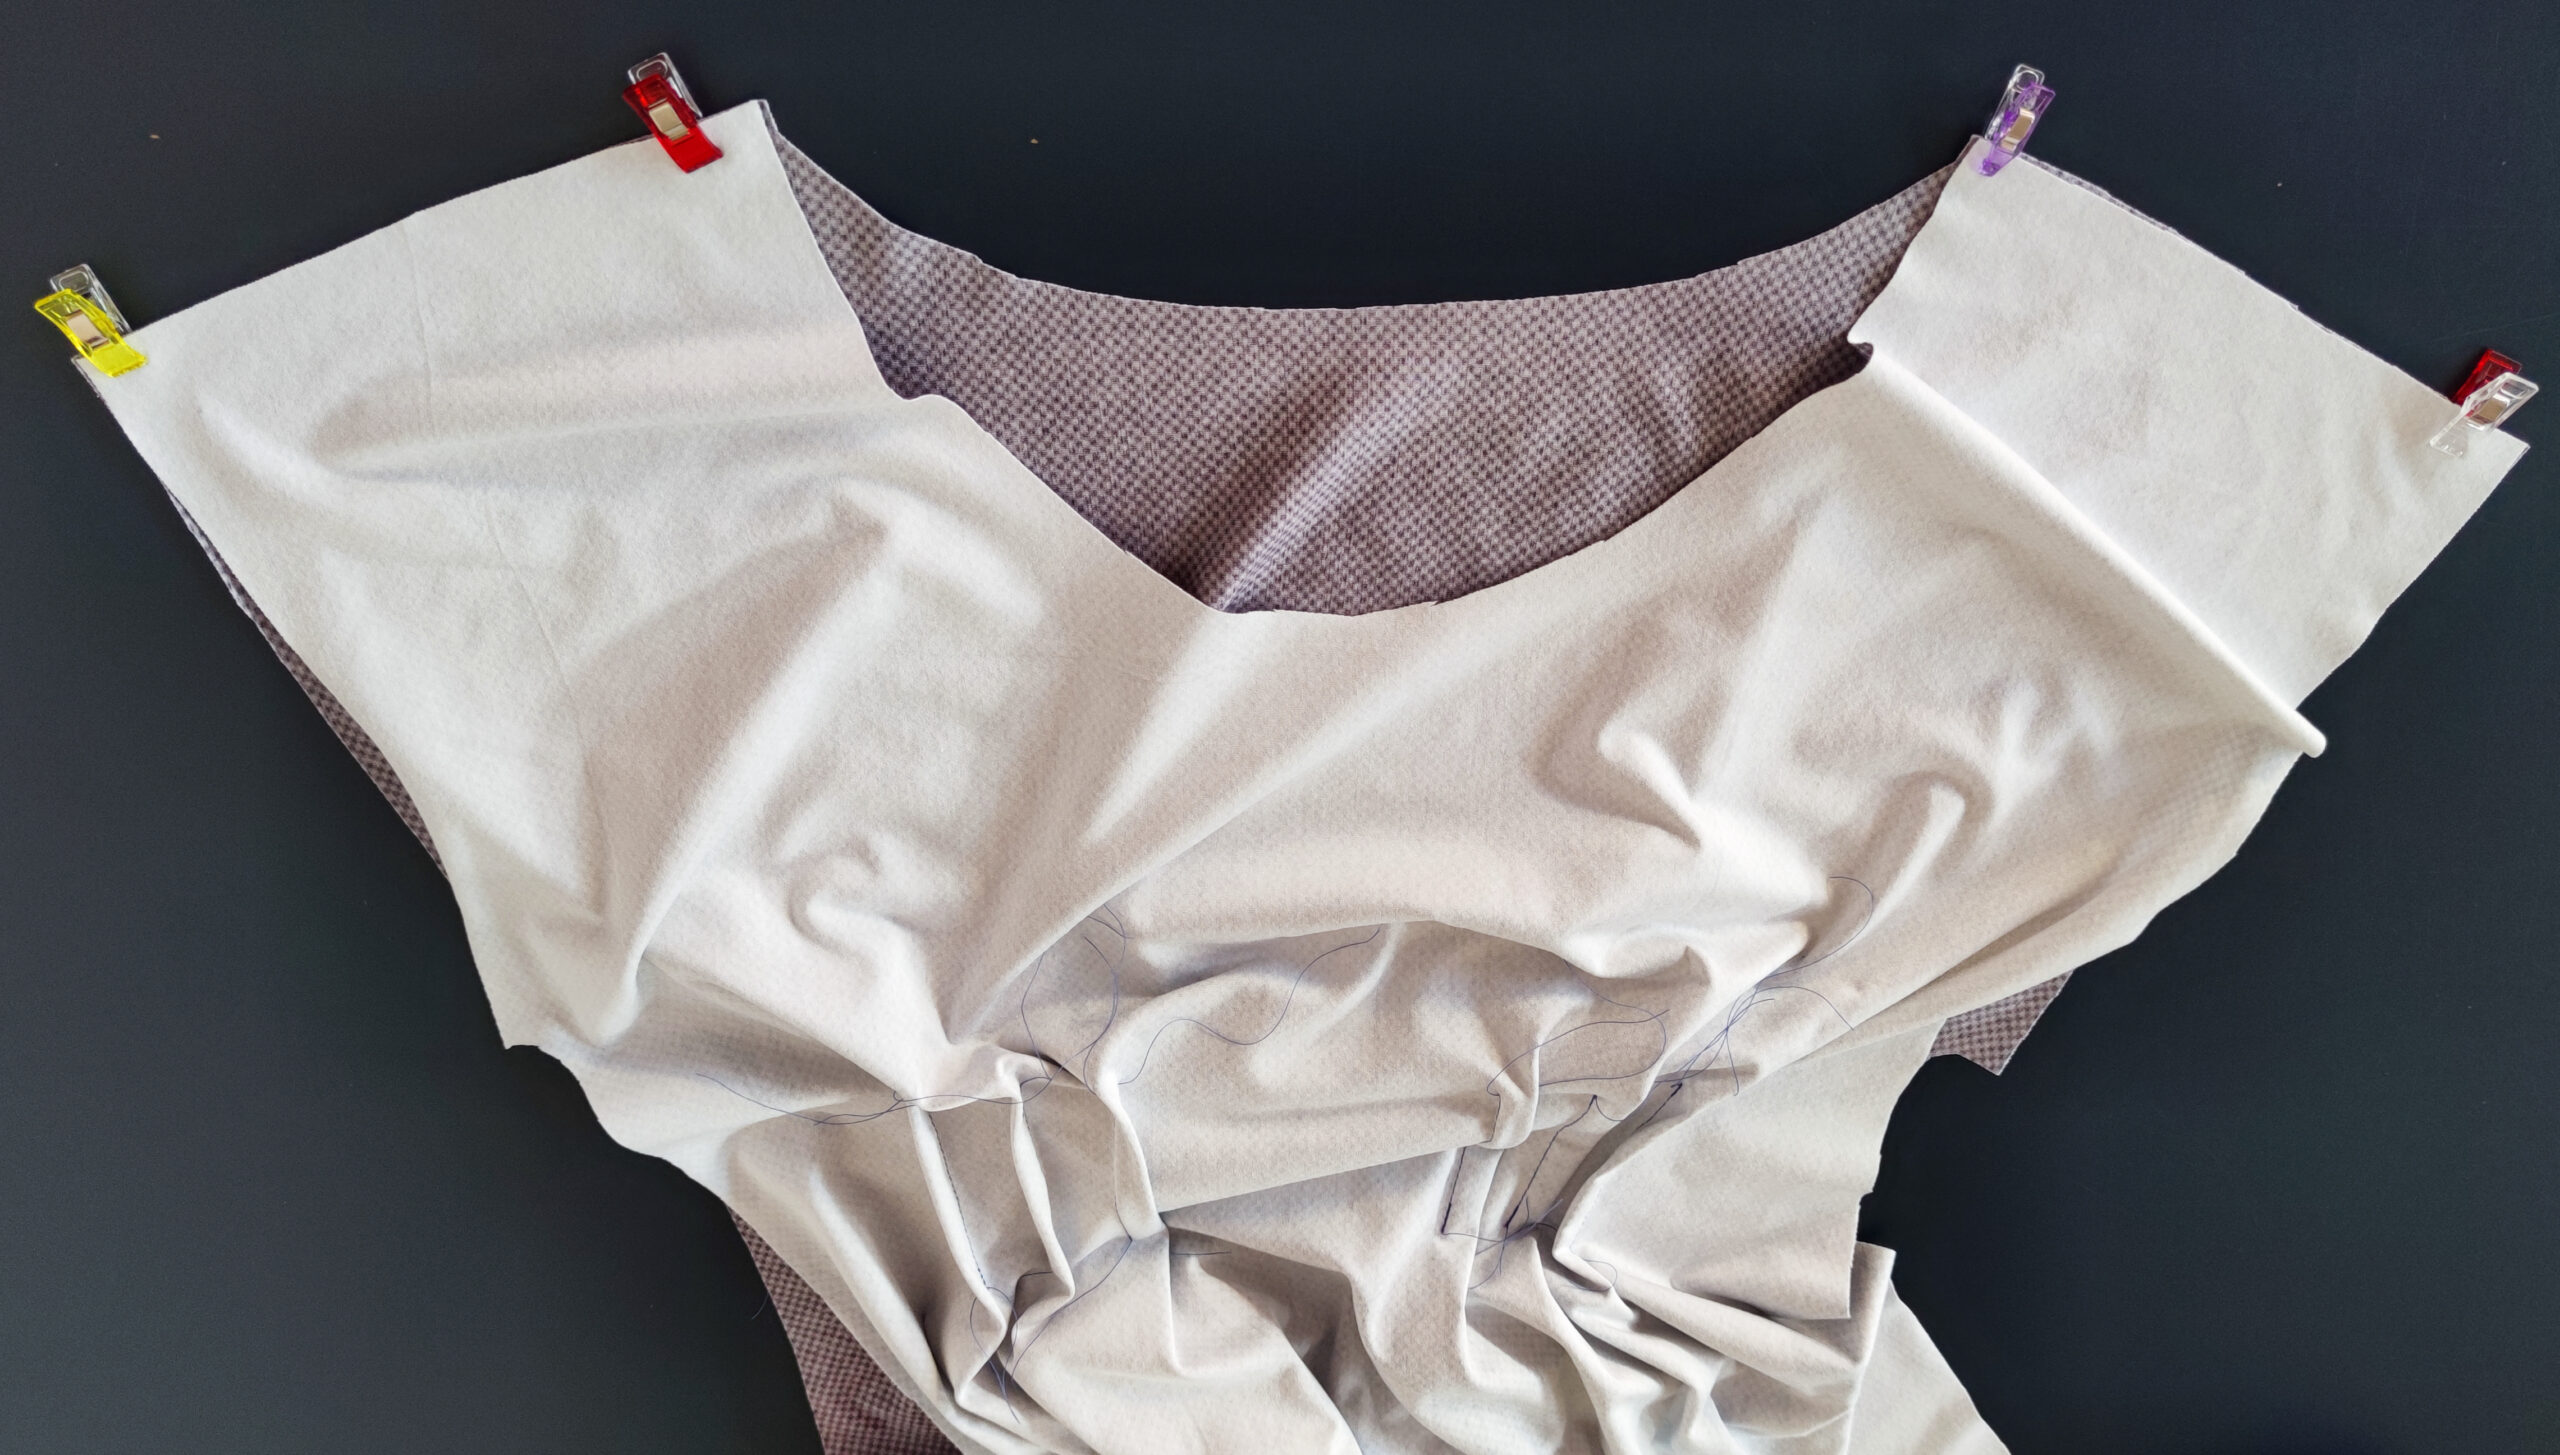
4. Schulter- und Seitennähte schließen (kurze Ärmel)
Schließe als nächstes beide Schulternähte und die Seitennähte. Es empfiehlt sich, das Kleid nun einmal anzuprobieren, um gegebenenfalls noch Anpassungen vorzunehmen. Das Kleid sollte in der Taille anliegend sitzen, an der Brust und Hüfte etwas Spiel haben.
4. Clothing the shoulder and side seams (Short sleeves)
Next, close both shoulder seams and the side seams. It’s a good idea to try the dress on now, to see if there’s anything else to make adjustments. The dress should fit snugly at the waist where chest and hips have some play.
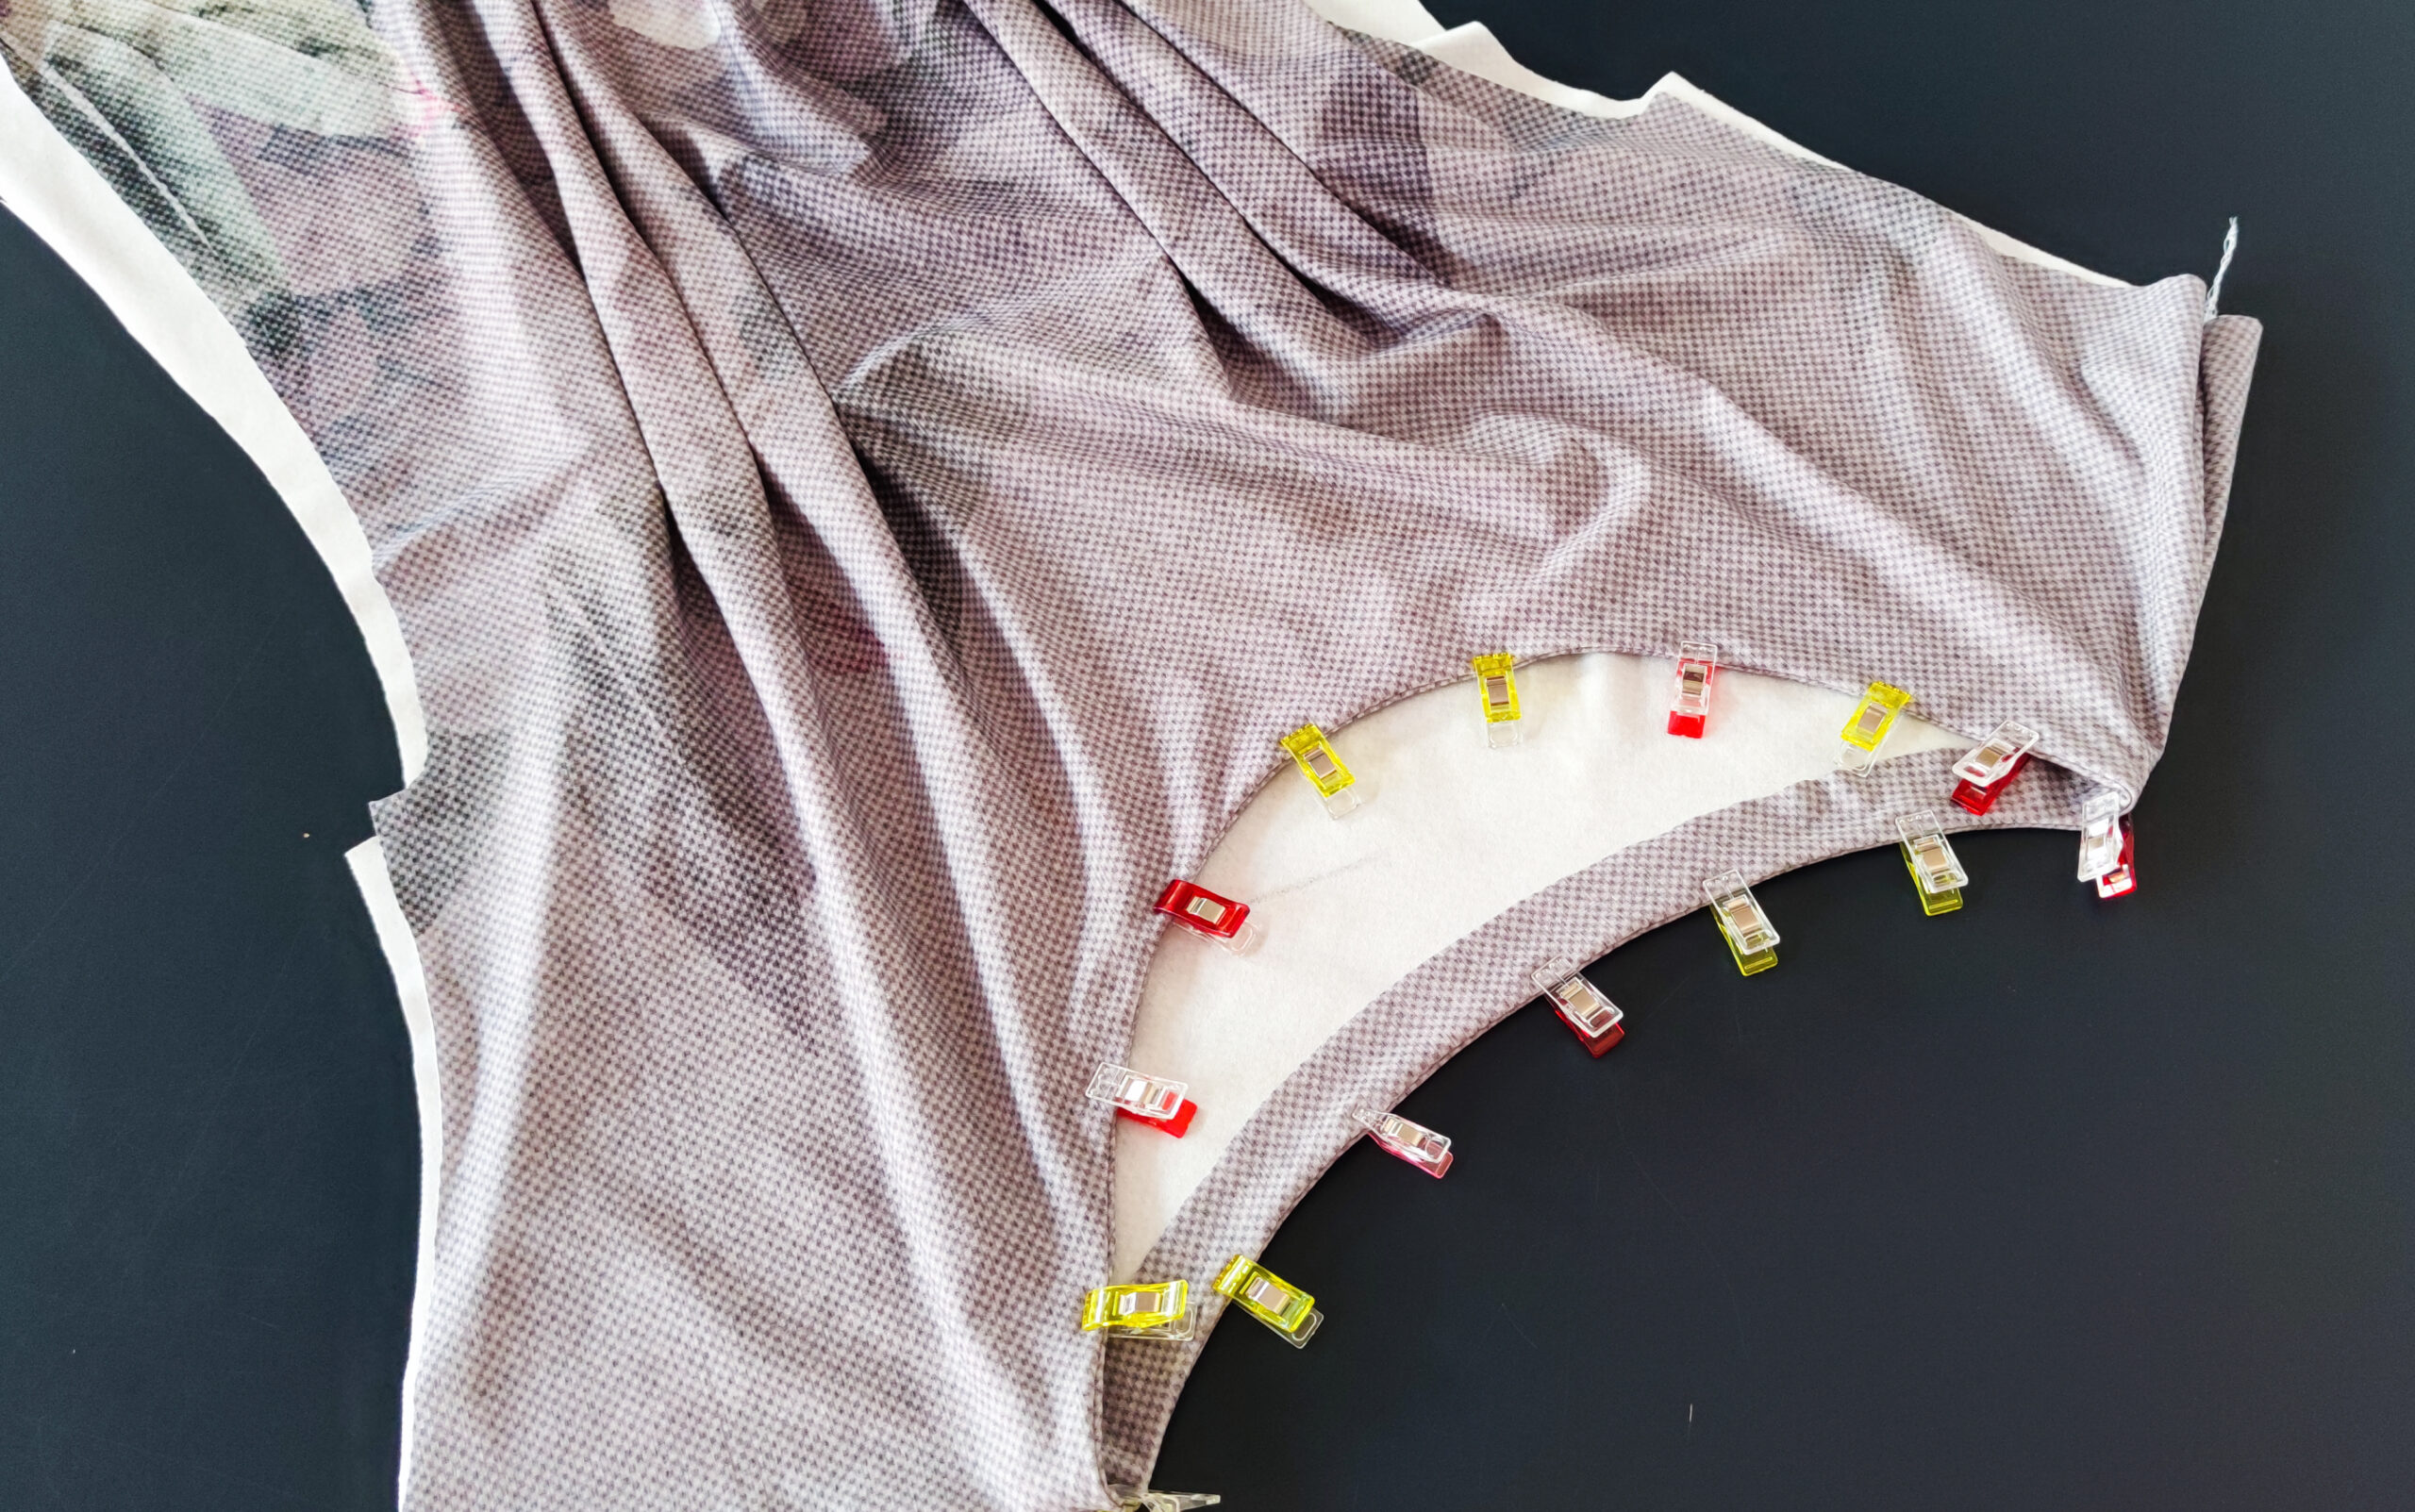
5. Ärmel annähen und Seitennähte schließen (lange Ärmel)
Schließe beide Schulternähte und nähe die Ärmel rechts auf rechts an das geöffnete Kleid. Schließe danach die Seitennähte in einem Rutsch.
5. Sewing the sleeves and the side seams (long sleeves)
Sew both shoulder seams and sew the sleeves to the open dress, right sides together. Then close the side seams in one go.
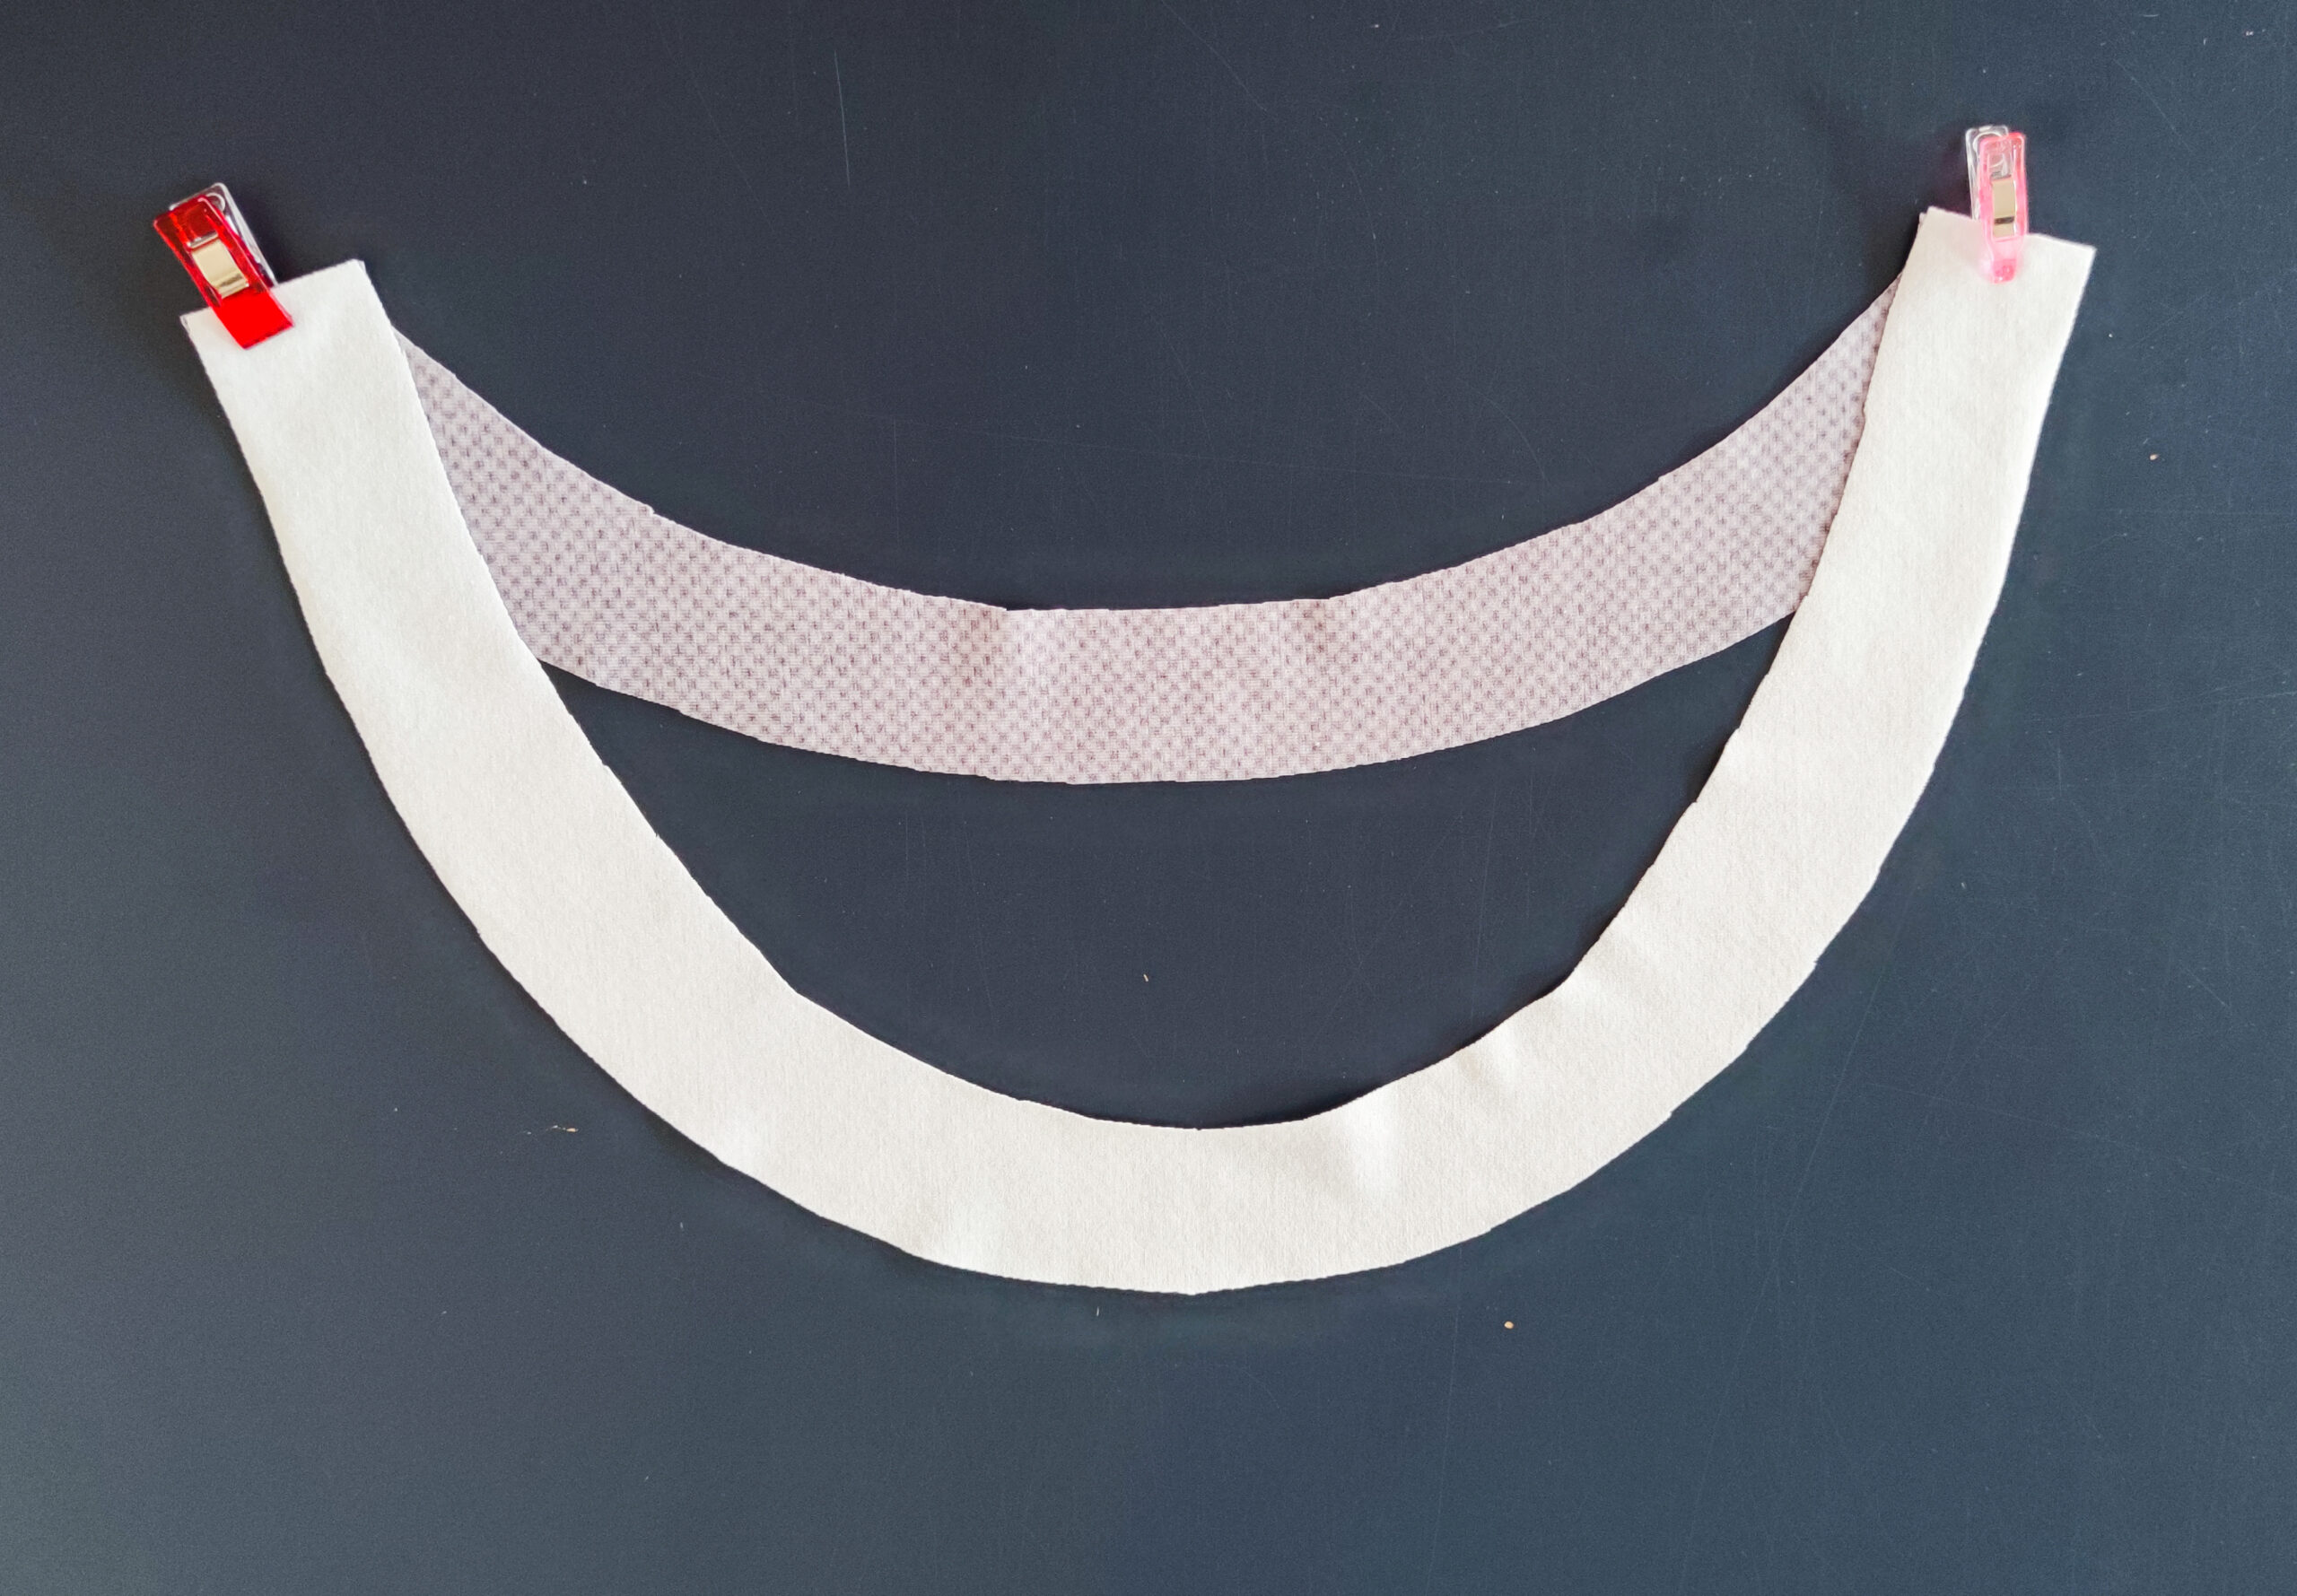
6. Beleg nähen
Nähe den vorderen und den hinteren Beleg rechts auf rechts zusammen. Optional kannst du ihn vorher mit leichter, dehnbarer Vliseline verstärken und ringsherum mit der Overlock versäubern.
6. Sewing the facing
Sew the front to the back facing right sides together. Optionally, you can reinforce it facing with light, stretchy fleece line and neaten it all around with the serger.
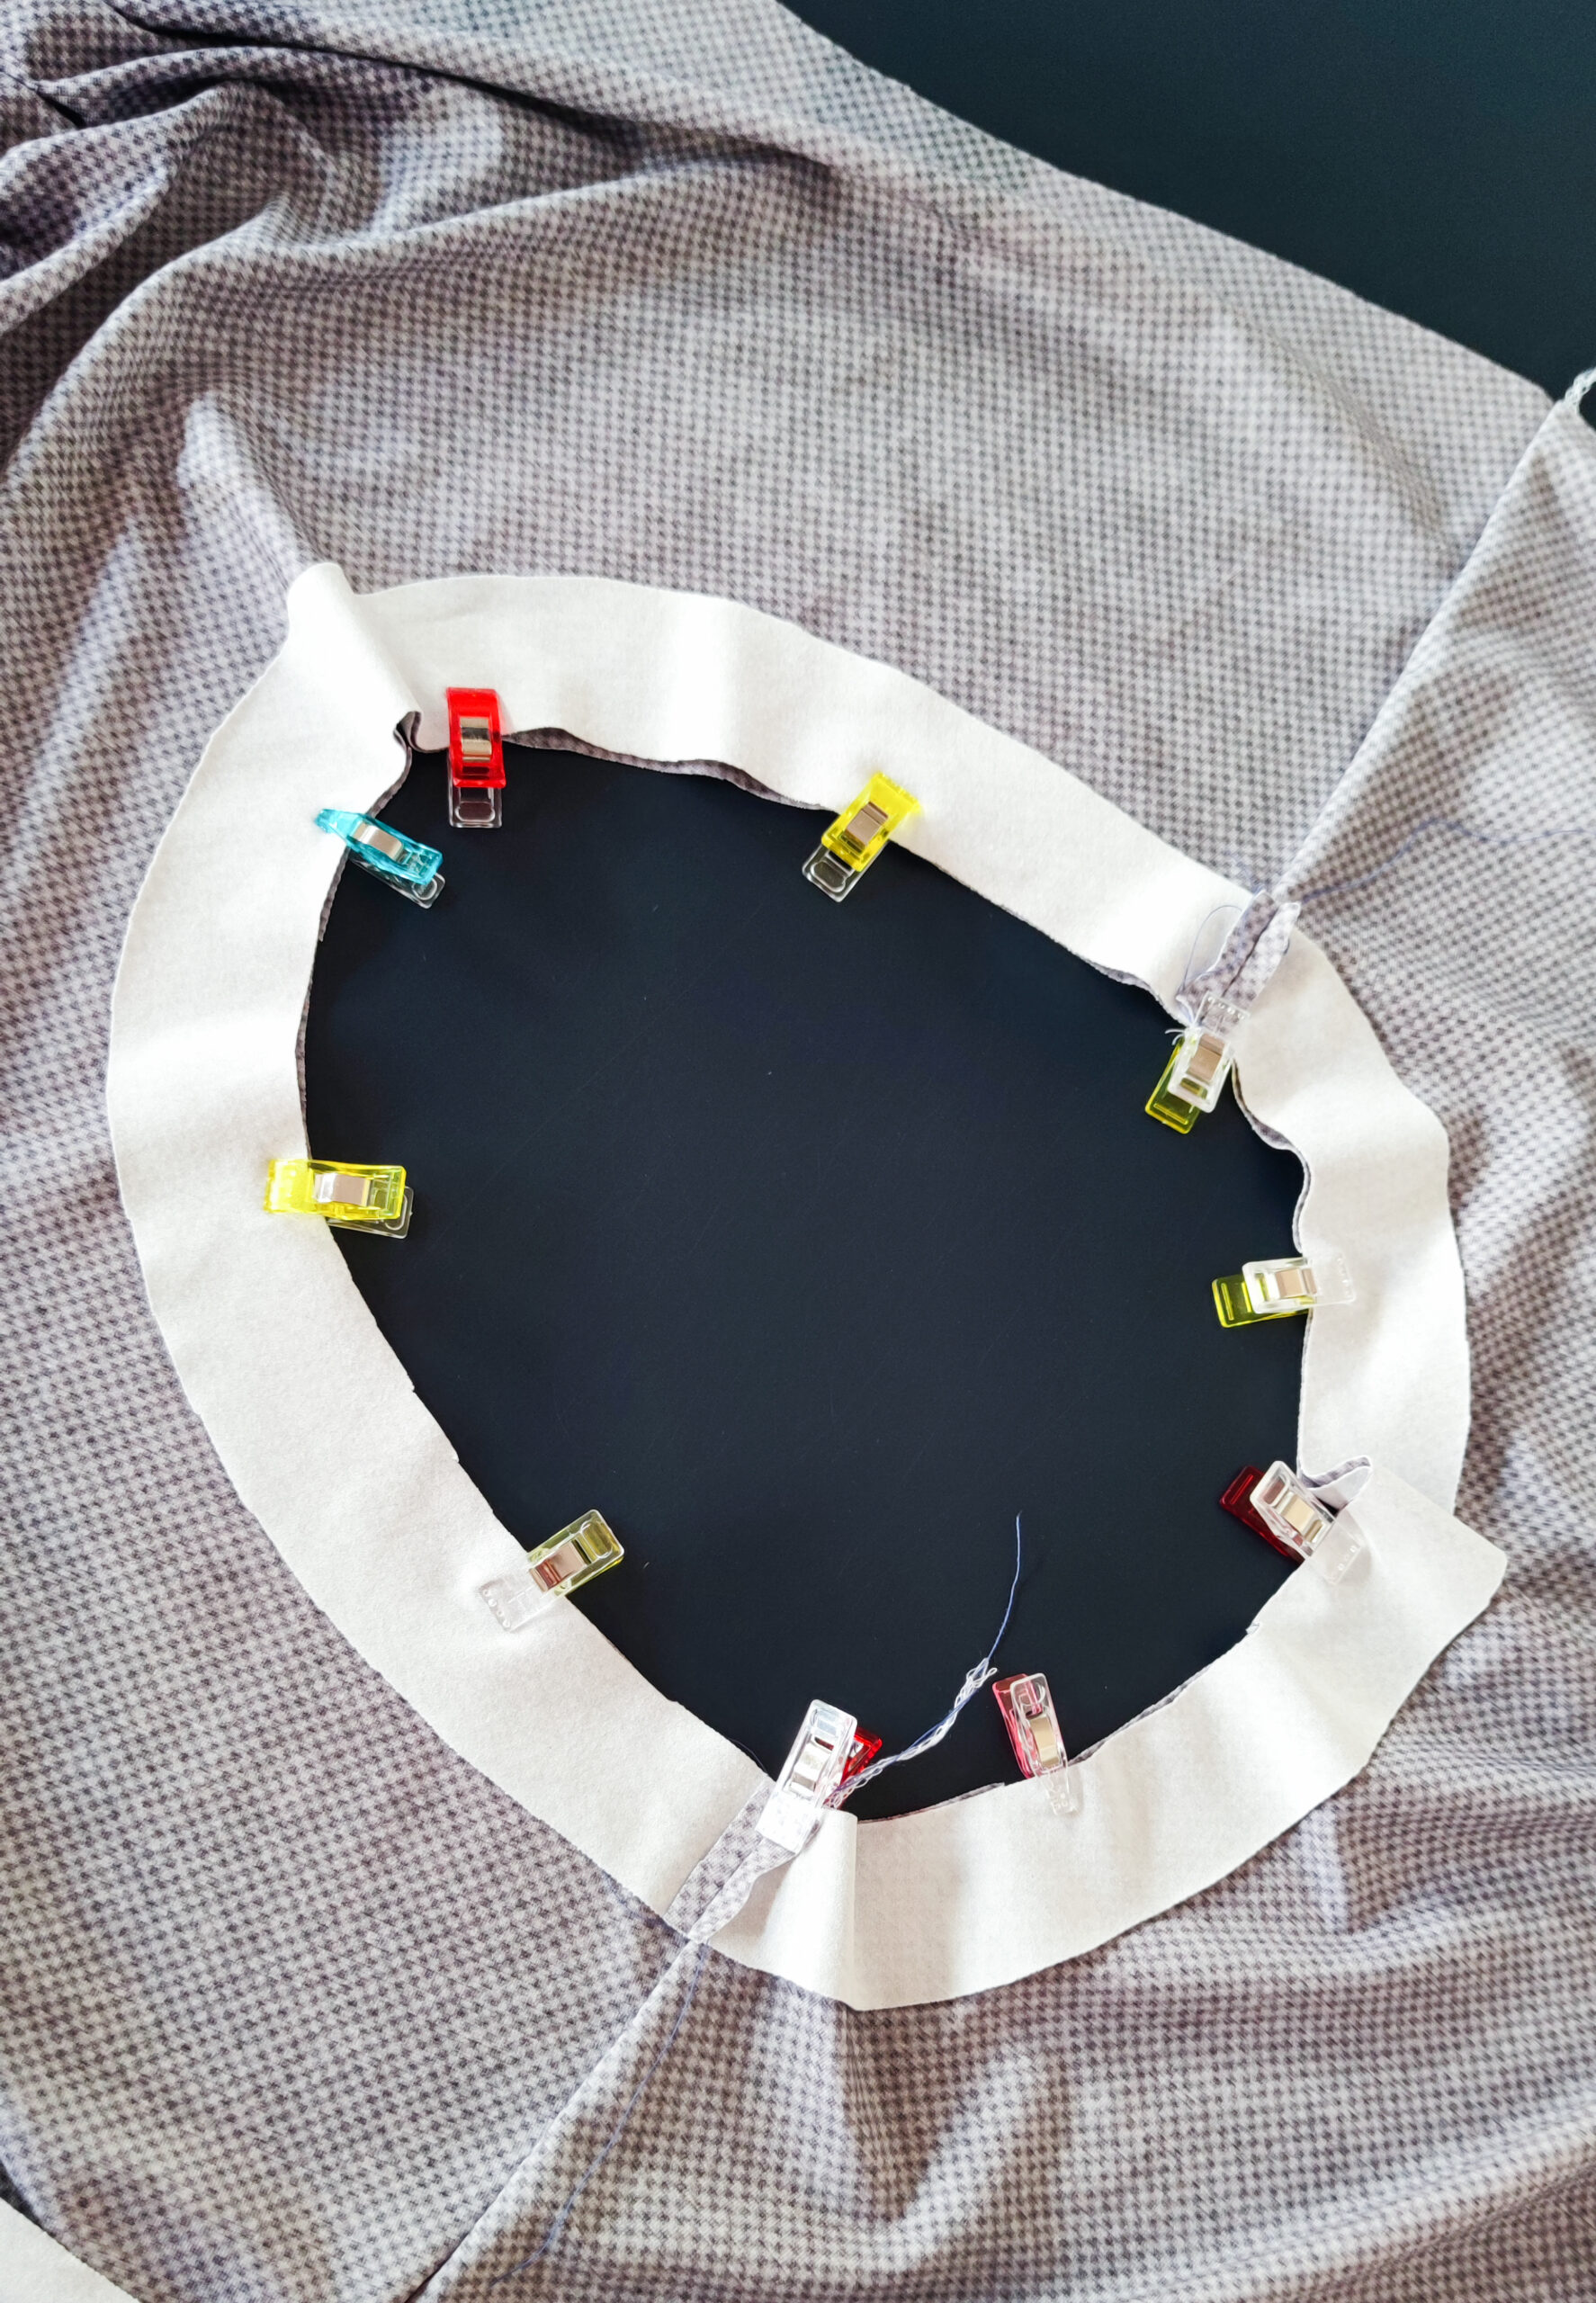
7. Beleg annähen
Nähe den Beleg rechts auf rechts an den Ausschnitt des Kleides.
7. Sewing the facing to the dress
Sew the facing to the neckline of the dress, right sides together.
8. Beleg absteppen
Steppe den Beleg einmal komplett ab, damit er nicht herausrutscht. Nutze dafür eine Zwillingsnaht oder die Coverstitch.
8. Topstitch the facing
Stitch the facing all the way to keep it from slipping out. Use a twin seam or the coverstitch for this.
9. Säumen
Säume den Rock mit 2,5 cm Saumzugabe, die kurzen Ärmel mit 0,7 cm Saumzugabe und die langen Ärmel mit 2,5 cm Saumzugabe mit einem elastischen Stich oder einer Zwillingsnadel.
9. Hem
Hem the skirt with a 2.5 cm hem allowance, the short sleeves with a 0.7 cm hem allowance an the long sleeves with a 2.5 cm hem allowence with an elastic stitch or a twin needle.