
zum Warenkorb 0,00 €
0Nähanleitung /// How to sew: Janus

Das perfekte Wickelkleid mit Wiener Nähten und FBA
„Janus“ ist der Traum von einem Wickelkleid. Highlights sind das Oberteil in Wickeloptik mit figurformenden Wiener Nähten und die Raglan-Statementärmel.
Ein separates Schnittteil für ein Oberteil mit FBA (Anpassung an eine große Brust) ist ebenfalls enthalten.
The perfect wrap dress with princess seams and FBA
„Janus“ is the dream of a wrap dress. Highlights are the wrap-around top with figure-shaping princess seams and the statement raglan sleeves.
A separate pattern piece for a bodice with FBA (fitting a large bust) is also included.
Richtige Größe drucken
Die gekauften Dateien haben zwei verschiedene Varianten: A4 und A0 Dateien. Die A0 kannst du online oder in einem Copyshop drucken lassen, A4 kann dein Drucker drucken. Bei beiden Varianten ist es dir möglich, nur die Größe zu drucken, die du tatsächlich benötigst. Oder zwei-drei Größen, falls du Anpassungen vornehmen musst.
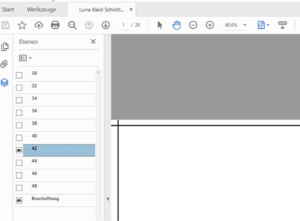
Öffne die Datei im Acrobat Reader und klicke das Symbol in der linken Leiste am Rand an, das auf dem Bild blau dargestellt ist. Daraufhin klappt ein neues Menü auf, in dem du durch einen Klick auf das Auge die Größen ein- und ausblenden kannst. Die Ebene „Beschriftung“ sollte immer an bleiben. Beim oben gezeigten Beispiel würdest du Gr. 42 drucken.
Blende nun alle unnötigen Größen aus und drucke das Schnittmuster wie gewohnt. Auf dem Beispielbild ist es die Größe 42, die gedruckt wird.
Print the correct size
The purchased files come in two different variants: A4 and A0 files. You can have the A0 printed online or in a copy shop. Your printer can print A4. With both variants it is possible for you to print only the size that you actually need. Or two to three sizes in case you need to make adjustments.
Open the file in Acrobat Reader and click on the symbol in the left bar at the edge, which is shown in blue on the picture. A new menu then opens in which you can show and hide sizes by clicking on the eye. The „labeling“ layer should always remain on.
Now hide all unnecessary sizes and print the pattern as usual. Using the example above, you would print size 42 only.
Maßtabelle /// Size chart (cm)

Stoffbedarf alle Größen/// Fabric requirements (cm)

Stoffempfehlung
Für Janus eignen sich am besten Stoffe mit weichem Fall und etwas Stand, wie unser Viskosejersey und Modal Frenchterry. Der Stoff sollte mindestens 5% Elasthananteil haben und einen Flächengewicht von mindestens 200g/qm
Fabric recommendation
Fabrics with a soft drape and some body, such as our viscose jersey and modal french terry, are best suited for Janus. The fabric should have at least 5% elastane and a weight of at least 200 g/sqm.
Anpassung
Das Kleid liegt an Brust, Taille und Hüfte figurnah an. Wähle deine Größe entsprechend der Maßtabelle. Der Gürtel sollte in der Taille liegen, ggf. musst du das Oberteil kürzen oder verlängern. Wir haben im Schnittmuster eine Sperrlinie eingezeichnet, in der du die Länge verändern kannst. Denke daran, auch die Belege anzupassen.
Sollte die Differenz zwischen deinem Oberbrust- und deinem Brustumfang größer als 5 cm sein, entscheide dich für das Oberteil mit FBA. Mehr zum Thema FBA findest du in unserem Blog
Solltest du Hilfe benötigen, schau gern in der Mondstoff-Gruppe auf Facebook vorbei: Mondstoff-Gruppe
Adjustment
The dress is fitted at the bust, waist and hips. Choose your size according to the measurement table. The belt should be at the waist, you may have to shorten or lengthen the top. We have drawn a locking line in the pattern where you can change the length. Remember to adjust the facings as well.
If the difference between your upper chest and your chest measurement is more than 5 cm, choose the top with FBA. You can find more about FBA in our blog.
If you need help, feel free to join the Mondstoff group on Facebook: Mondstoff Group
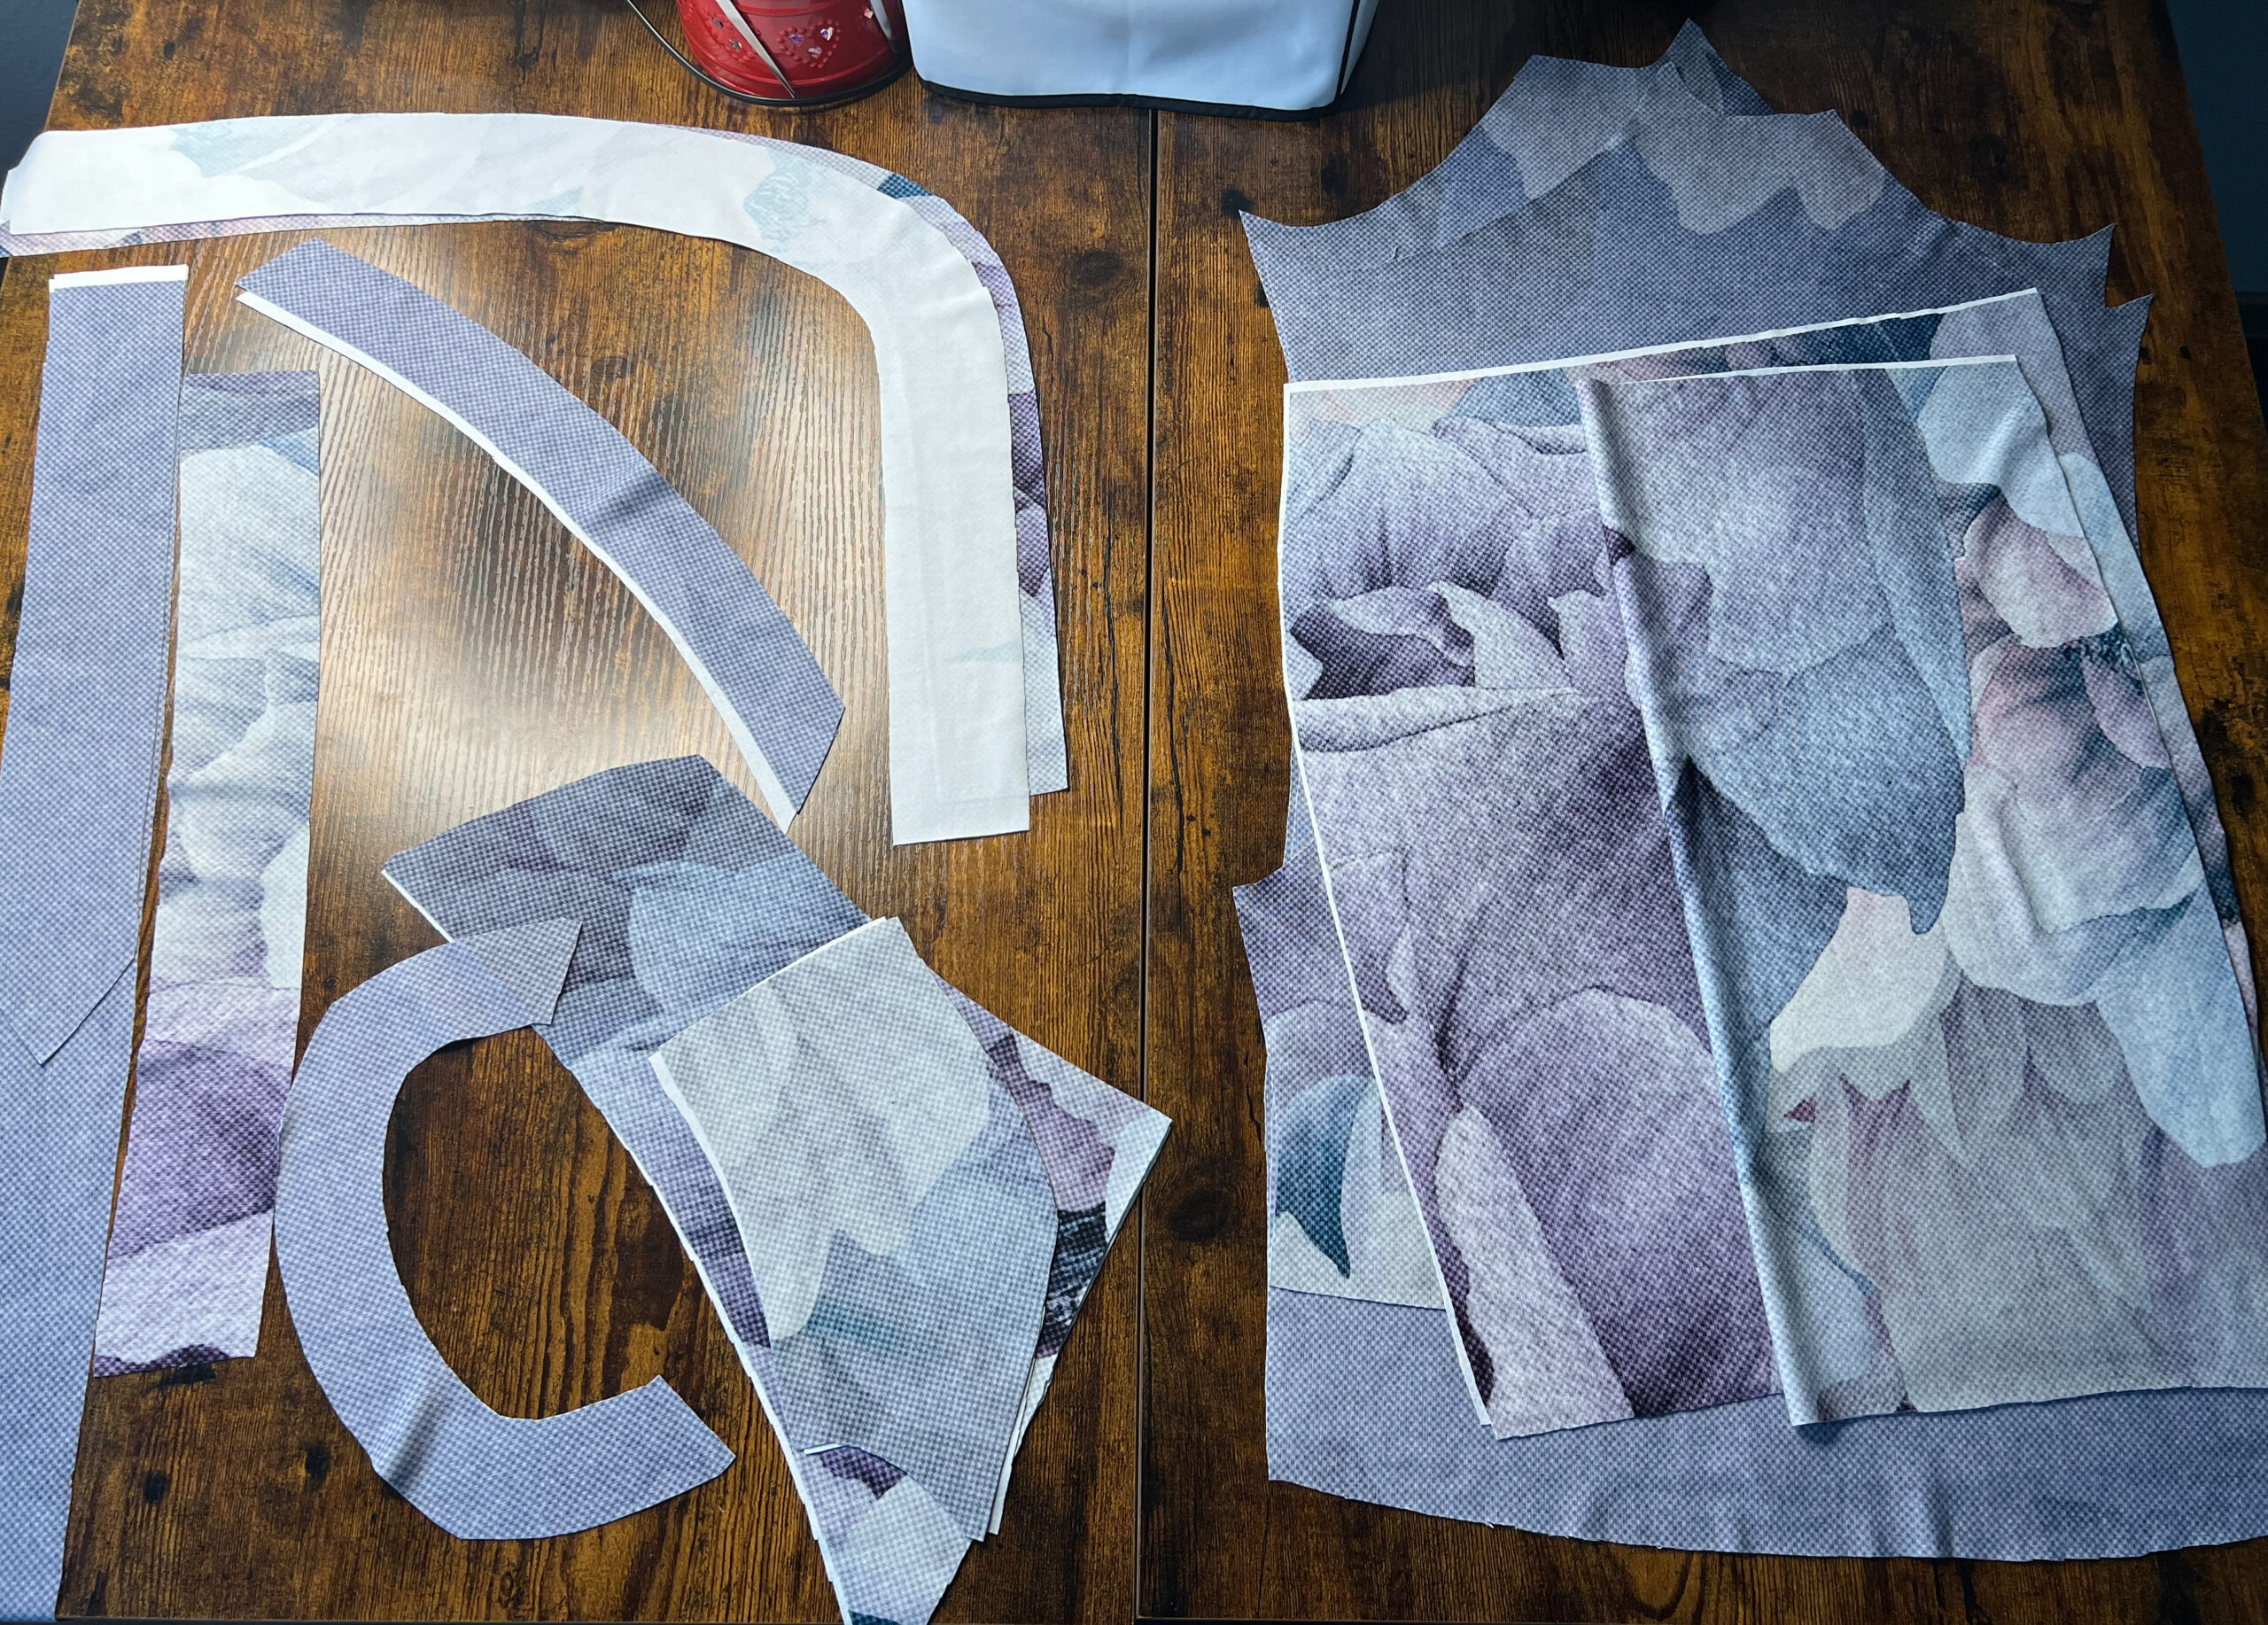
1. Zuschnitt
Für das Oberteil:
2x Vorderteil Mitte gegengleich (entscheide dich für die Variante mit oder ohne FBA)
2x Vorderteil seitlich gegengleich (entscheide dich für die Variante mit oder ohne FBA)
1x Oberteil hinten im Bruch
2x Beleg Oberteil vorne gegengleich (entscheide dich für die Variante mit oder ohne FBA)
1x Beleg hinten im Bruch
Für den Rock:
1x Rockteil hinten im Bruch
2x Rockteil vorne gegengleich
2x Beleg Rock vorne gegengleich
1x Beleg Rock hinten im Bruch
Für die Gürtel:
1x Gürtel kurz im Bruch
1x Gürtel lang im Bruch
Für die Ärmel:
2x Ärmel gegengleich
1. Cutting
For the top:
2x front middle mirrored (decide on the variant with or without FBA)
2x side front mirrored (decide on the variant with or without FBA)
1x top back on fold
2x front top facing mirrored (decide on the variant with or without FBA)
1x back facing on fold
For the skirt:
1x back skirt on fold
2x front skirt mirrored
2x front skirt facing mirrored
1x facing back skirt on fold
For the belts:
1x belt short on fold
1x belt long on fold
For the sleeves:
2x sleeves on fold
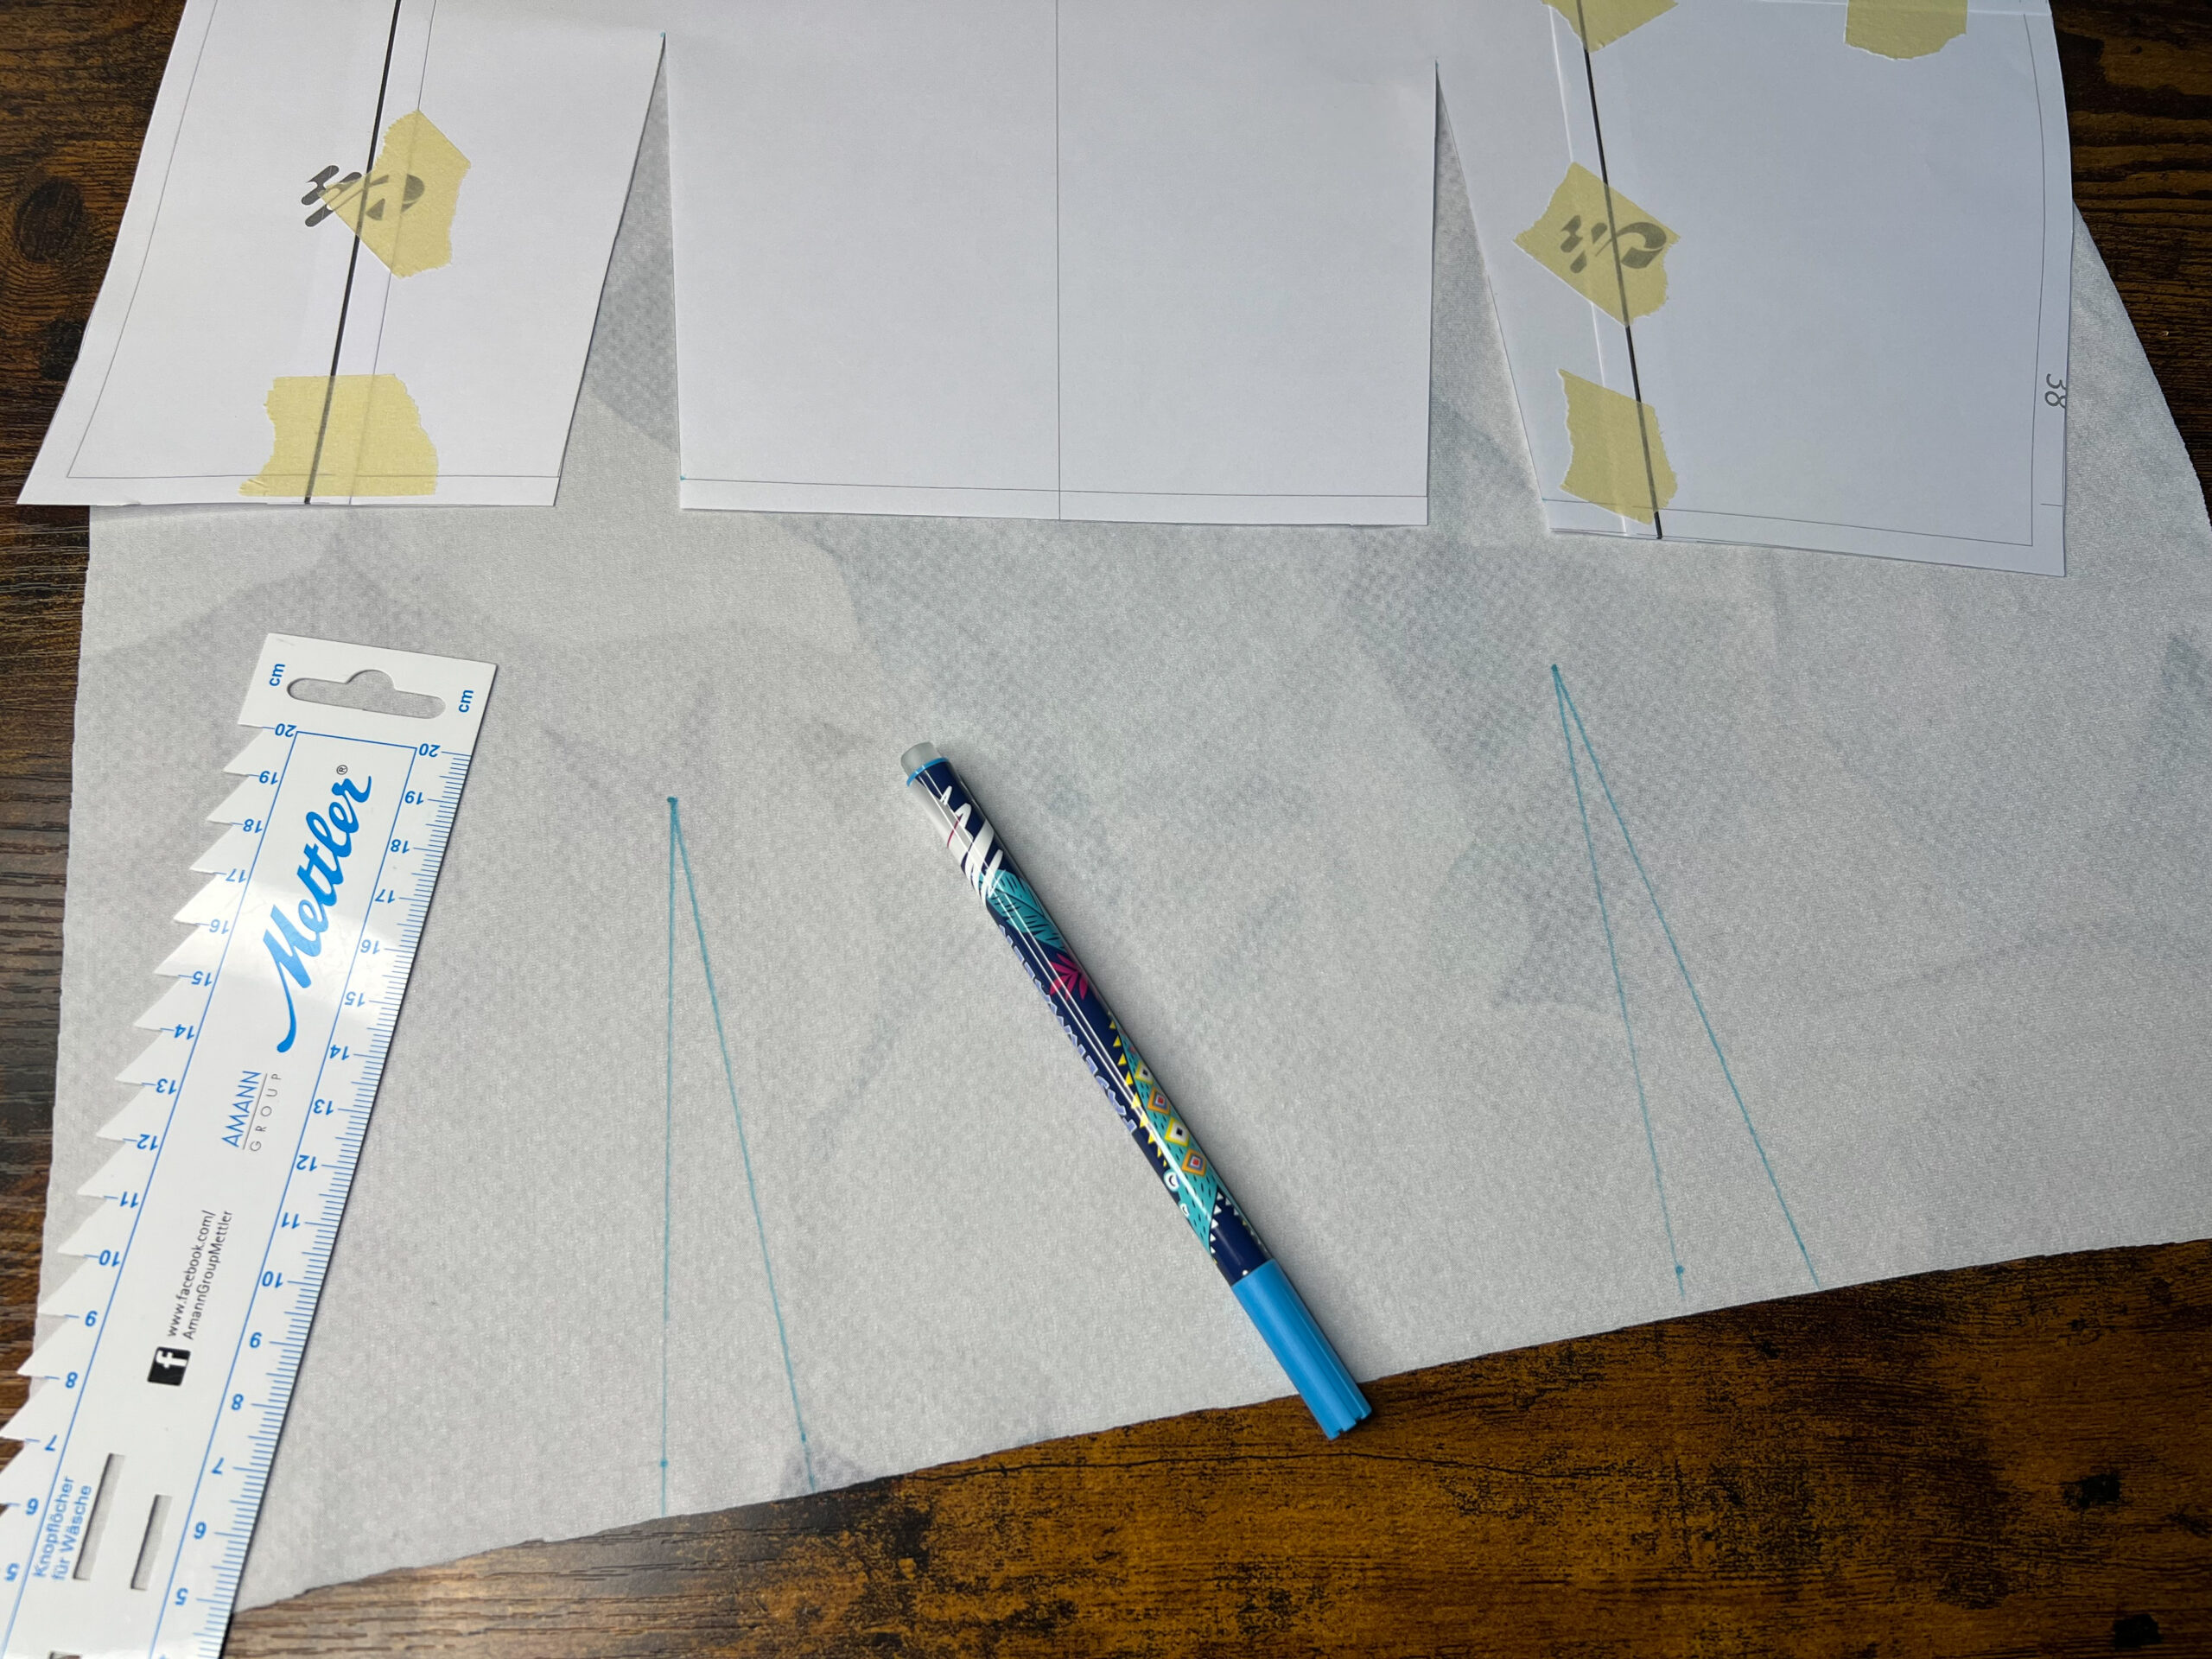
2. Passzeichen übertragen
Übertrage alle Abnäher und Passzeichen mit Hilfe eines Trickmarkers oder ähnlichem auf die linke Stoffseite.
2. Transfer the marks
Transfer all darts and marks to the wrong side of the fabric using a trick marker or something similar.
Oberteil nähen / Sewing the Top
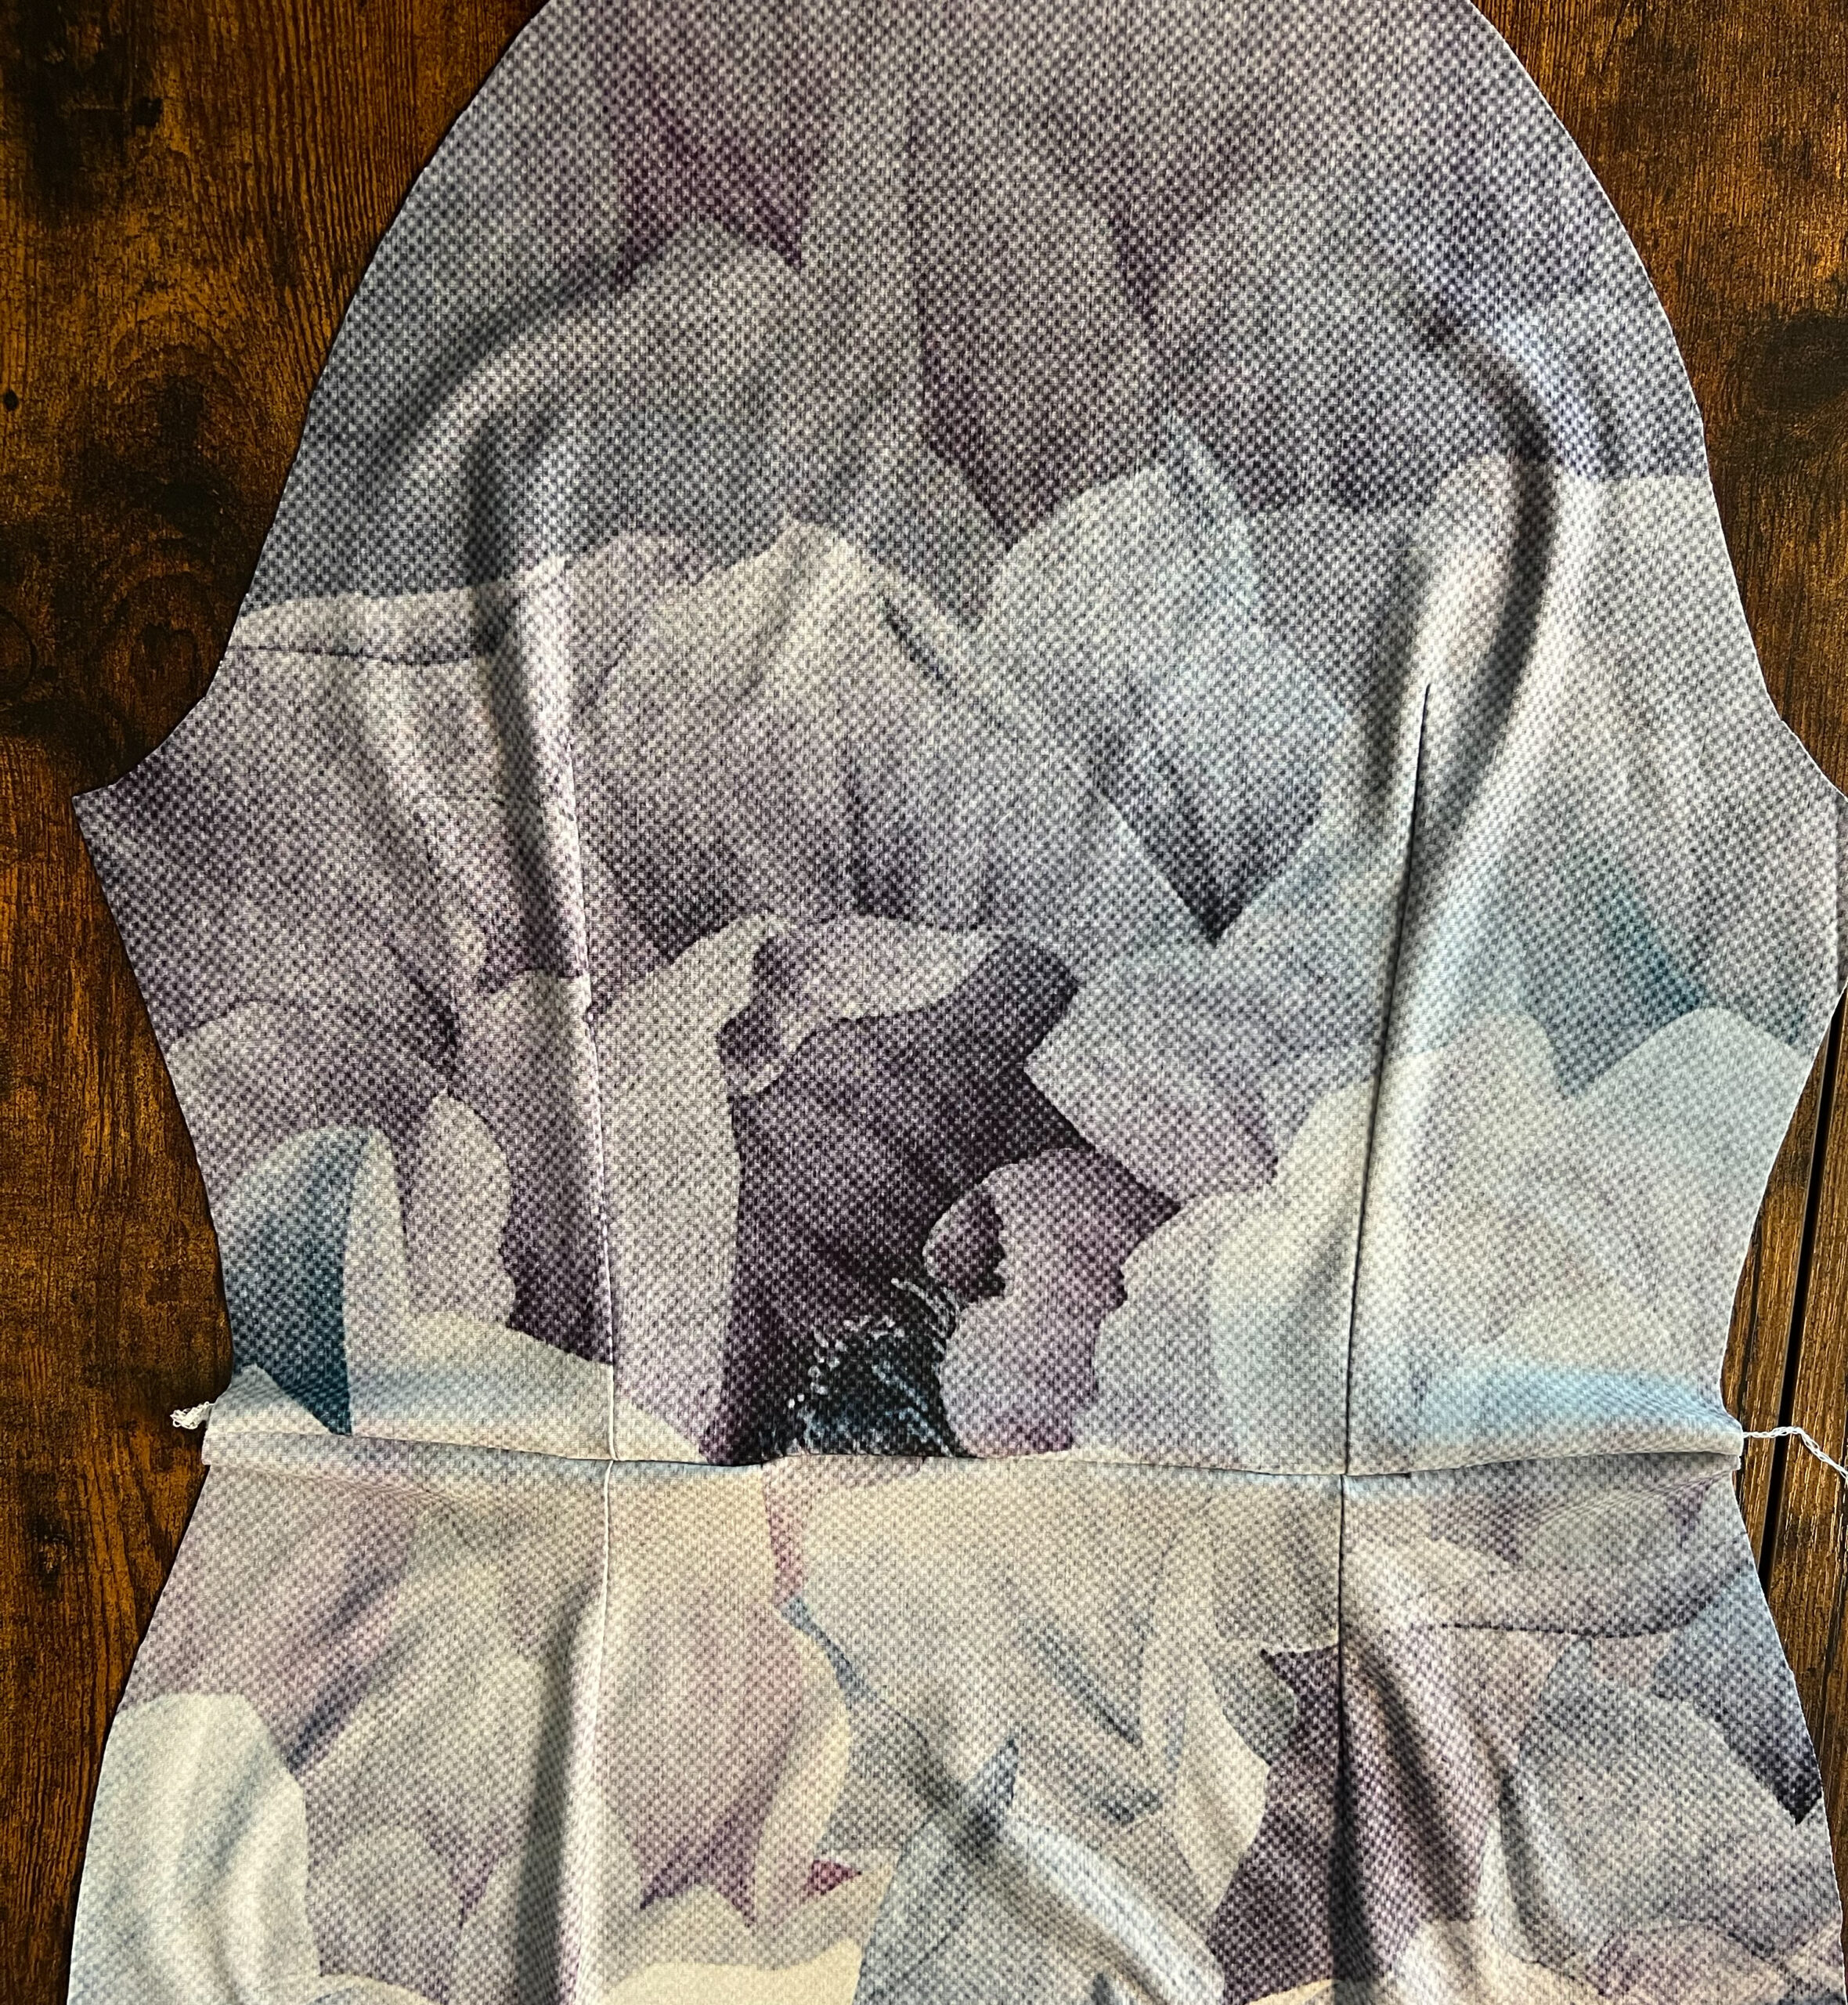
1. Vorderteil nähen
Das Vorderteil hat sogenannte Wiener Nähte, die das Oberteil in Form bringen.
Nähe zunächst die vorderen Seitenteile jeweils an das dazugehörige Mittelteil. Orientiere dich beim zusammenstecken an den Knipsen. Nutze dazu die Overlock oder einen elastischen Stich deiner Nähmaschine.
Die Nahtzugaben Richtung vordere Mitte bügeln.
1. Sewing the front
The front part has so-called princess seams, which bring the upper part into shape.
First sew the front side parts to the corresponding middle part. Use the snaps to orientate yourself when sewing them together. Use the serger or an elastic stitch on your sewing machine.
Iron the seam allowances toward the center front.
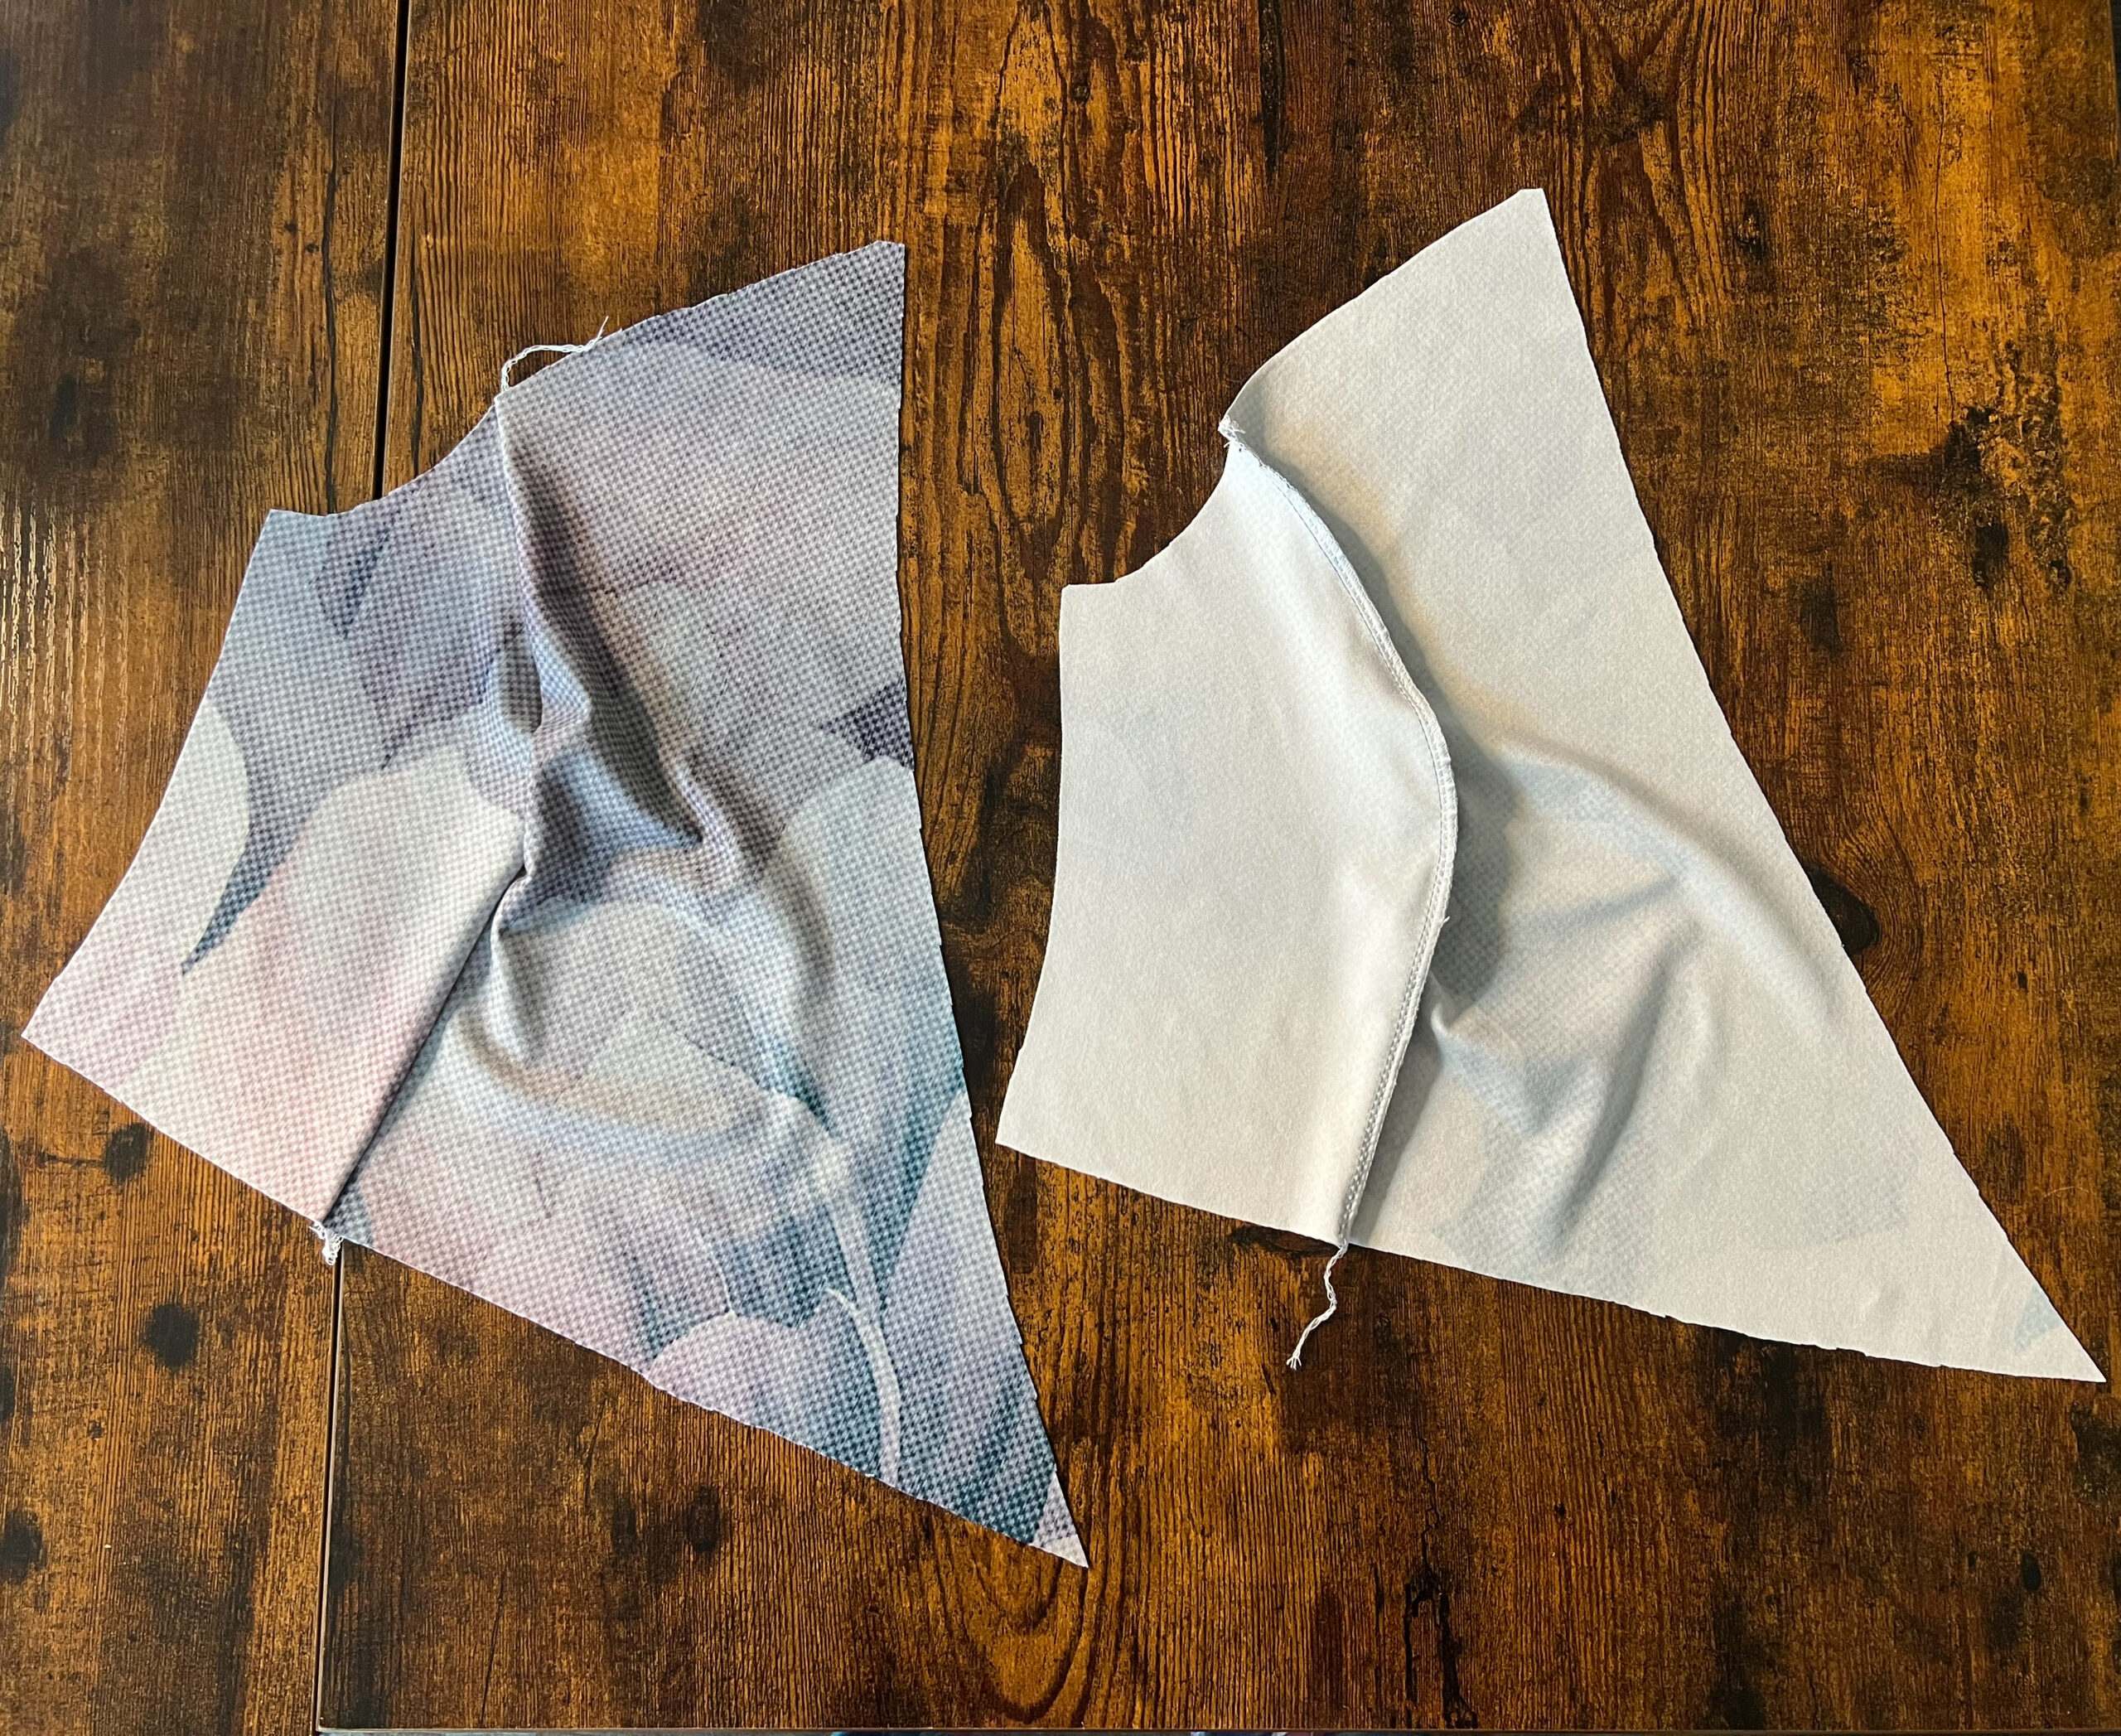
2. Rückenteil nähen
Schließe die Abnäher, indem du von der unteren Kante mit einem kleinen Gradstich (Stichlänge 2,5) nähst. Verriegle das Ende der Naht nicht, sondern lass lange Fäden stehen und verknote sie gründlich.
2. Sewing the back
Close the darts on the back by sewing a small straight stitch (stitch length 2.5) from the bottom. Do not lock the end of the seam, but leave long threads and knot them thoroughly.
Rock vorbereiten / Sewing the skirt
1. Abnäher schließen
Schließe jeweils am Vorderrock und am Hinterrock die Abnäher, indem du von der unteren Kante mit einem kleinen Gradstich (Stichlänge 2,5) nähst. Verriegle das Ende der Naht nicht, sondern lass lange Fäden stehen und verknote sie gründlich.
1. Closing the darts
Close the darts on the back by sewing a small straight stitch (stitch length 2.5) from the bottom. Do not lock the end of the seam, but leave long threads and knot them thoroughly.
Gürtel nähen / Sewing the belts
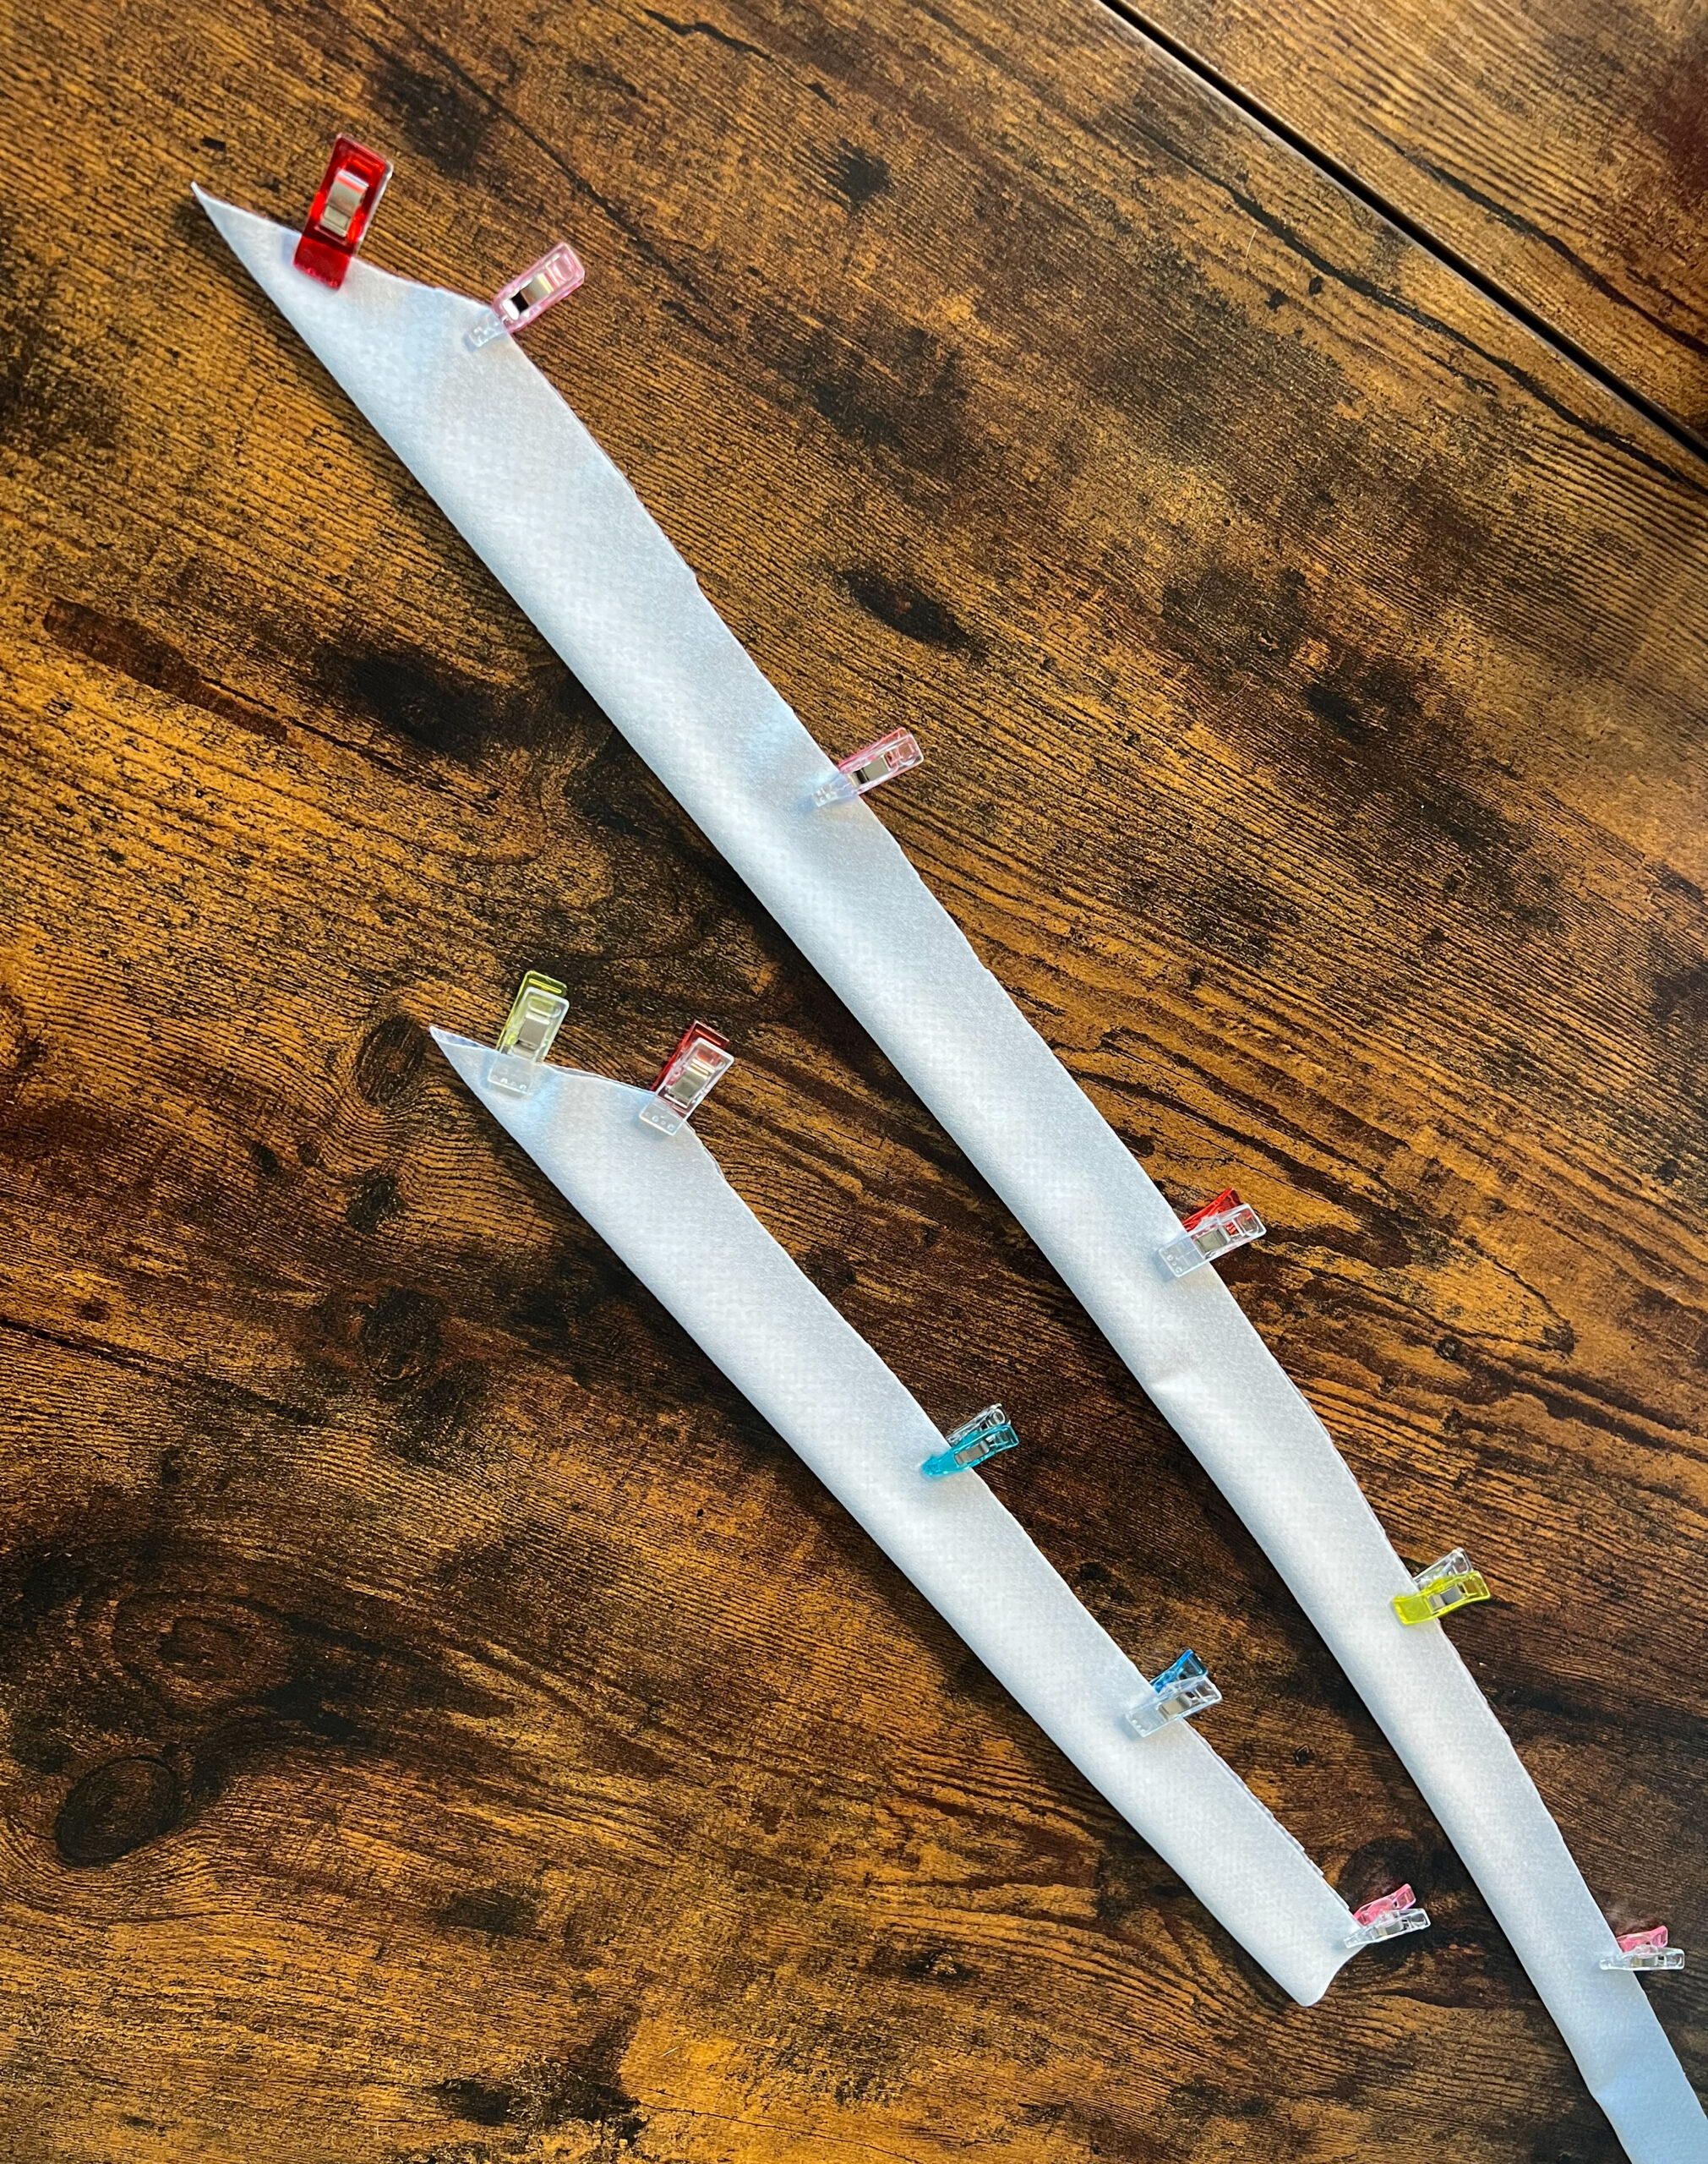
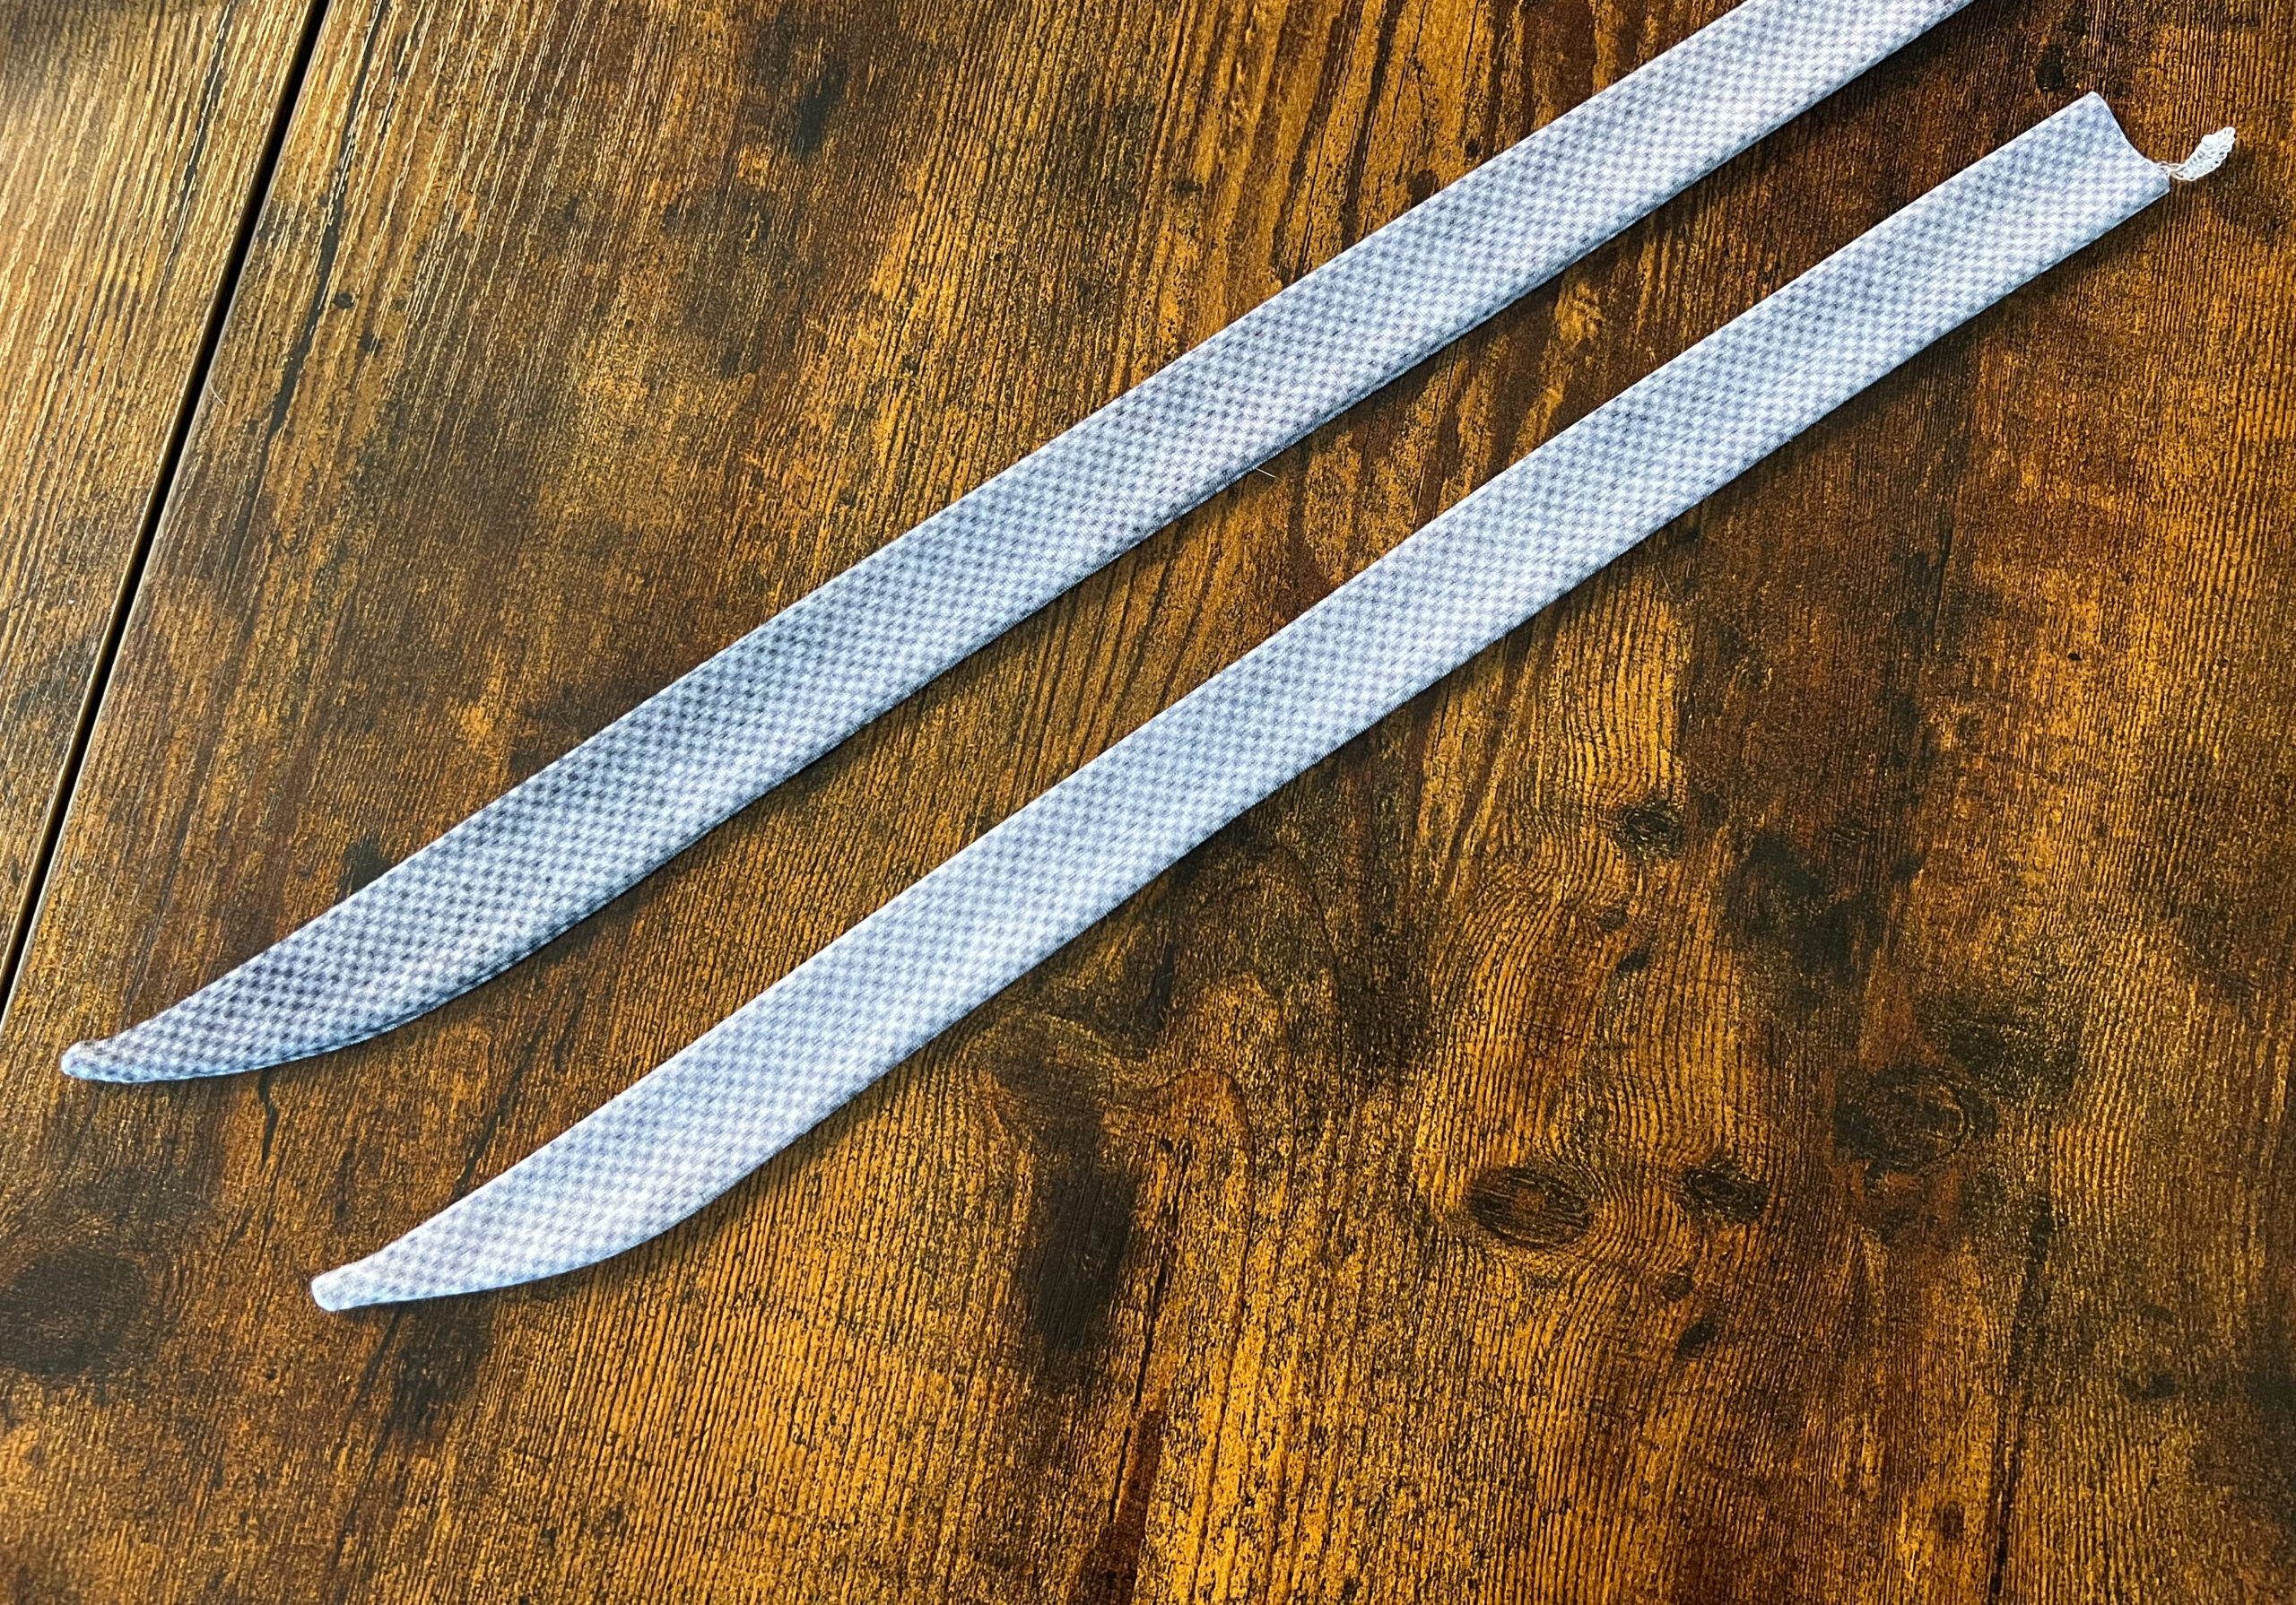
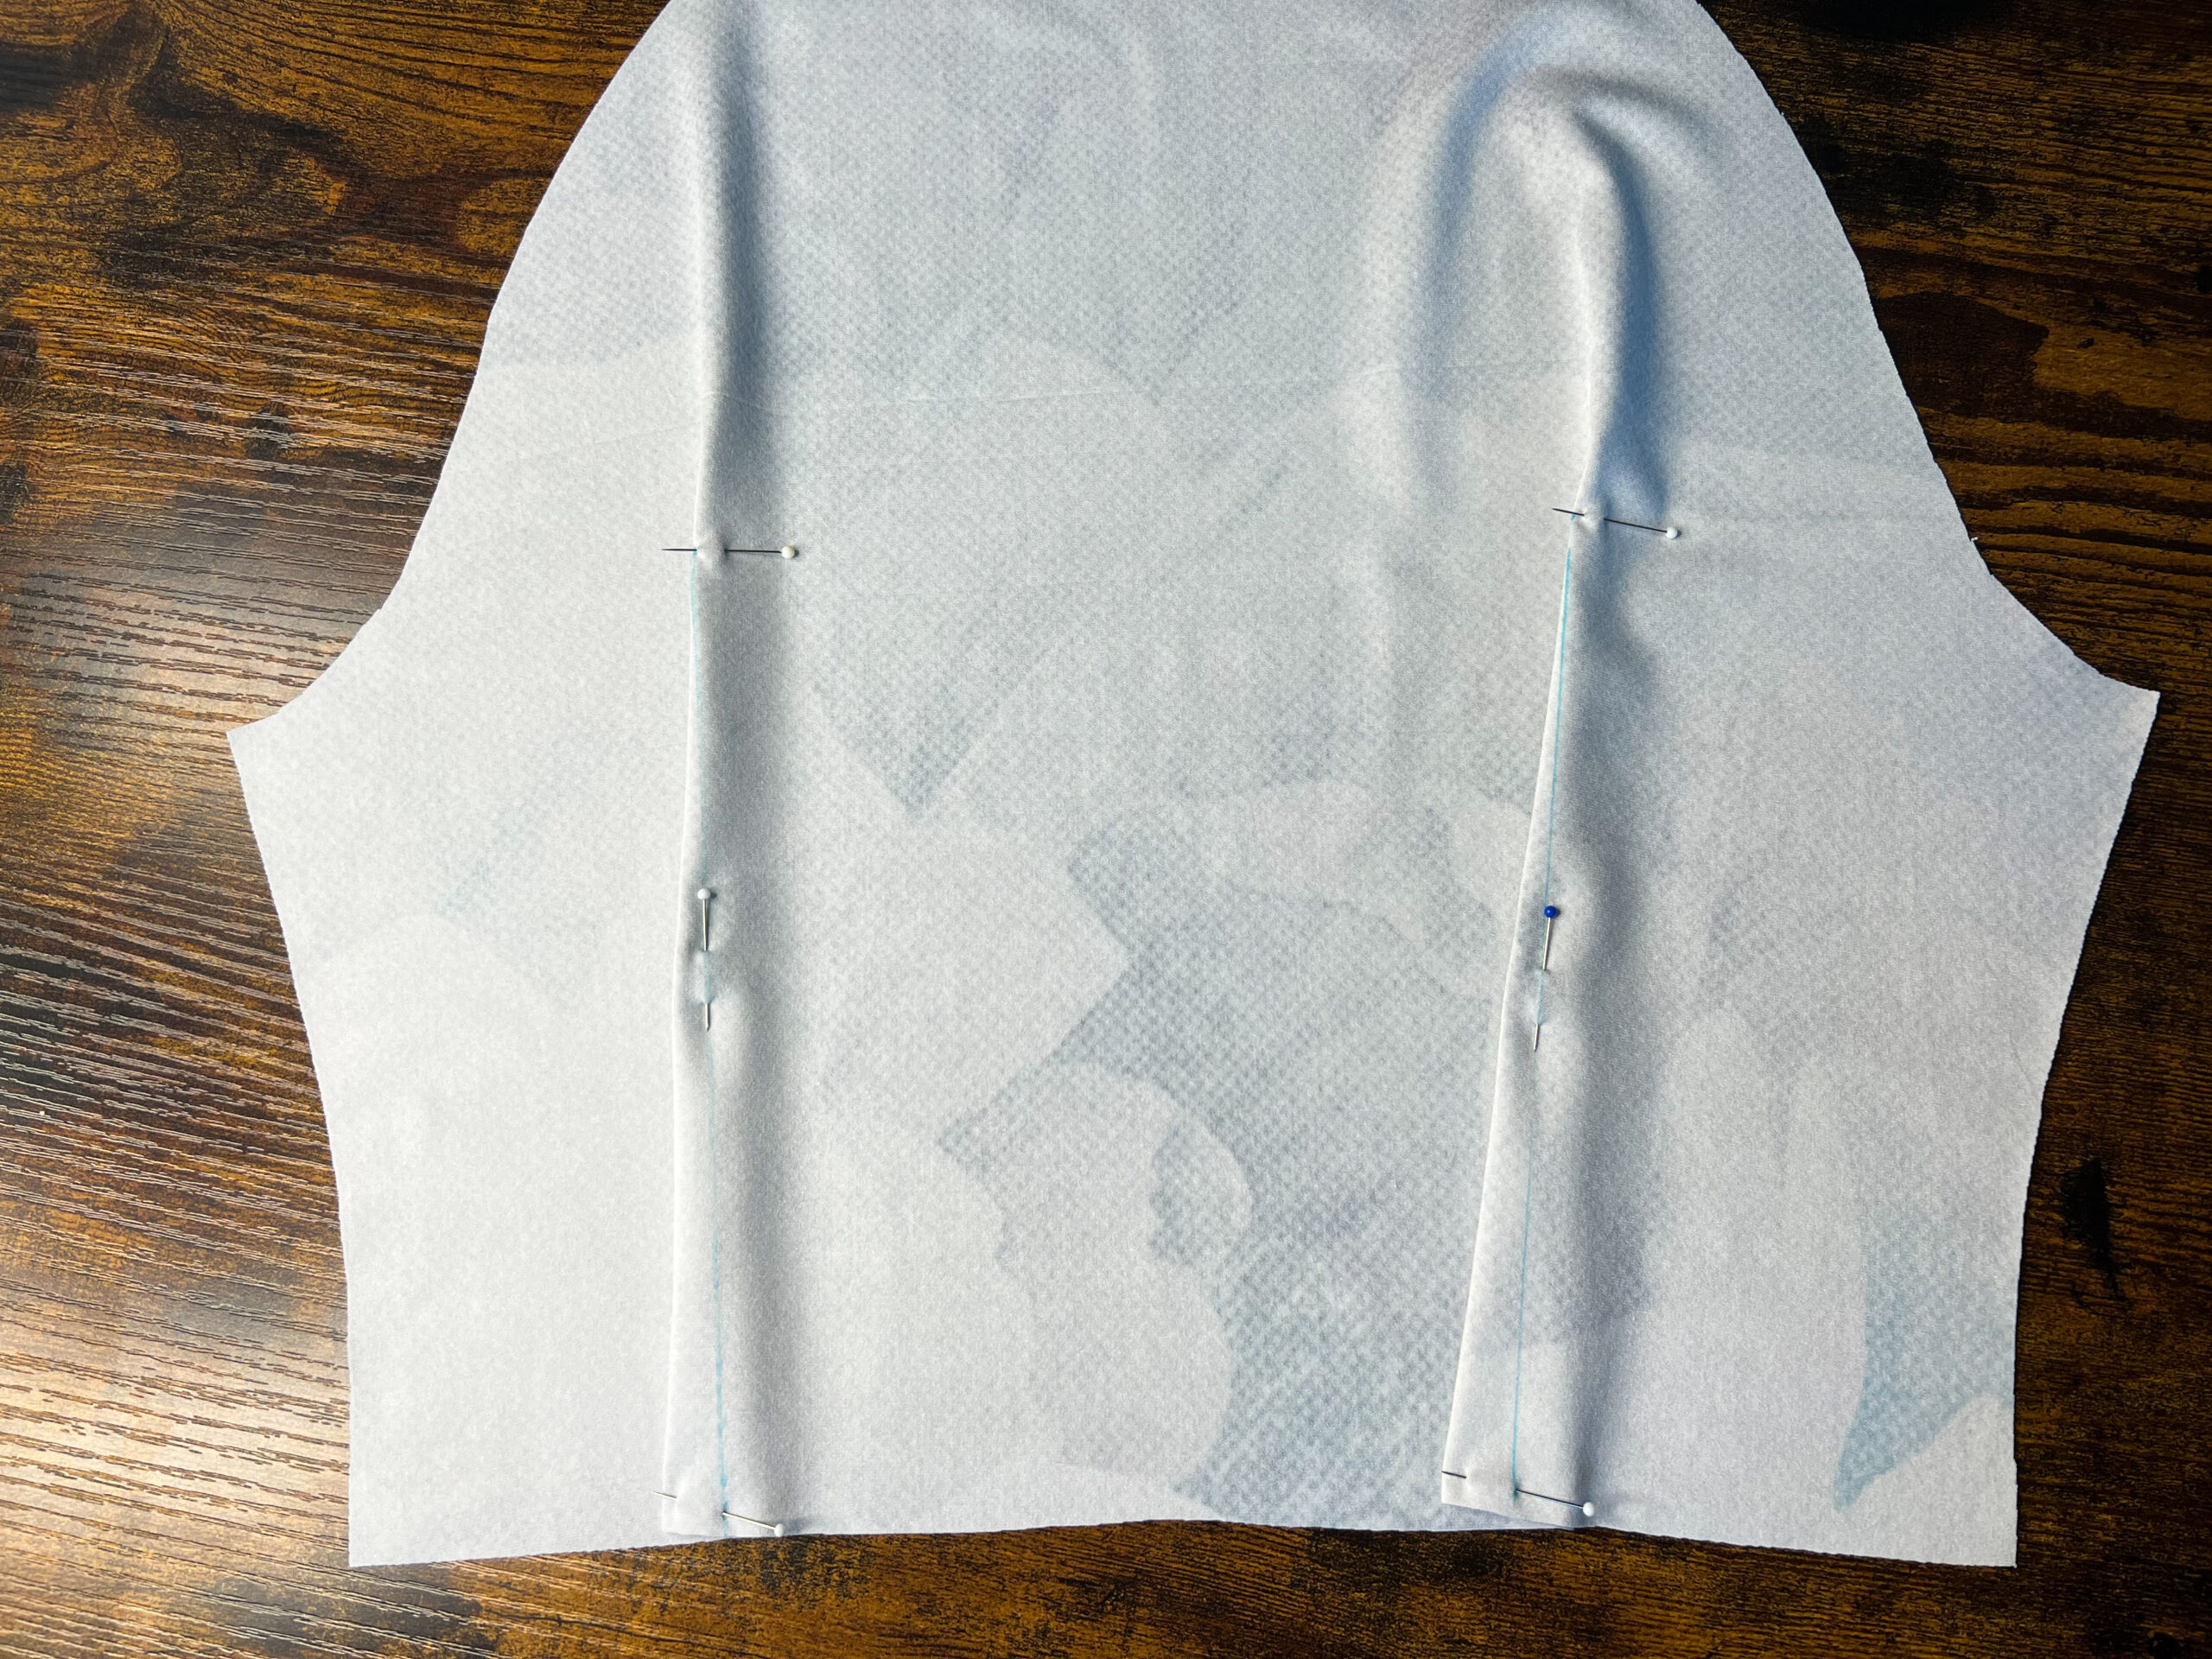
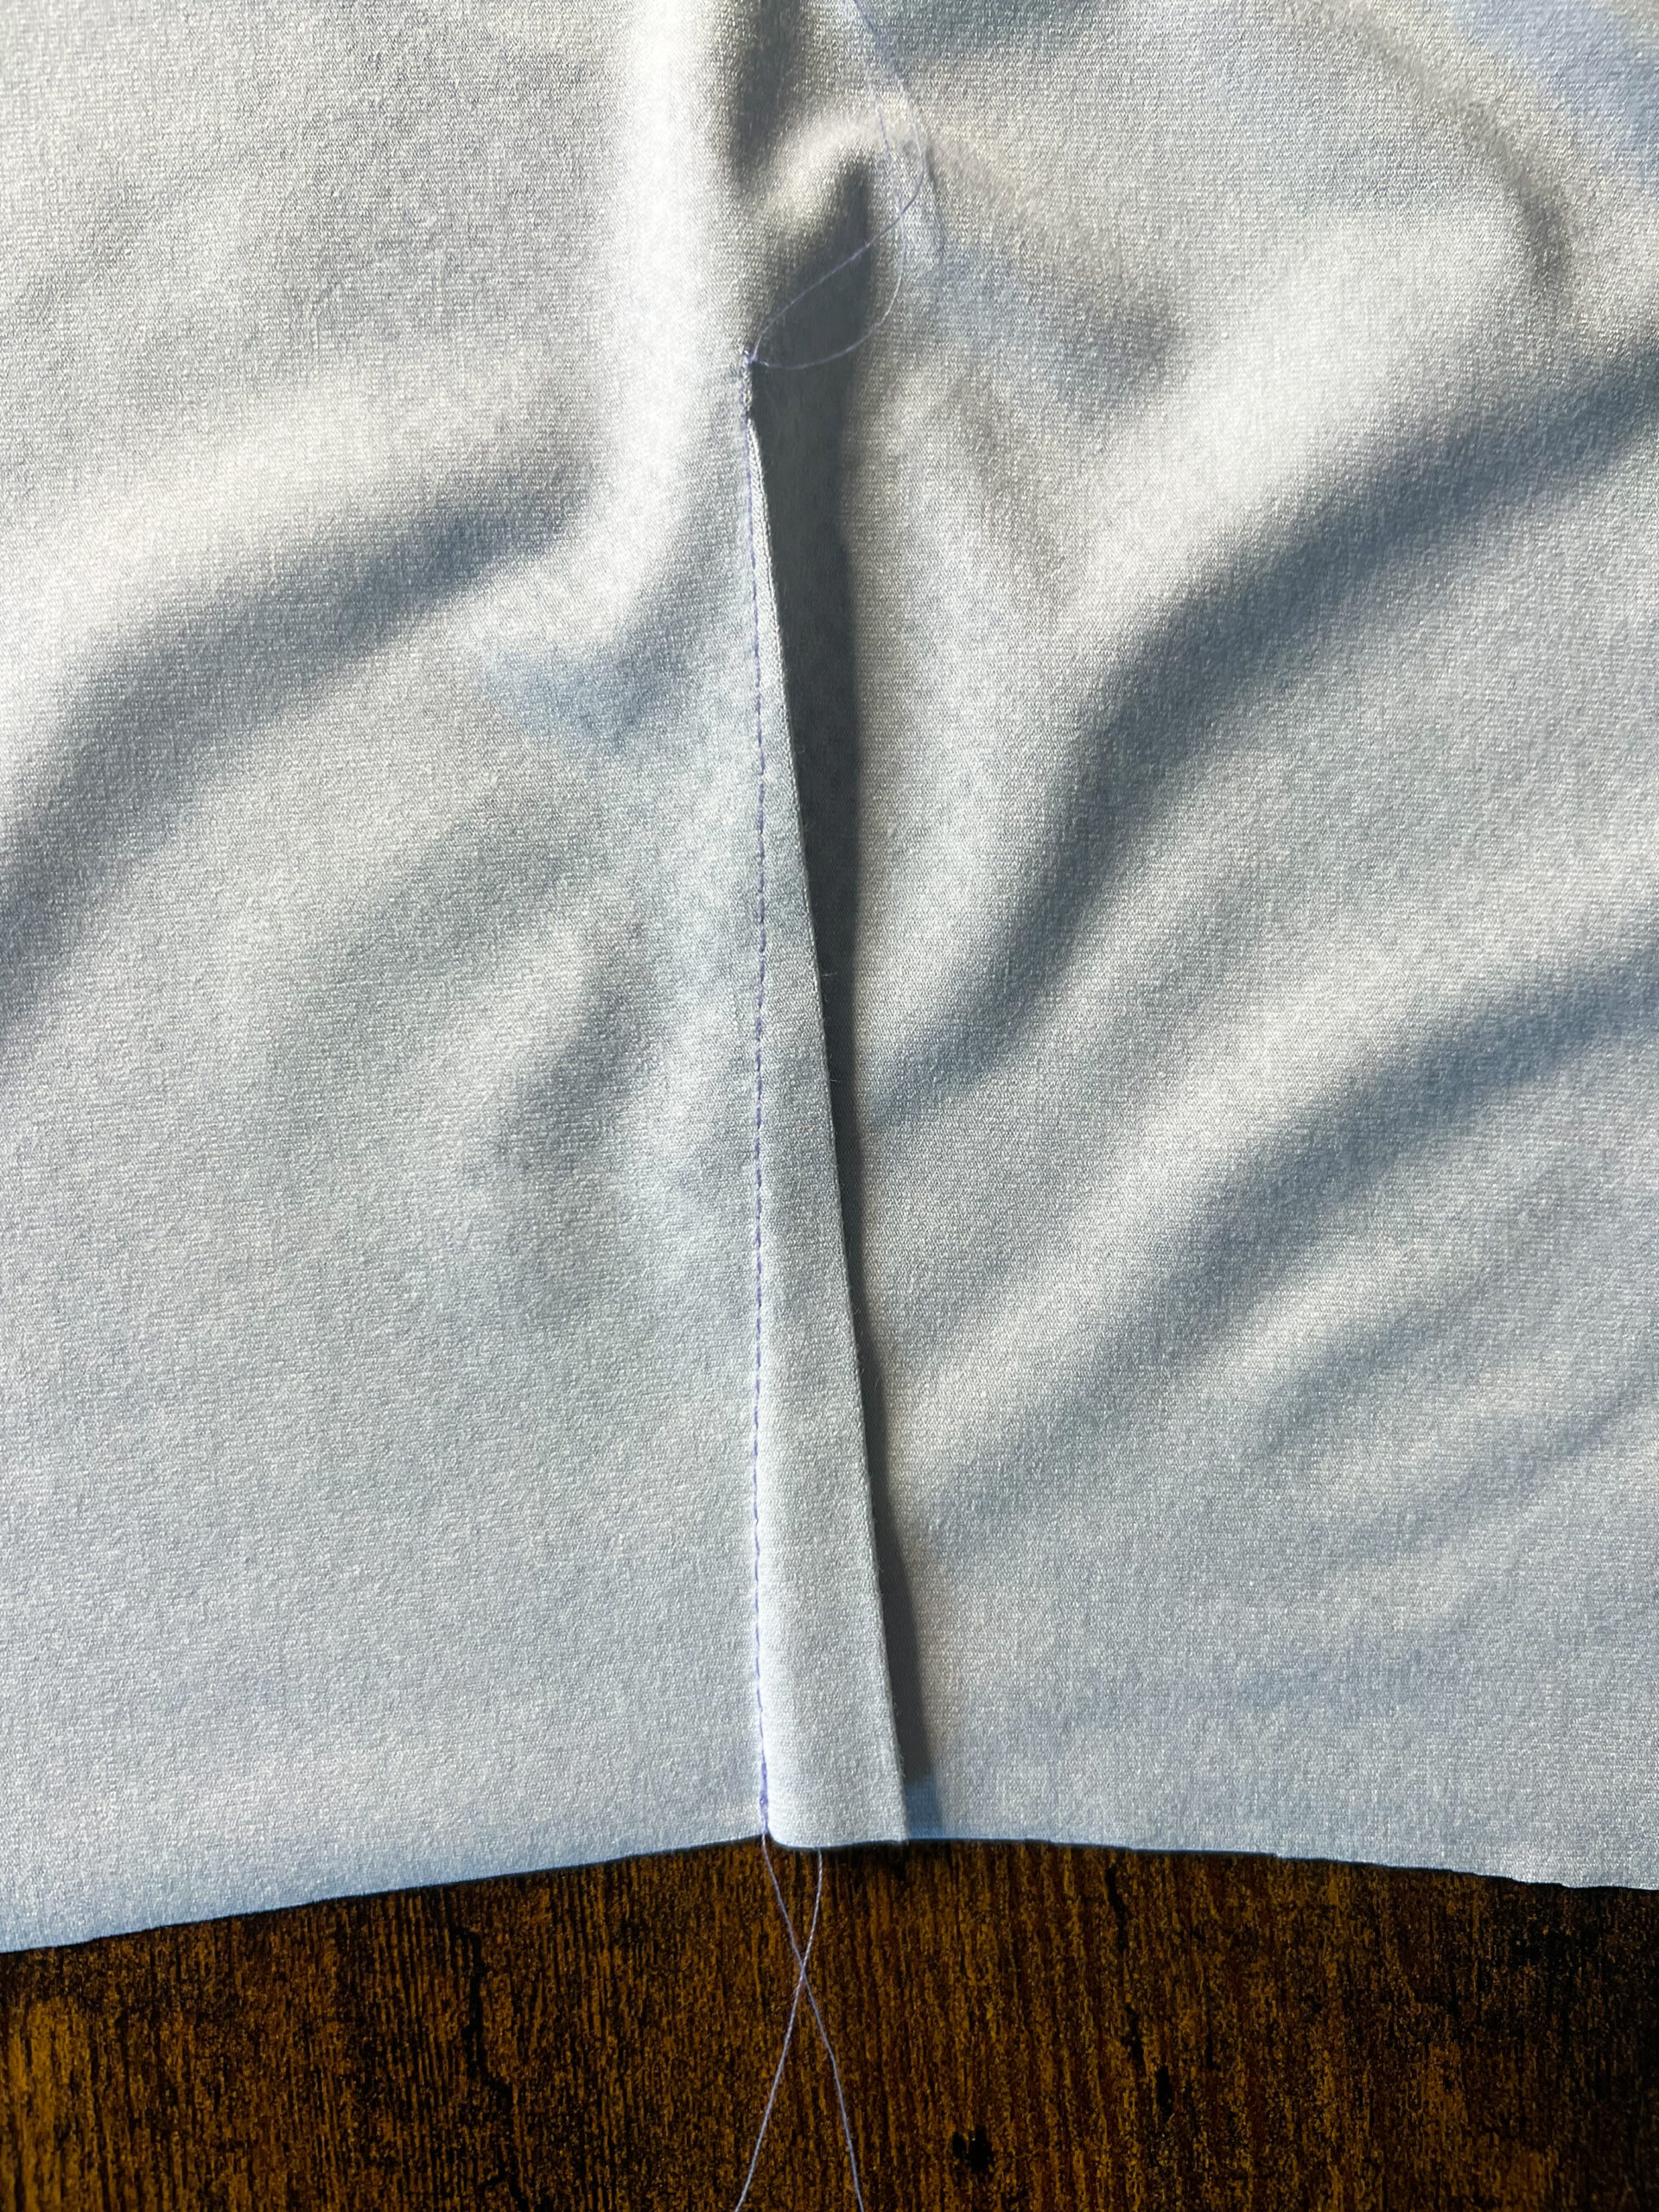
1. Gürtel nähen
Lege die Gürtelteile jeweils rechts auf rechts aufeinander. Nutze zum zusammennähen im Bereich der Spitze einen kleinen Gradstich. Für den Rest kannst du die Overlock nutzen. Schneide die Nahtzugabe im Bereich der Spitze knappkantig zurück und wende die Gürtelteile auf rechts. Bügel die Gürtelteile. Optional kannst du sie einmal ringsherum knappkantig absteppen.
1. Sewing the belt
Pin the belts right sides together. Use a small straight stitch to sew together the tip area. For the rest you can use the serger. Cut back the seam allowance in the area of the tip and turn the belt parts right side out. Iron the belt parts. Optionally, you can topstitch them all around.
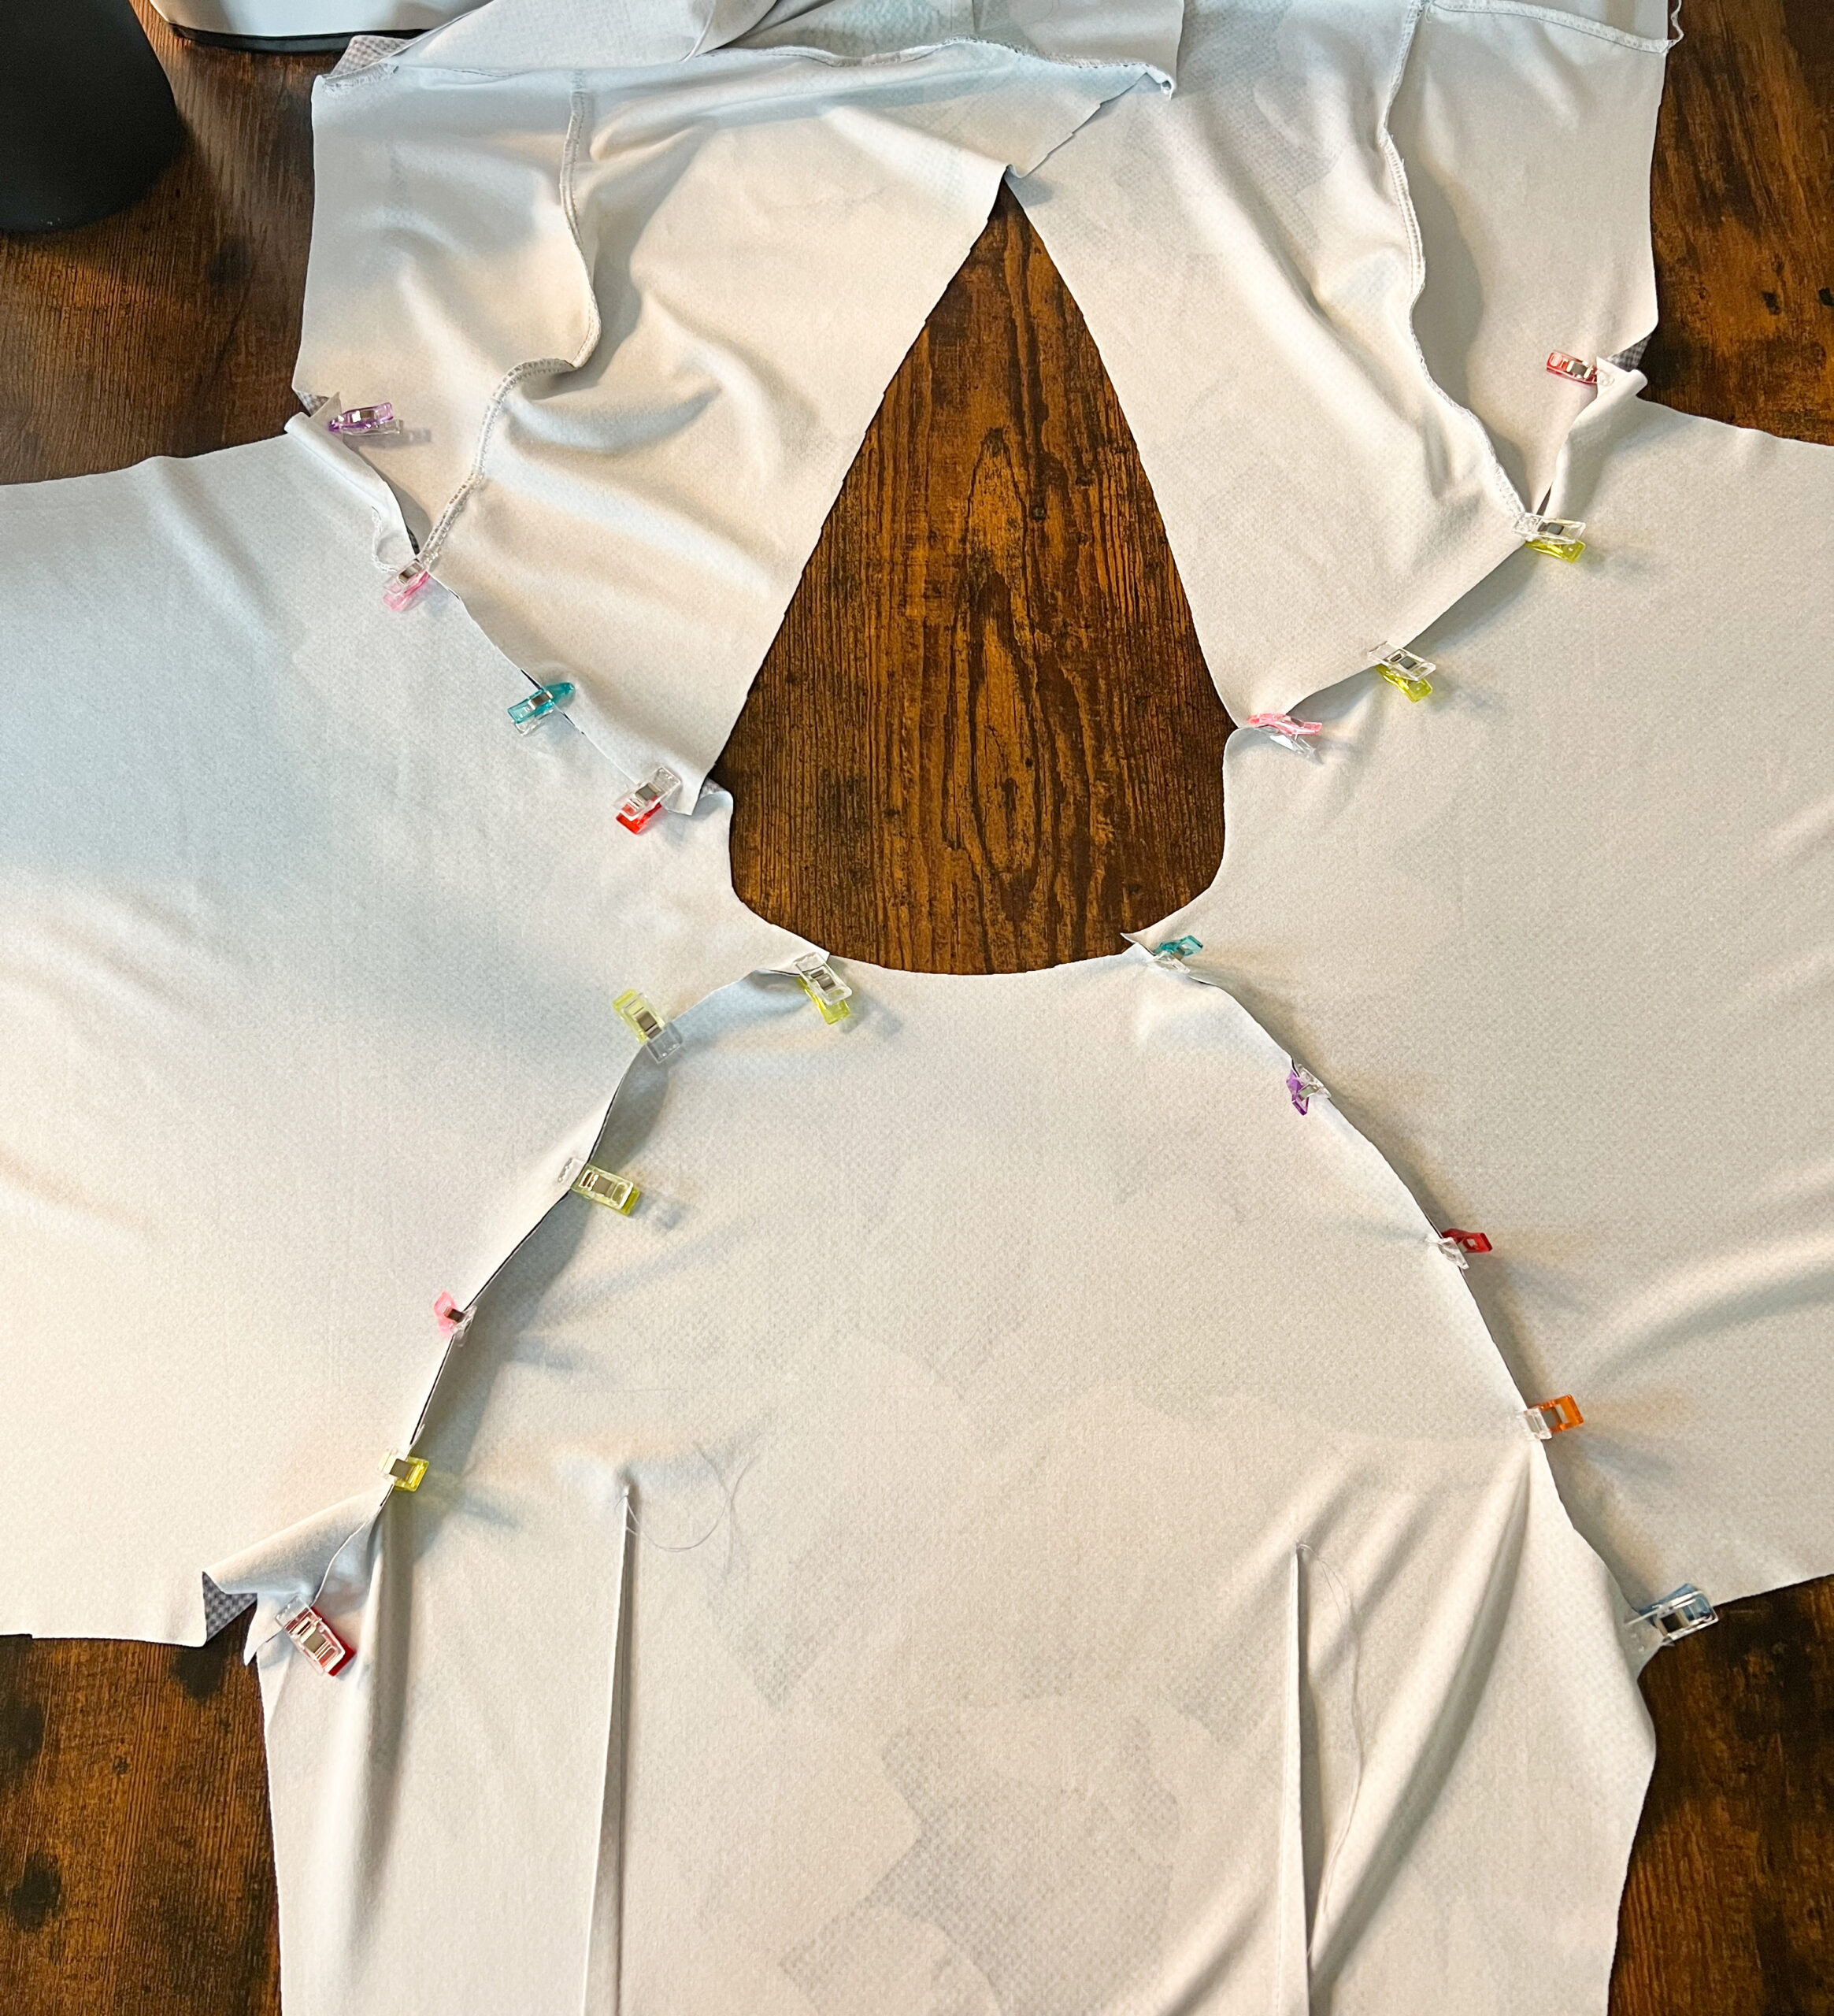
Belege vorbereiten / The Facing
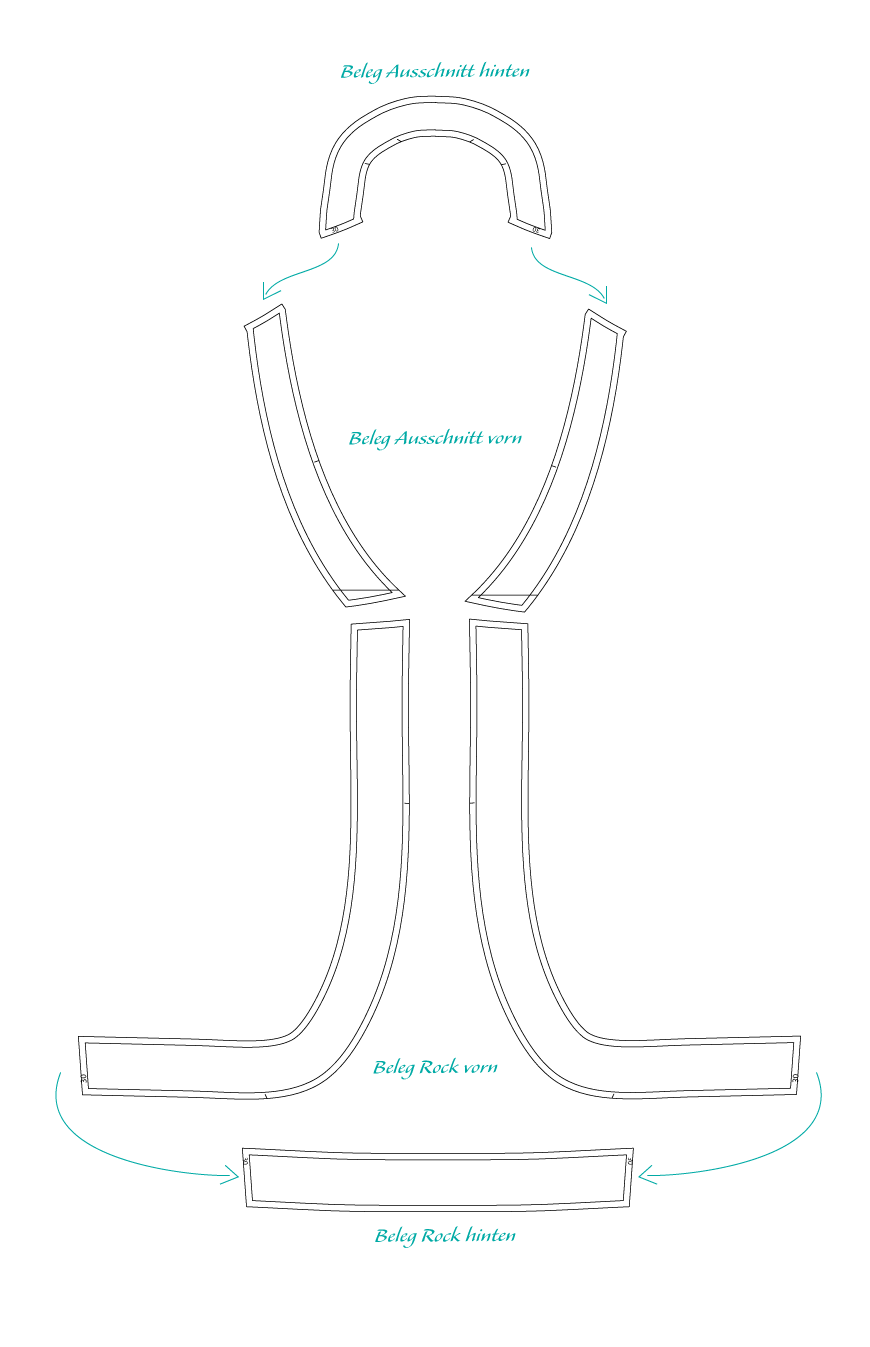
1. Belege zum Kreis schließen
Die Belege werden zu einem geschlossenen Kreis zusammengenäht.
An den Beleg „Ausschnitt hinten“ kommen jeweils rechts aus rechts die zwei Belege „Ausschnitt vorn“.
Unten an die Belege „Ausschnitt vorn“ kommt jeweils ein Beleg „Rock vorn“, zwischen die beiden Vorderrockbelege kommt der Beleg „Rock hinten“.
Übertrage alle Markierungen gründlich, dies erleichtert dir das Annähen.
Optional kannst du den fertigen Beleg einmal ringsherum mit der Overlock versäubern.
1. Sewing the Facing parts together
The facings are sewn together to form a closed circle.
Pin the two facings “front top” to the right sides of the facing “back”.
At the bottom of the “front top” pin the “front skirt” facings right sides together, between the two front pieces of the skirt comes the piece “back skirt”.
Transfer all markings thoroughly, this will make sewing easier for you.
Optionally, you can finish the facing all around with the serger.
Kleid fertig stellen / Finishing the dress
1. Hinteres Kleid nähen
Lege den Hinterrock auf das hintere Oberteil und nähe mit einem elastischen Stich. Die Abnäher von Hinterrock und Oberteil treffen dabei aufeinander.
1. Sewing the back dress
Place the back skirt on the back bodice and sew with an elastic stitch. The darts meet exactly.
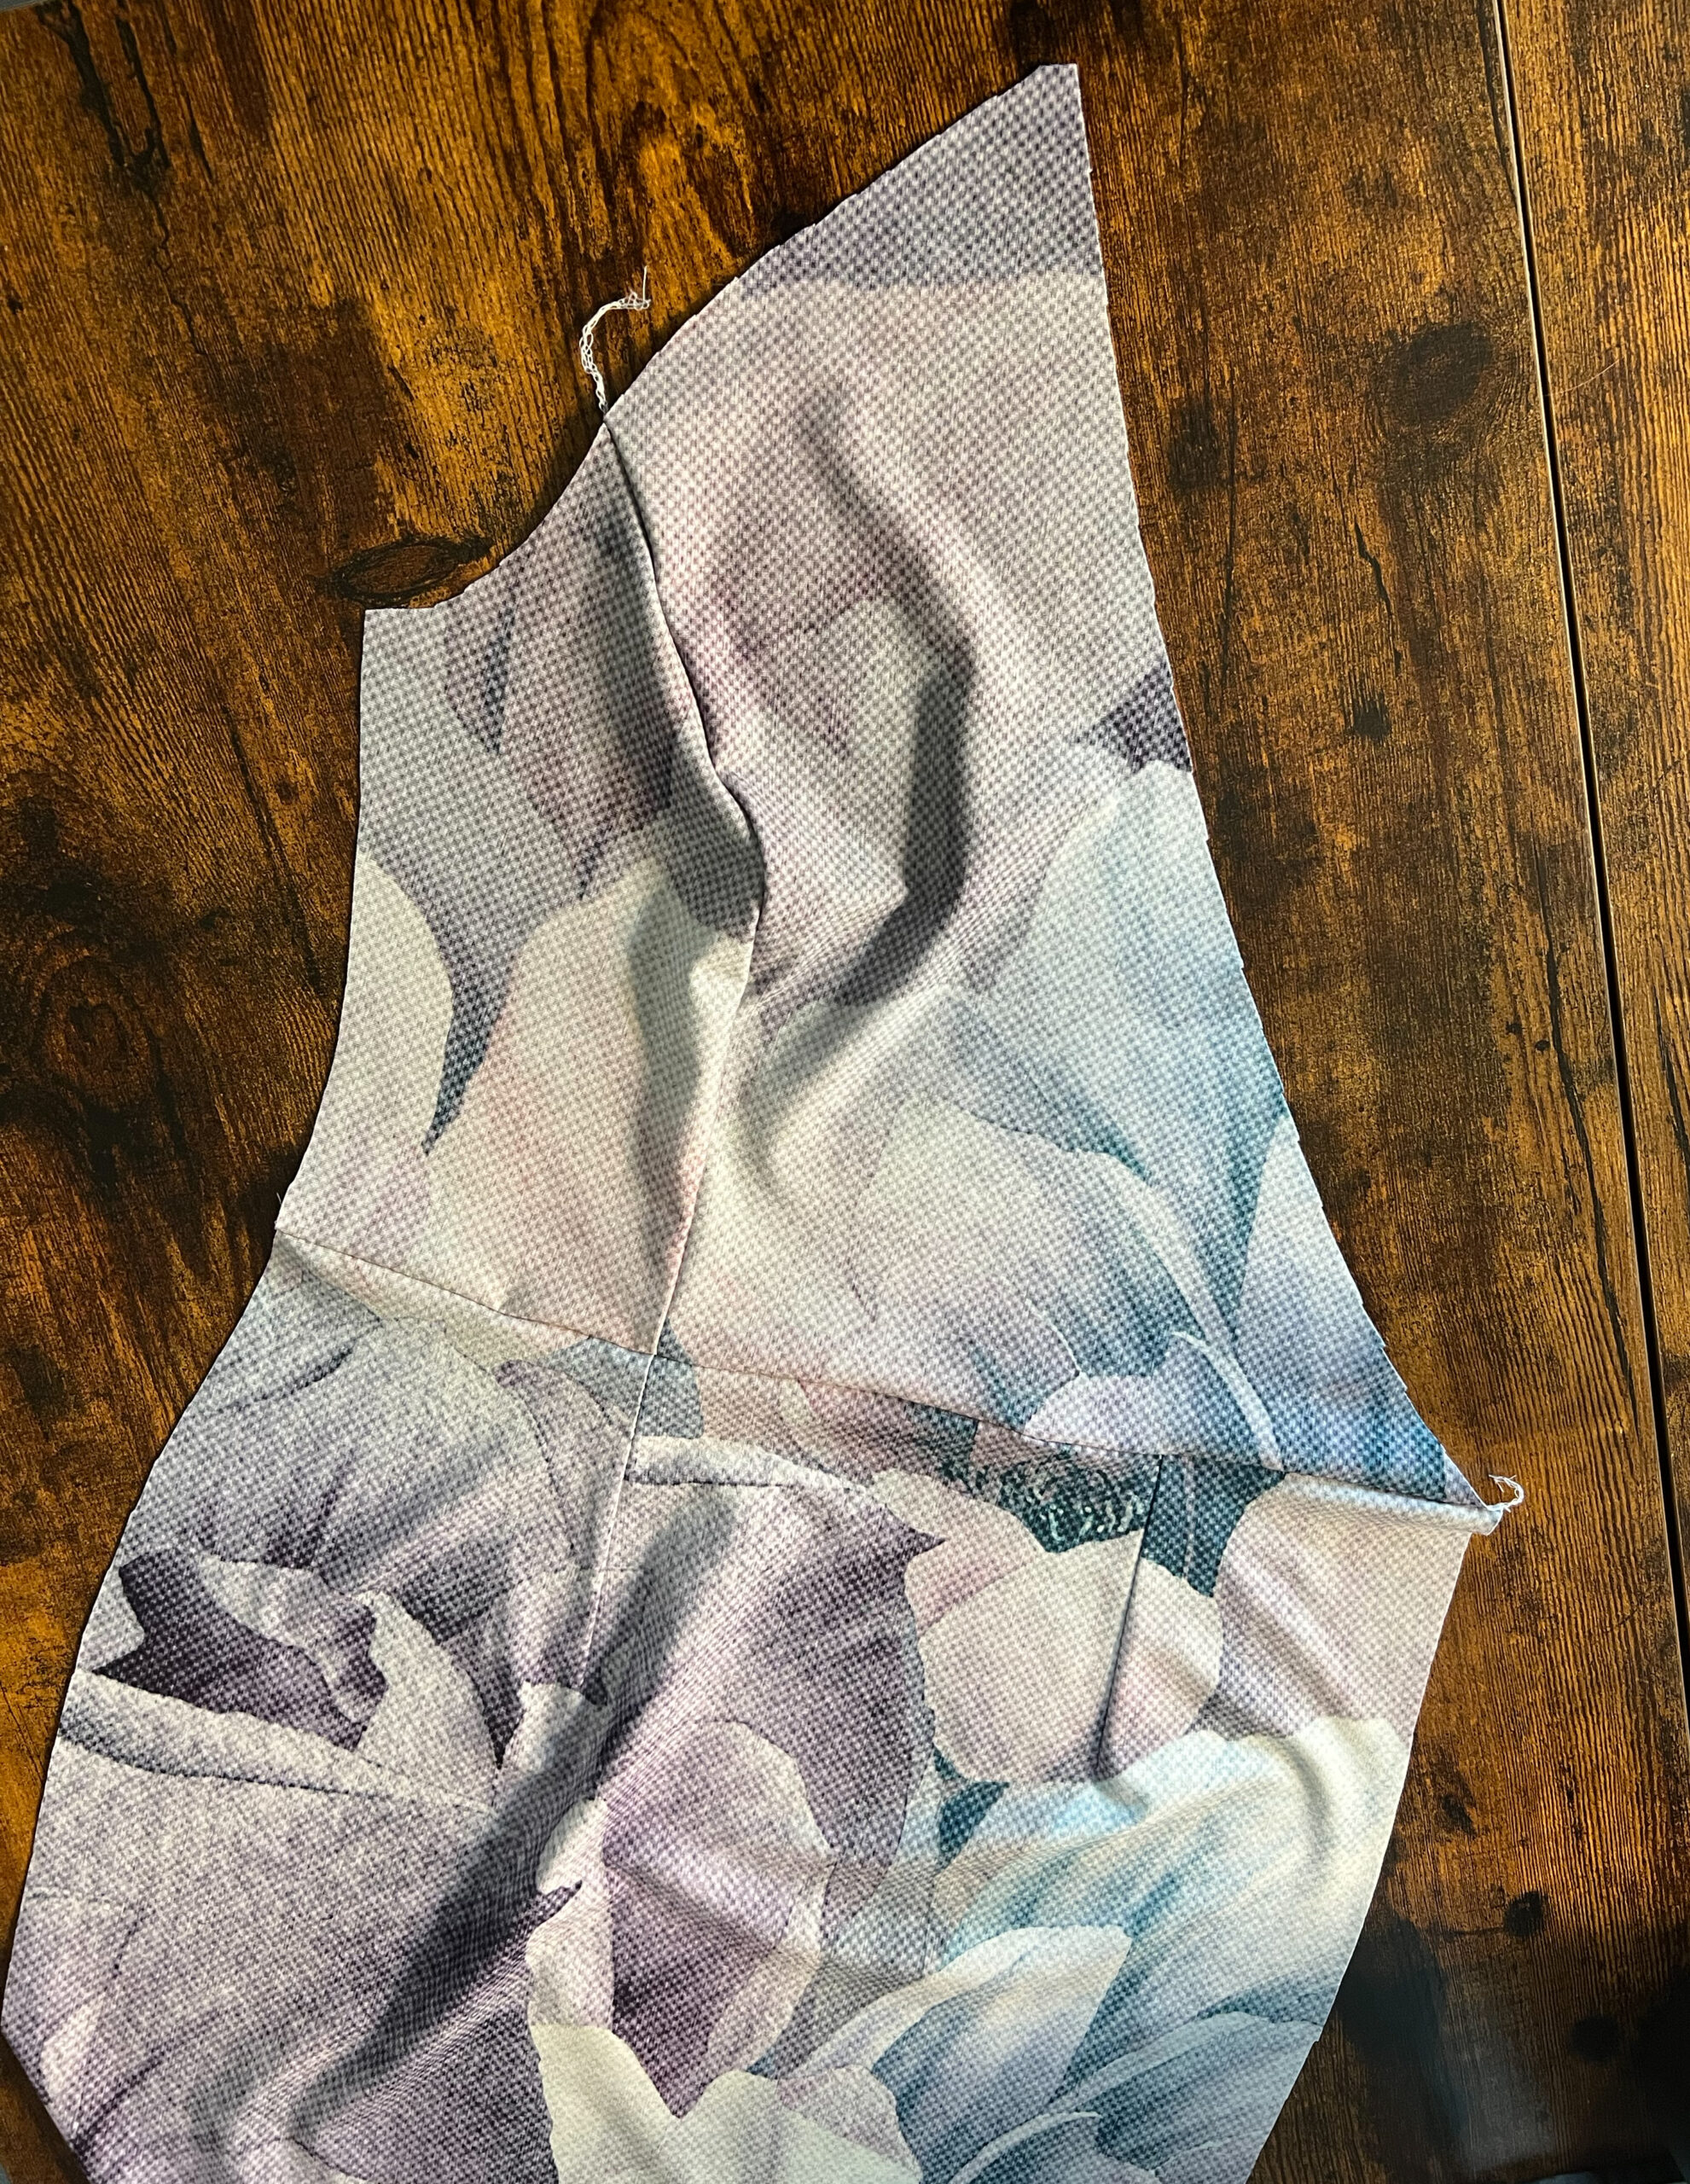
2. Vorderes Kleid nähen
Lege jeweils ein Vorderteil rechts auf rechts auf einen Vorderrock und schließe die Naht mit einem elastischen Stich. Die Wiener Naht des Oberteils trifft dabei auf den äußeren Abnäher.
2. Sewing the front dress
Place one front piece, right sides together, on one front skirt and close the seam with an elastic stitch. The princess seam of the top meets the outer dart.
3. Ärmel annähen
Stecke die Ärmel jeweils rechts auf rechts an das Vorderteil und nähe sie mit einem elastischen Stich. Beachte die Markierungen für hinten und vorne. Lege dann das Rückteil jeweils rechts auf rechts auf die rückwärtige Ärmelnaht und nähe sie ebenfalls mit einem elastischen Stich.
3. Sewing the sleeves
Pin the sleeves to the front piece, right sides together, and sew them with an elastic stitch. Note the markings for the back and the front. Then place the back piece, right sides together, on the back sleeve seam and sew it with an elastic stitch as well.
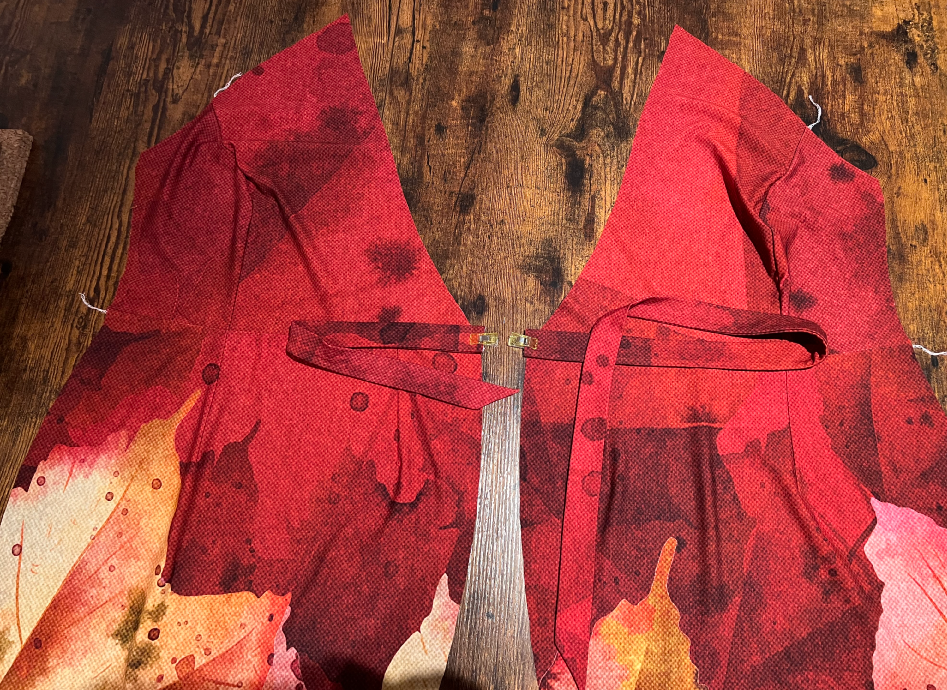
4. Gürtel heften
Wickelkleider überlappen klassischerweise rechts über links. Du kannst es aber auch andersherum machen, wenn es dir besser gefällt.
Fixiere den kurzen Gürtel auf dem rechten Vorderteil (siehe Bild, rechts von der Trägerin aus gesehen) und den langen Gürtel auf dem linken Vorderteil.
4. Fix the belt
Wrap dresses traditionally overlap right over left. But you can also do it the other way around if you like it better.
Fix the short belt on the right front piece (see picture, right side seen from the wearer) and the long belt on the left front piece.

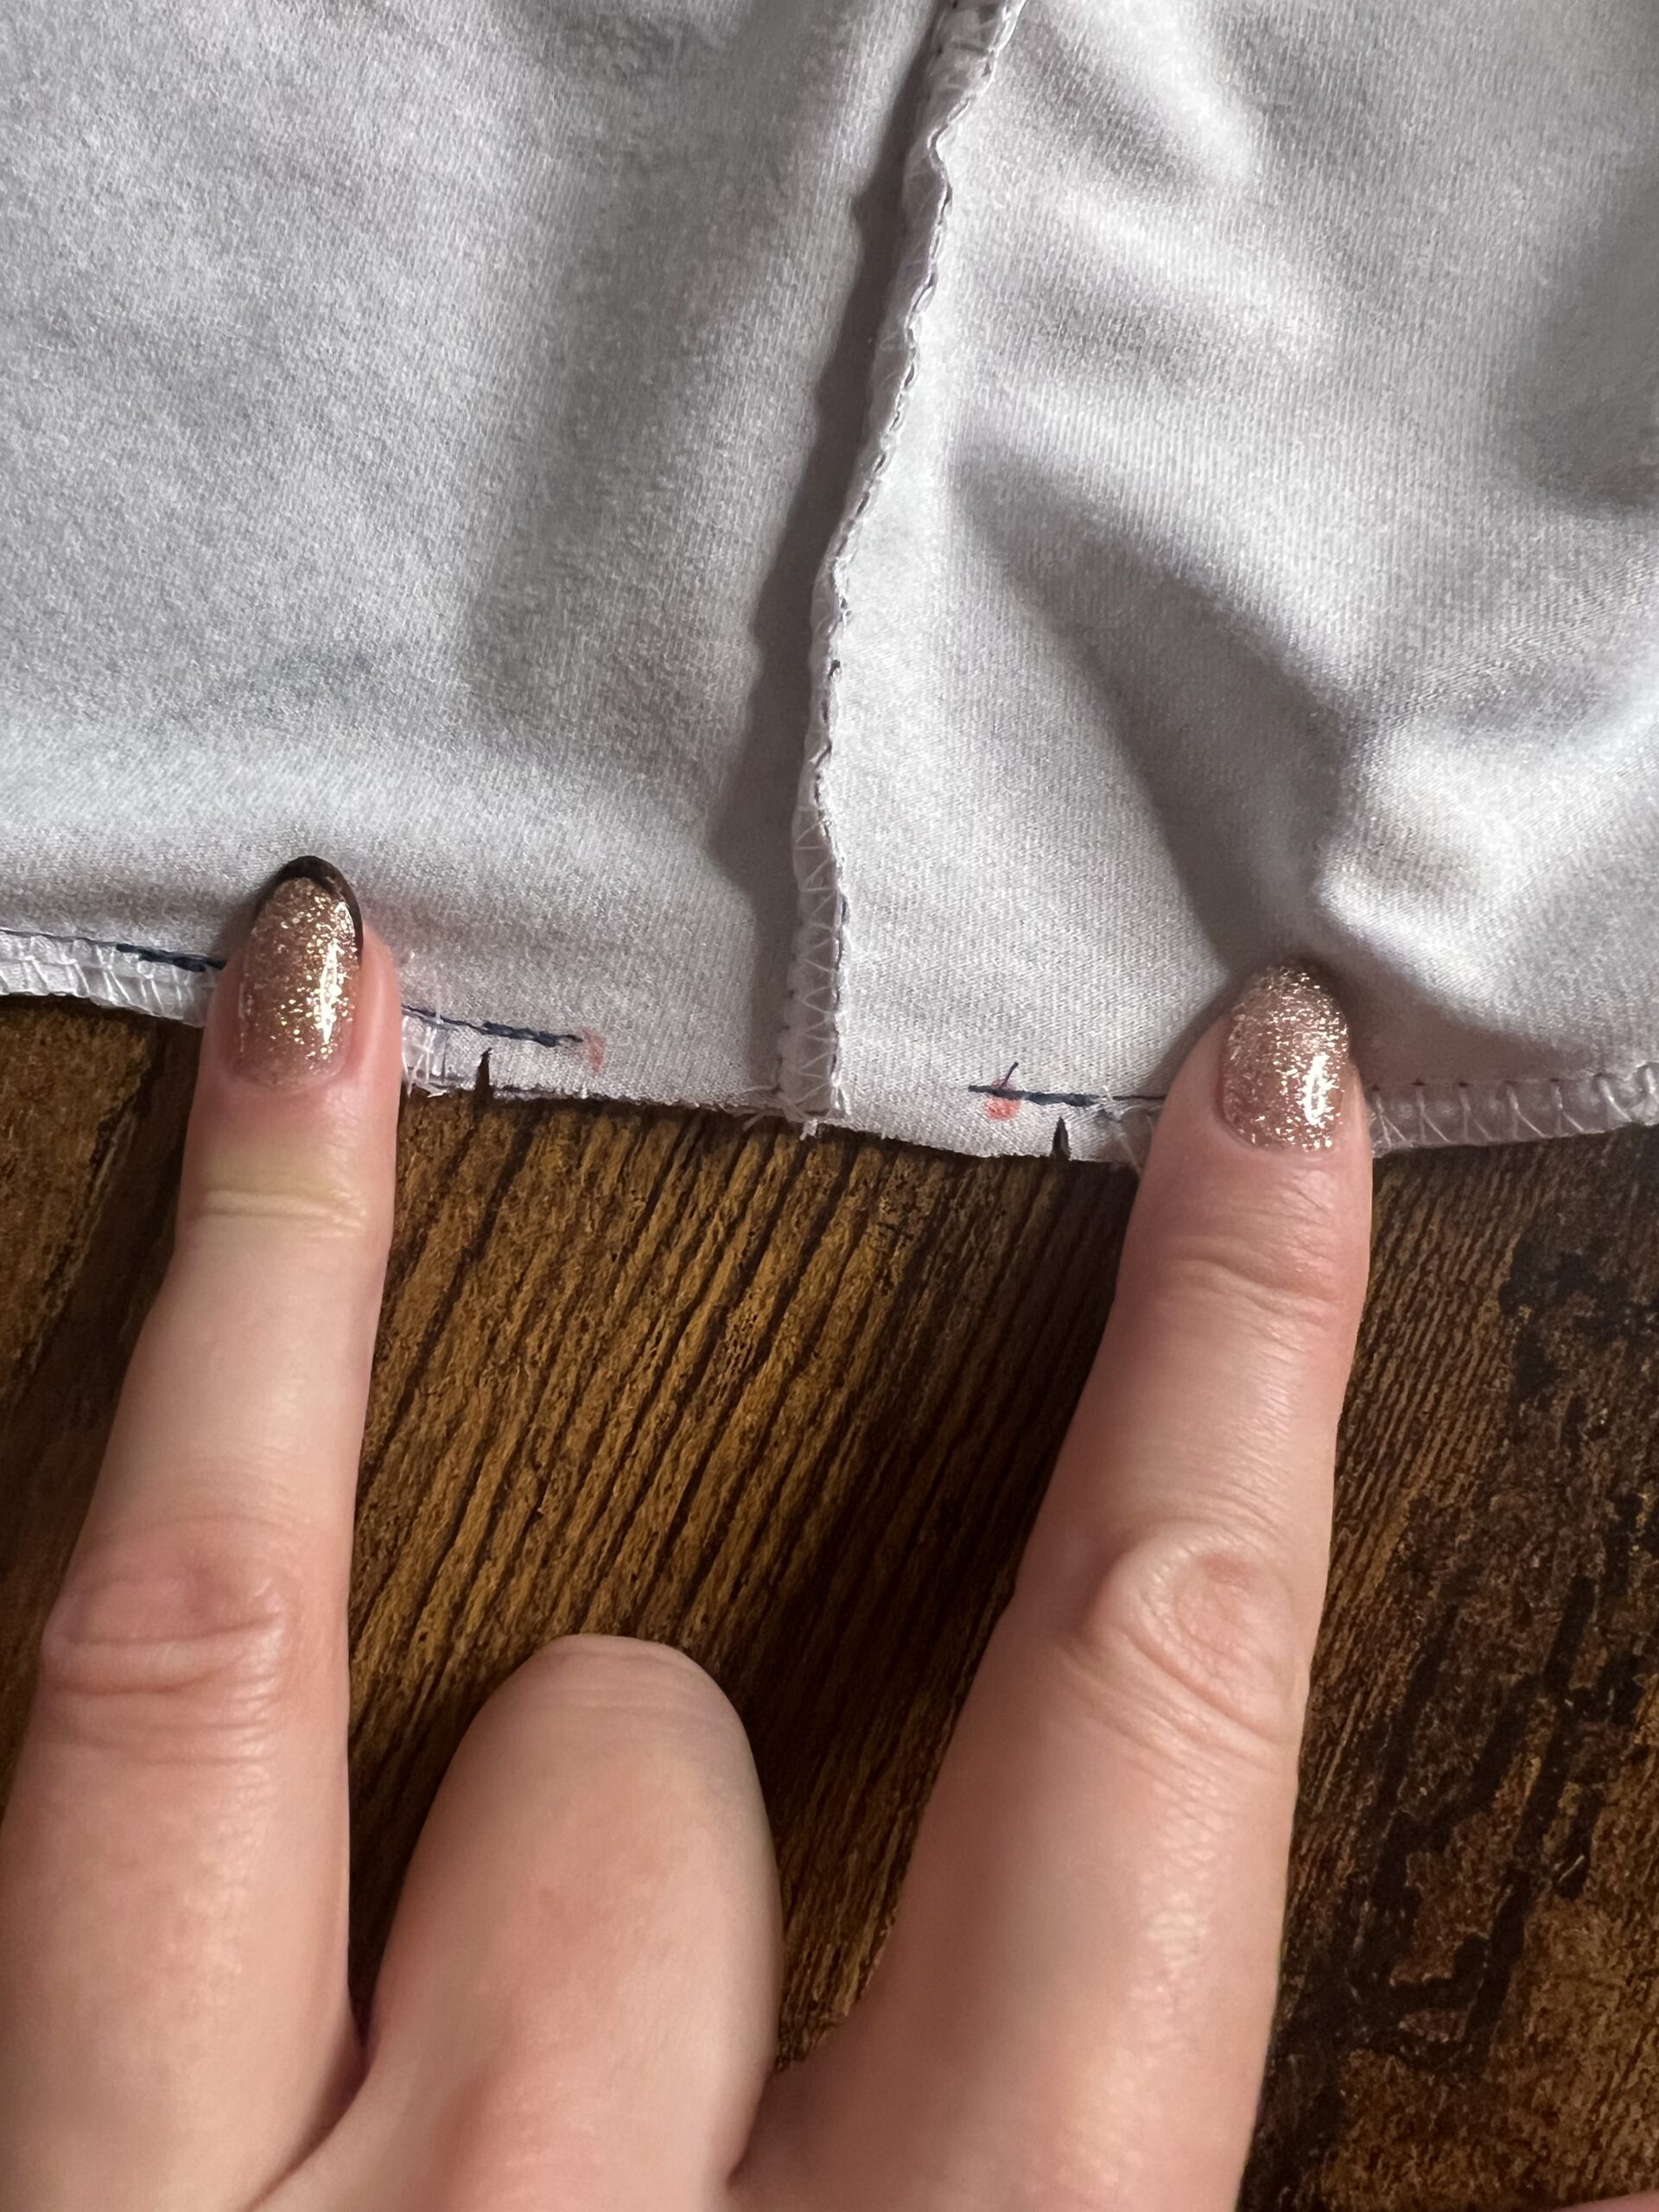
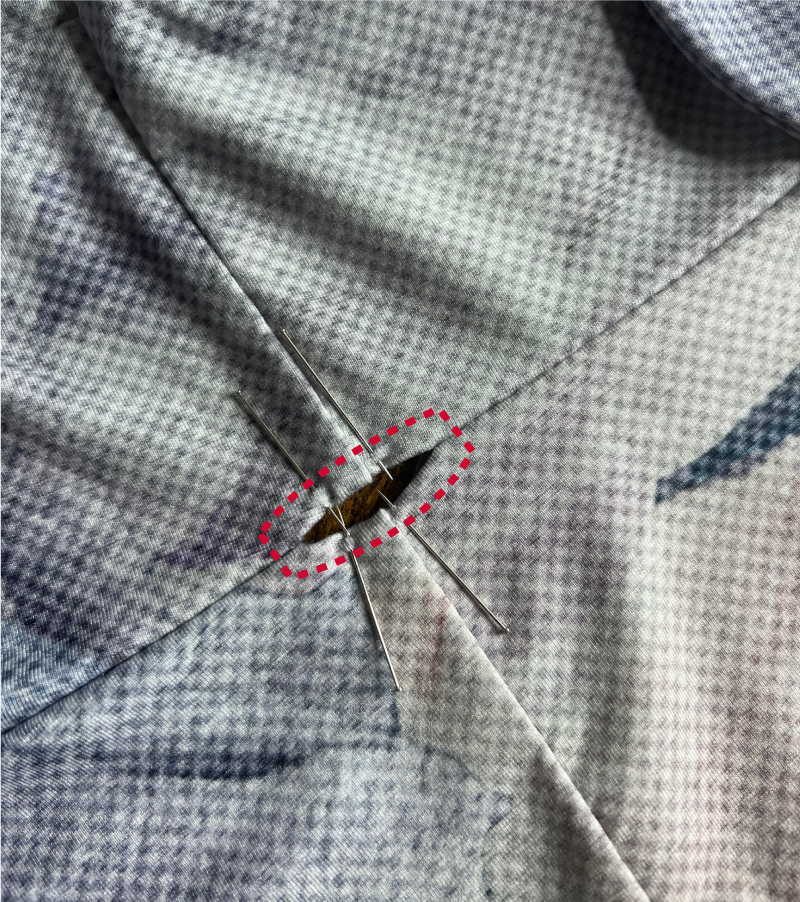
5. Seitennähte schließen
Schließe nun die Seitennähte indem du das ganze Kleid rechts auf rechts legst. Wenn dein Kleid rechts auf links überlappen soll lasse in der rechten Seitennaht (von der Trägerin aus gesehen) im Bereich der Markierung eine Öffnung, durch die du später den langen Gürtel fädeln kannst.
Nähe im Bereich der Öffnung mit der Nähmaschine und einem kurzen Gradstich bis zur Markierung und schneide die Nahtzugabe etwas ein.
Fixiere die Öffnung mit Stecknadeln und nähe sie mit einem kurzen Gradstich einmal ringsum.
5. Closing the sideseams
Now close the side seams by laying the whole dress right sides together. If you want your dress to overlap right sides onto left, leave an opening in the right side seam (seen from the wearer) in the area of the marking through which you can later thread the long belt.
Sew in the area of the opening with the sewing machine and a short straight stitch up to the marking and cut the seam allowance slightly.
Secure the opening with pins and sew it all the way around with a short straight stitch.
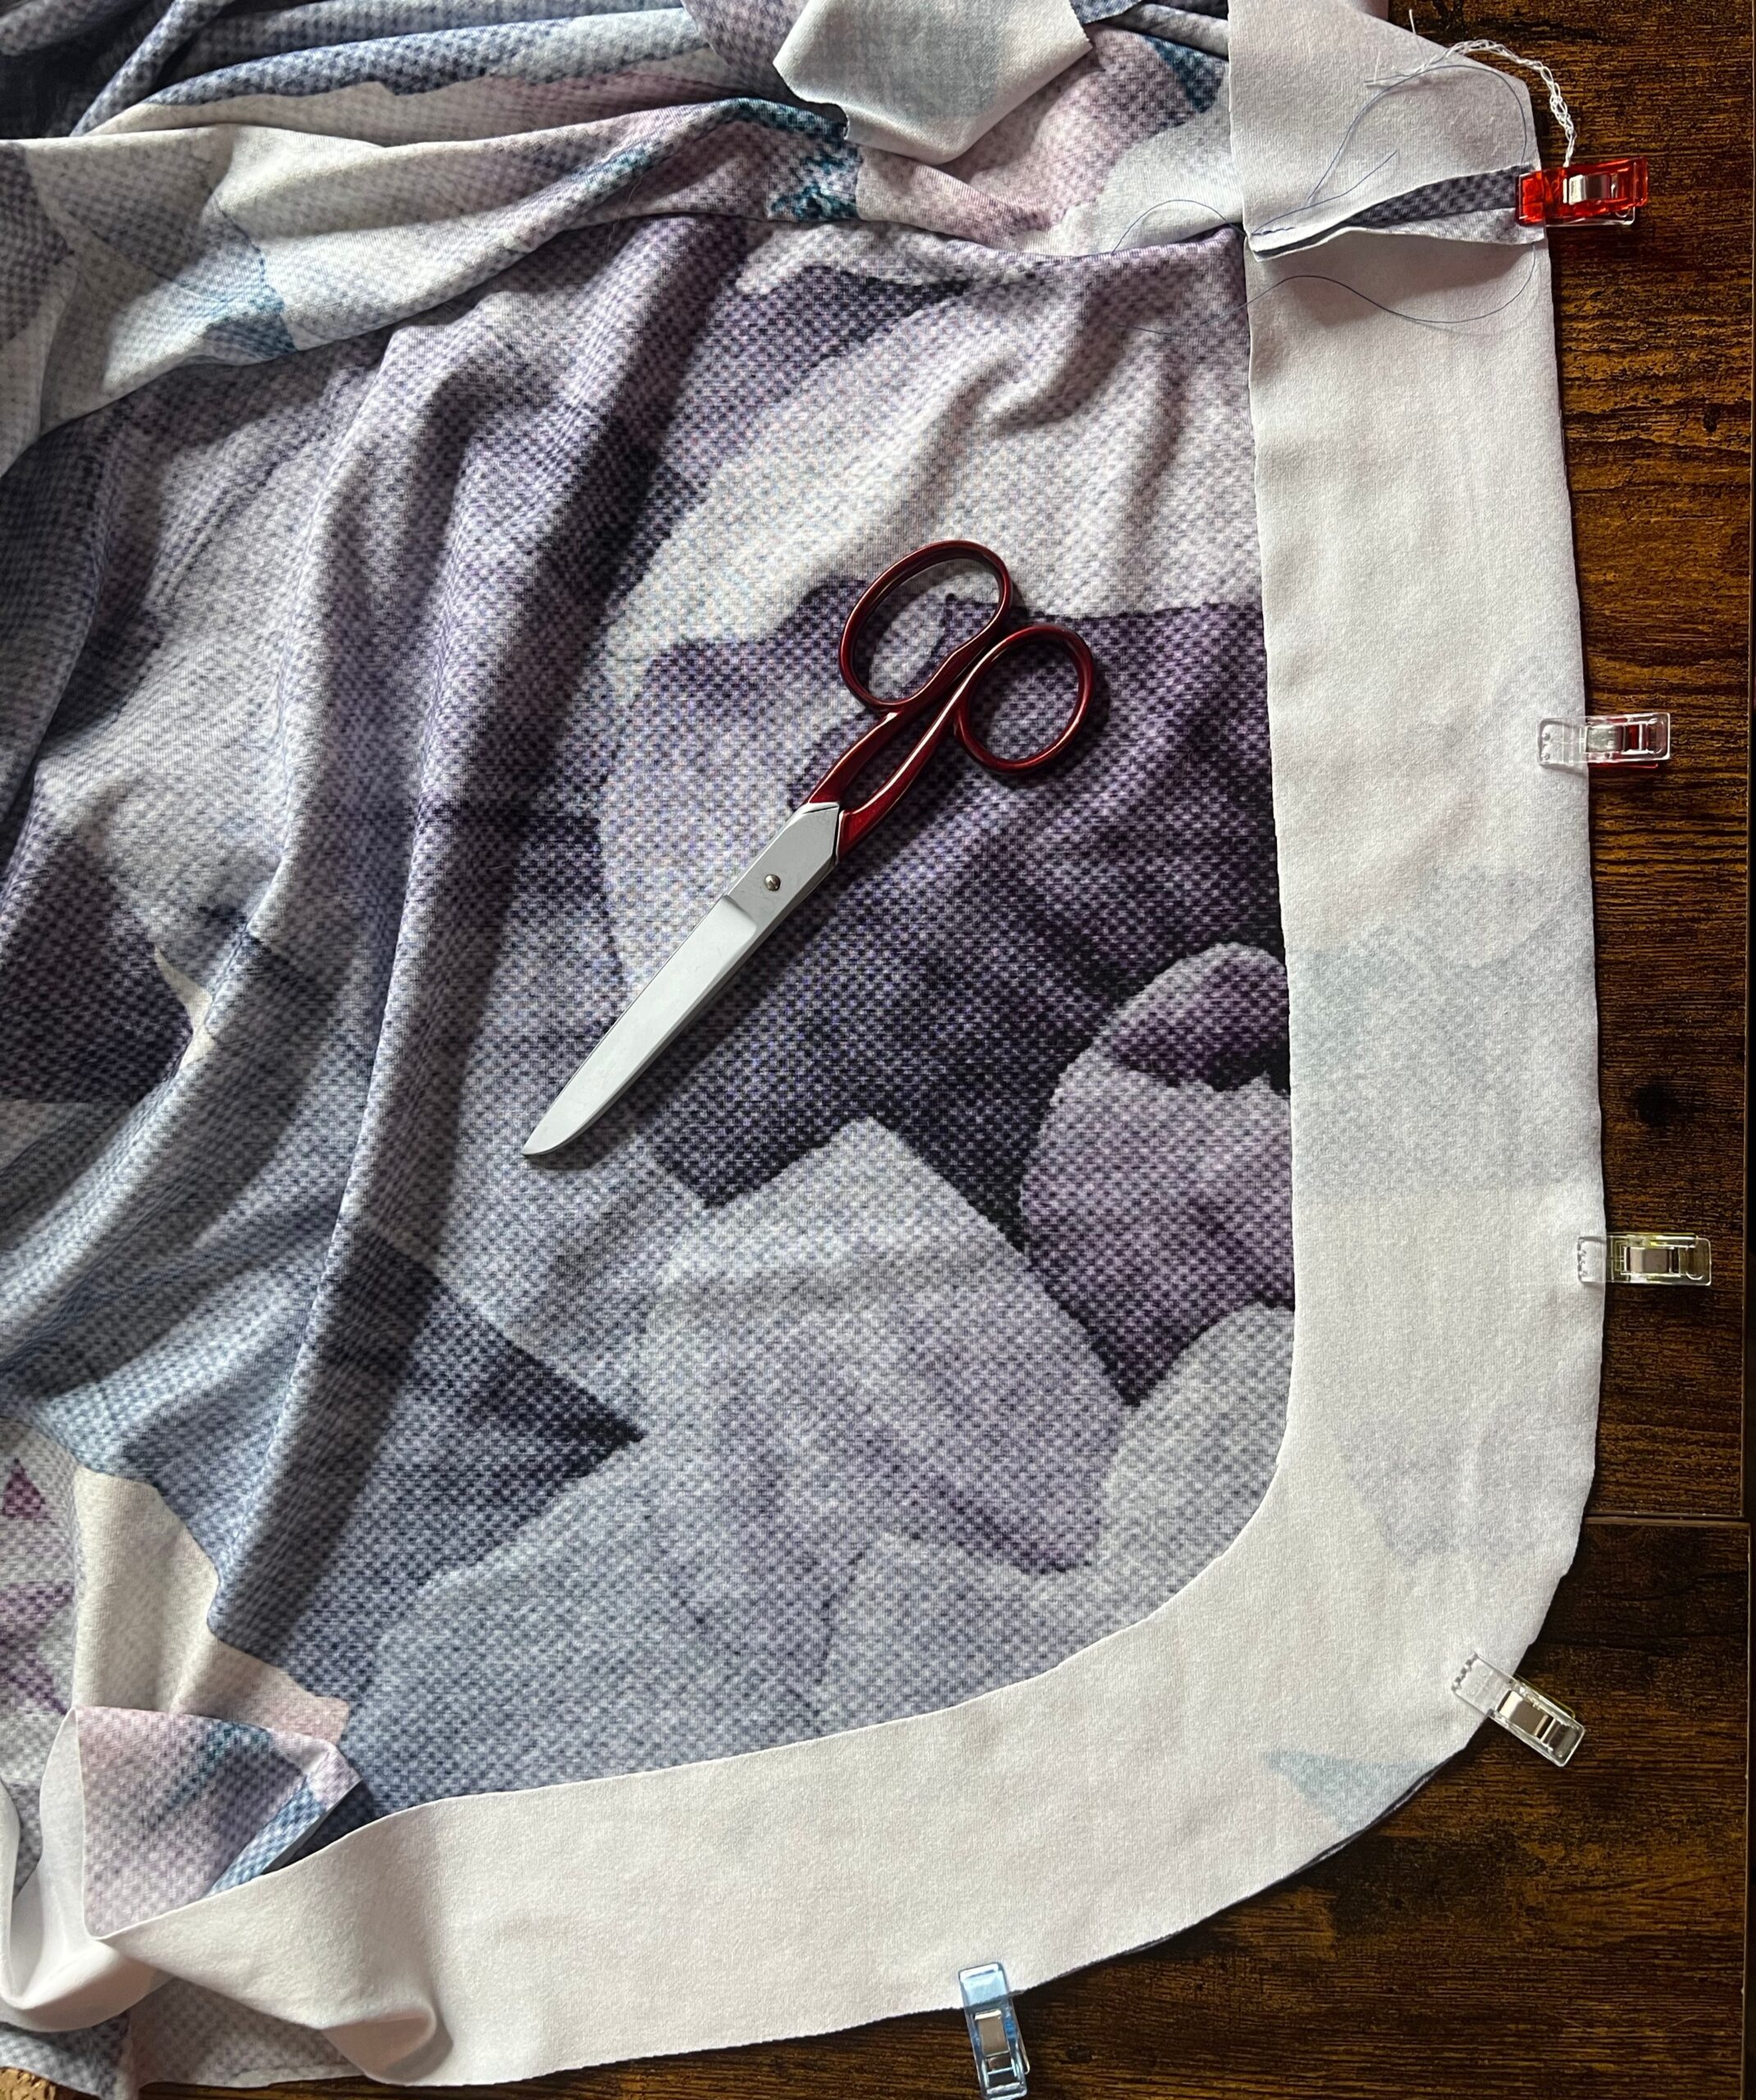
6. Belege annähen
Lege dein Kleid mit der rechten Seite zu dir. Stecke den Beleg einmal komplett rechts auf rechts an das Kleid. Orientiere dich beim Stecken an den Knipsen. Nähe den Beleg mit einem elastischen Stich einmal ringsherum fest.
Klappe den Beleg anschließend nach innen, bügele gründlich und steppe den kompletten Beleg ab. Achtung: Steppe am Rand des Beleges ab, nicht am Rand des Kleides, da es sich sonst wellt.
6. The facing
Lay your dress right side towards you. Pin the facing to the dress, right sides together. Use the snaps to orientate. Sew the facing all the way around with an elastic stitch.
Then fold the facing inwards, iron thoroughly and topstitch the entire facing. Caution: Stitch along the edge of the facing, not the edge of the dress, otherwise it will curl.
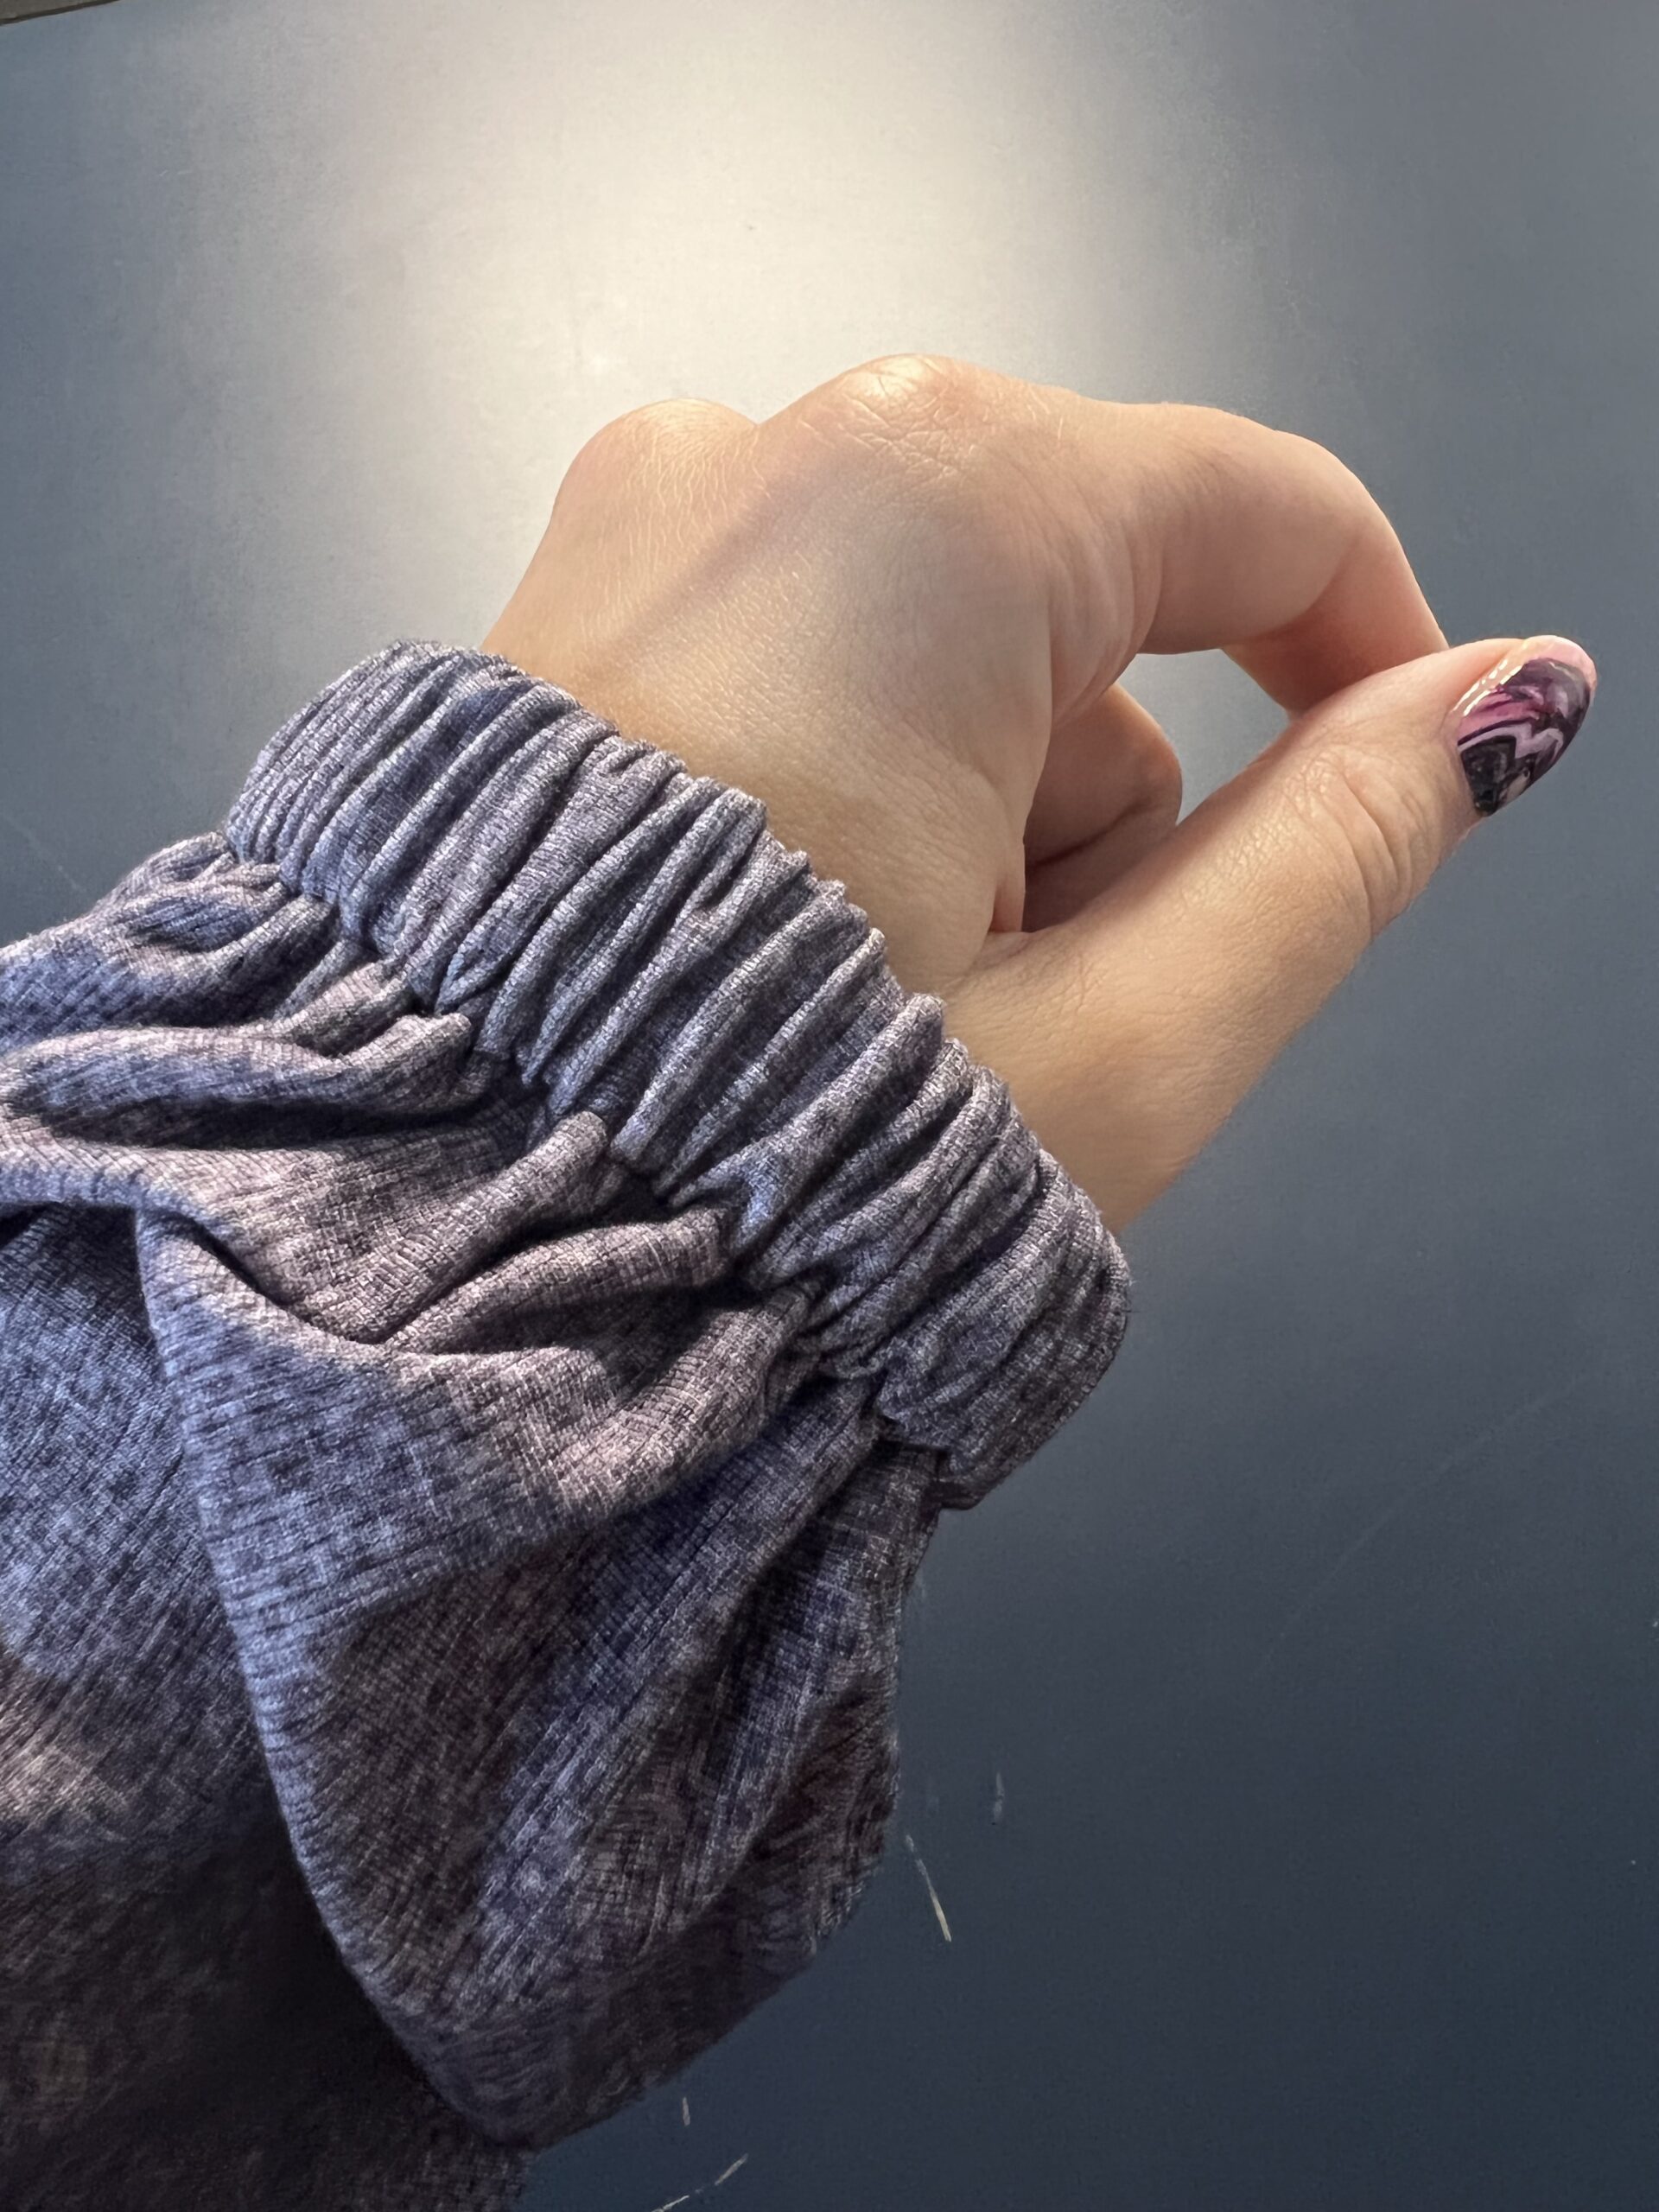
7. Ärmel säumen
Versäubere die Ärmelsaumkante optional mit der Overlock. Klappe den Saum 2,5 cm um und nähe ihn bis auf eine kleine Öffnung zum einziehen des Gummis zu. Ziehe mit Hilfe einer Sicherheitsnadel ein 2 cm breites Gummiband ein. Probiere das Kleid an und schneide das Gummi in deiner Wohlfühllänge zu. Das Gummibündchen sollte am Handgelenk anliegen, aber nicht zu eng sein, da es sonst beim Tragen unbequem wird.
7. Hem the sleeves
Optionally finish the sleeve hem edge with the serger. Fold the hem 2,5 cm and sew, leaving a small opening for the elastic to pass through. Using a safety pin, pull in a 2 cm elastic band. Try on the dress and cut the elastic to your comfortable length. The elastic cuff should fit the wrist but not be too tight, otherwise it will be uncomfortable to wear.